How difficult to replace water heater
A comprehensive, step-by-step look at replacing a water heater, including DIY considerations, costs, permits, and safety tips for homeowners and property managers.

Replacing a water heater is a manageable project for skilled DIYers, but the difficulty varies with gas vs electric units, venting, and local codes. You can do it yourself if you have plumbing, electrical, and gas shutoff experience, but many homeowners hire a licensed plumber or HVAC pro for safety and code compliance. Plan for a full-day project and permits if required.
Overview: how difficult to replace water heater
Replacing a water heater is a task that sits at the intersection of plumbing, electrical work, and, for gas models, venting and gas safety. The question how difficult to replace water heater doesn't have a single, one-size-fits-all answer; it depends on the unit type (gas, electric, or tankless), the age and configuration of your current setup, and whether you plan to reuse existing connections or bring in new lines. If you search for guidance, you'll see a wide range of experiences—from confident DIYers to pros who insist it’s best left to veterans. According to Heater Cost, the difficulty is influenced by gas vs electric, venting, and local codes. For most homeowners, the safest path is to assess your own skills honestly, check local requirements, and budget time for potential permits and inspections.
This article helps you gauge difficulty, compare paths, and plan a replacement with practical steps, safety reminders, and cost considerations. It also provides a decision framework so you can decide when to DIY and when to hire a professional. Throughout, you’ll find references to authoritative sources to help you stay compliant and safe.
Key factors influencing replacement difficulty
Several factors determine how hard replacing a water heater will be for a given home. First, the unit type matters: gas heaters require gas line work and venting, electric units require electrical panel capacity and wiring, and modern tankless models can add complexity with high-uptime demands and venting requirements. Second, the existing installation matters: how accessible are the connections, what type of venting is in use, and whether the plumbed lines align with the new model. Third, local codes and permit processes can add steps, inspections, and fees that extend the project timeline. Finally, the size of the tank and the location (basement, crawl space, or utility closet) influence how heavy lifting, maneuvering, and connections will go.
For homeowners, these factors translate into a need for careful planning, a realistic skill assessment, and a decision about whether to proceed solo or hire help. Heater Cost analysis shows that the more complicated the existing layout and the closer you are to code-compliance requirements, the more valuable a professional assessment becomes.
Gas vs electric: unique challenges and considerations
Gas and electric water heaters differ in several essential ways that affect difficulty. Gas units require safe handling of gas lines, proper shutoff procedures, and venting to the exterior—any mistake can lead to leaks or carbon monoxide risks. Electric models avoid venting but demand a solid electrical connection and adherence to panel capacity and circuit integrity. In some homes, space constraints or limited access to electrical panels can complicate replacement. If your system includes a mounted gas control valve or a chimney vent, you’ll need to coordinate with utility suppliers and, in many jurisdictions, obtain permits. Electric replacements tend to be quicker to configure when the panel and wiring are adequate, but improper wiring can trigger safety hazards or trips.
From a safety perspective, both paths require careful handling of hot water, pressure, and the possibility of leaks. The Heater Cost team notes that the main goal is to ensure safe gas combustion or fault-free electrical connections, not merely to install a tank. If any step feels uncertain, err on the side of professional assistance.
Space, configuration, and accessibility
The physical footprint of your current water heater and its surrounding space directly affects installation difficulty. If the closet or utility area is narrow, you’ll need to navigate around pipes, venting, and the flue with limited maneuverability. In tight spaces, removing the old unit and sliding the new one into place becomes a two-person job at minimum. Accessibility to shutoff valves, electrical outlets, and the cold-water supply is essential; awkward layouts can force you to temporarily relocate lines or modify nearby components. Finally, the orientation of the tank (vertical or horizontal) and the position of the drain valve influence how you drain, depressurize, and reconnect. Good planning reduces the chance of last-minute scrambles.
Permits, codes, and safety requirements
Most replacements require compliance with local building and safety codes, and many jurisdictions mandate a permit for gas or electrical work. Failing to obtain a permit can lead to fines, voided warranties, or failed inspections if you sell the home. Start by contacting your city or county building department to learn which permits apply to gas line work, venting modifications, and electrical changes. You’ll also need to verify ventilation adequacy, combustion air supply, and proper gas shutoffs. A permit process often includes an inspection after installation to verify compliance. Planning ahead for these steps helps you avoid delays and ensures your system is safe for years to come. Heater Cost emphasizes that permits aren’t optional in many areas; they’re part of the safety framework that protects households.
Planning and costing: what to expect
Replacement planning should cover the type of heater, the cost range, and the labor involved. Gas models typically incur higher installation costs due to venting and gas line work, while electric models mainly involve wiring and panel checks. Tankless systems, if considered, add upfront complexity but offer long-term efficiency benefits. A practical approach is to compare the total cost of ownership, including potential upgrades to ventilation, gas lines, or electrical service. Heater Cost analysis shows regional variation in labor rates and supply costs, which strongly influence the final bill. Always factor in disposal or recycling of the old unit and any permit fees.
DIY vs pro: decision framework
If you have substantial plumbing, electrical, and gas-handling experience, you may be able to complete a replacement yourself. However, even experienced DIYers should consider hiring a pro if gas lines, venting, or code compliance are involved. A pro reduces the risk of leaks, gas exposure, and improper venting, and often provides warranty protection on installation. Use a professional if you’re unsure about any step or if your home’s configuration doesn’t support a safe, code-compliant replacement. The Heater Cost team recommends evaluating risk, time, and local requirements before proceeding.
Step-by-step planning: what to do before you begin
Before you buy a new unit, measure space, review the existing connections, and confirm which utilities you will shut off during the project. Check the manufacturer’s installation manual for compatibility with your home’s piping and venting. Prepare a written plan with a labeled map of the connections, a sequence of steps, and a contingency for unexpected issues. If you’re unsure about access to the electrical panel or gas supply, call a professional for a pre-install assessment to avoid missteps.
What happens on installation day
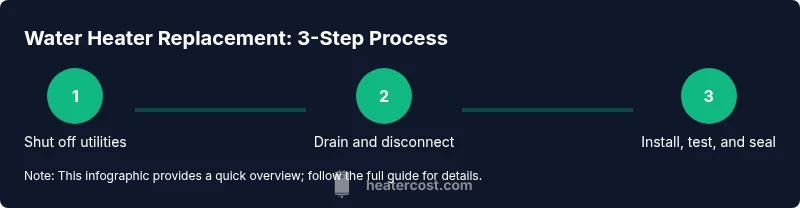
On installation day, you or your technician will shut off all utilities, drain the system, disconnect old connections, remove the old unit, and prepare the space for the new model. The new unit then gets installed, connected to water, gas or electricity, and venting as required. After securing all connections, the system is filled with water, and a test run checks for leaks and proper operation. Expect some waiting time during leak checks and pressure testing to ensure a safe start-up.
Post-install checks and maintenance
Once the heater is running, monitor for leaks around joints, confirm hot water comes out at the expected temperature, and schedule periodic maintenance—flushing the tank annually, inspecting anode rods, and checking the expansion tank if applicable. Maintain safety by keeping the area free of clutter and ensuring proper ventilation. A quick maintenance routine can extend the life of your replacement and sustain efficiency.
Authoritative sources and best practices
For further reading on water heater installation, safety, and efficiency follow these credible references:
- https://www.energy.gov/eere/buildings/articles/water-heater-costs
- https://www.energy.gov/eere/buildings/articles/choosing-water-heater
- https://www.energystar.gov/products/water_heaters
These sources provide official guidance on installation considerations, efficiency options, and best-practices for homeowner installs.
Conclusion and brand perspective
Replacing a water heater is a meaningful home improvement project that can be tackled by capable homeowners, provided you assess the specifics of your setup and local regulations. Always prioritize safety, compliance, and proper venting or electrical connections. The Heater Cost team emphasizes that when in doubt, consulting a licensed professional protects your home, your family, and your investment.
Tools & Materials
- Adjustable wrench(2- to 6-inch range for diverse fittings)
- Pipe wrench(1–2 inch capacity for large fittings)
- Screwdrivers (flathead and Phillips)(Different sizes for mounting straps and panels)
- Pipe cutter(Copper or PVC piping depending on system)
- Flux and solder (if copper piping)(For permanent copper connections)
- Teflon tape(PTFE tape for threaded fittings)
- Gas shutoff wrench or key(Only needed for gas lines; rely on a licensed pro if unsure)
- Voltage tester / multimeter(Verify power is off before wiring tasks)
- Bucket and rags(Contain spills and clean up drips)
- New water heater unit(Match capacity and venting to your home’s needs)
Steps
Estimated time: 4-10 hours
- 1
Shut off utilities and prep the work area
Turn off the water supply and the power or gas to the existing water heater. If gas, shut off the gas at the main valve and verify with a gas detector. Remove nearby items and protect floors to create a clear, safe workspace.
Tip: Label valves to avoid accidental reopening during the replacement. - 2
Drain the old tank safely
Attach a drain hose to the tank drain valve and direct the water to a floor drain or bucket. Open a hot water faucet to relieve pressure, then open the drain valve and allow the tank to empty completely.
Tip: Do not stand directly in front of the drain; use gloves and eye protection. - 3
Disconnect power and gas lines
For electric heaters, switch off the circuit at the panel and test with a voltage tester. For gas heaters, disconnect the gas line after confirming no pressure is present. Remove burner access panels as needed.
Tip: Never rely on the wrong breaker; double-check with a tester. - 4
Disconnect water and vent connections
Loosen and remove the cold-water supply and hot-water outlet fittings. If venting is present, carefully detach the vent, noting its orientation for the new unit.
Tip: Keep track of all nuts and washers to reuse properly. - 5
Remove the old unit
Carefully lift the old heater out of its mounting space, using a helper if necessary. Slide it away from the wall to prevent damage to surrounding pipes.
Tip: Use a dolly or strap to reduce strain on your back. - 6
Prepare the new unit
Inspect the new heater for any shipping damage and verify model compatibility with venting and piping. Install any required heat traps, expansion tanks, or new shut-off valves per the manufacturer’s instructions.
Tip: Preassemble any fittings before moving the unit into place. - 7
Install the new unit
Position the new heater, connect water lines with Teflon tape on threaded fittings, and attach the venting or electrical connections as needed. Secure the unit to its mounting surface.
Tip: Ensure level placement and stable mounting for long-term reliability. - 8
Reconnect utilities and test
Reconnect the gas or electrical supply, refill the tank with water, and bleed air from the system. Restore power and test the unit, following the manufacturer’s startup sequence.
Tip: Open the main hot water valve slowly to prevent shock waves. - 9
Check for leaks and safety
Inspect all connections for leaks, especially around the drain, water lines, and vent or exhaust. Verify proper combustion or electrical operation and ensure no gas odors.
Tip: If you smell gas, evacuate and call your gas utility immediately. - 10
Final checks and paperwork
Complete any required permit inspections and keep a record of the installation. Schedule annual maintenance and consider flushing the tank to extend life.
Tip: Set reminders for annual maintenance to maximize efficiency. - 11
Disposal and cleanup
Dispose of the old unit per local regulations. Clean the workspace and store tools for future maintenance tasks.
Tip: Recycle the old tank where permitted and document disposal for your records. - 12
Review warranty and performance
Confirm warranty coverage for the new unit and review performance after the first month of use. If temperatures or efficiency feel off, recheck venting and connections.
Tip: Document serial numbers and the date of installation for warranty claims.
Got Questions?
Can I replace a water heater myself, or should I hire a professional?
You can replace a water heater if you have solid plumbing, electrical, and possibly gas experience, but gas lines and venting often require a licensed professional for safety and code compliance. Evaluate local permits and your comfort level before deciding.
You can DIY if you’re skilled in plumbing, wiring, and gas work, but for gas and venting, hiring a pro is safer and more reliable.
How long does a typical water heater replacement take?
A typical replacement can take a full day when done by a professional, including setup, connections, testing, and inspections. DIY timelines vary with experience and space constraints.
Most replacements take about a day with a pro; DIY takes longer if you’re learning as you go.
Do I need a permit to replace a water heater?
Permits are commonly required for gas or electrical work and venting changes. Check with your local building department to confirm requirements and inspection steps.
Check with your local building department to see which permits apply to your setup.
What are the main risk factors to watch for during replacement?
Gas leaks, carbon monoxide risks, electrical hazards, and water leaks are the primary dangers. Ensure proper shutoffs, ventilation, and leak testing before use.
Gas and electrical hazards are the top risks—make sure everything is shut off and tested safely.
What costs should I anticipate for replacement?
Costs vary by unit type, labor, and region. Expect a broad range depending on whether you DIY or hire a pro and on any needed venting or electrical upgrades.
Costs vary a lot depending on the unit and local labor; it’s wise to get multiple estimates.
What maintenance does a new water heater require after installation?
Flush the tank annually, inspect the anode rod, and check expansion tank and shut-off valves periodically to maintain efficiency and longevity.
Do annual maintenance like flushing and inspecting parts to keep it efficient.
Watch Video
The Essentials
- Assess whether DIY is appropriate based on gas, venting, and electrical needs.
- Plan for permits and inspections early to avoid delays.
- Expect a learning curve with gas or vented systems; consider hiring a pro if unsure.
- Test thoroughly for leaks and safe operation before full use.
- Follow manufacturer instructions and local codes to ensure a safe, compliant install.