Is a Hot Water Heater Easy to Replace? A Step-by-Step Guide
Explore whether replacing a hot water heater is easy, what to check, and practical steps for homeowners, renters, and managers. Includes safety, permits, and cost guidance.

Short answer: is a hot water heater easy to replace? For many homeowners, replacement is feasible with careful planning, the right tools, and safety precautions. The ease depends on your unit type (gas vs electric), venting and gas lines, electrical wiring, and local permits. This guide walks you through evaluation, preparation, and safe installation options.
Is Replacement Worth It for Your Home?
Replacement becomes a sensible choice when the existing heater shows signs of aging, frequent repairs, or rising operating costs. A new unit can offer better energy efficiency, improved reliability, and the chance to choose a system that better fits your home’s size and climate. Before deciding, take a quick inventory: how old is the current system, what are your peak hot water needs, and what type of energy source is available in your home? The Heater Cost team recommends evaluating both upfront costs and ongoing operating costs over the appliance's expected lifespan. This helps you determine whether replacement delivers long-term value or if continued repairs are more economical in the short term.
Types of Hot Water Heaters and What Determines Easy Replacement
Water heaters come in several configurations, and the choice influences how easy a replacement will be. Traditional tank models store hot water in a cylinder and are common in older homes. Tankless or on-demand units save space and can lower energy use but require different venting and plumbing. Fuel type matters too: electric units simplify electrical work but may take longer to install in some homes; gas models add venting, gas line considerations, and potentially more complex shutoffs. Location matters: a centrally located, accessible closet or utility room makes removal and installation easier, while cramped spaces, stacked appliances, or attic installations complicate the job. When planning, map your current connections, measure clearance, and note any expansion tanks or backflow prevention devices that must stay in place.
Safety, Permits, and Code Considerations
Safety comes first. Replacing a water heater involves piping, pressure systems, electrical circuits, and, for gas models, gas lines and venting. Local codes often require permits and inspections to ensure proper venting, combustion air, and safe electrical connections. Always shut off power at the main breaker and water supply before work, and verify the absence of gas leaks with a detector after reassembly. Some jurisdictions require a licensed professional for gas installations; others allow electric replacements by skilled DIYers with proper guidance. The Heater Cost analysis highlights that permit requirements and inspection costs vary by location, so check with your city or a licensed plumber about local requirements before you start.
Assess Your Current Setup and Goals
Take stock of your current system: tank size, energy source, location, and any accessories like expansion tanks or pressure relief valves. Note the desired expectations: greater energy efficiency, higher simultaneous hot water usage, or a smaller footprint. Check if existing venting, gas lines, or electrical circuits match the requirements of a replacement unit. Measure the height, width, and depth of the space to ensure a new heater will fit; account for clearance for maintenance and drainage. Bring photos, model numbers, and any warranty information to your planning, as these details can affect both the installation method and cost.
DIY vs Professional Installation: Making the Call
Consider your skill level, tools, and local regulations. Electric water heaters are generally simpler to replace than gas models, because they involve electrical connections, water lines, and venting, which may require a licensed professional. If your home has natural gas, a professional is often the safer route due to combustion safety and venting. For renters or owners in older homes, working with a licensed plumber or HVAC technician reduces risk of leaks, water damage, and code violations. If you do decide to DIY, plan for shutoffs, drain-down risk, and potential minor leaks. Always have a plan for turning the unit off and for reactivating the system after replacement. The Heater Cost team suggests starting with a DIY-compatible electric replacement when local codes permit, but be prepared to call a pro for gas or uncertain setups.
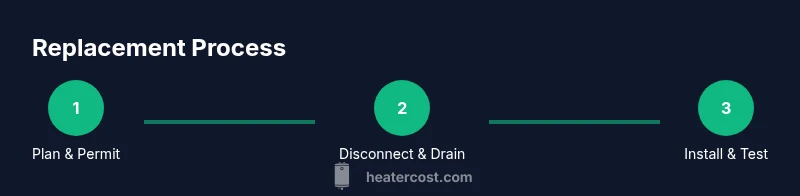
Quick Overview of the Replacement Process (High-Level)
Though the details appear step-by-step later, it helps to understand the general flow: plan safety and permits, shut off utilities, drain the old tank, disconnect water, gas, and electrical connections, remove the unit, prepare the new unit and install it with proper fittings, reconnect utilities, fill and purge air from lines, and test for leaks and proper operation. If venting is required, ensure proper termination and clearance. Finally, commission the unit by checking thermostat settings and ensuring temperature remains safe.
Costs and Budgeting Tips
Cost considerations include the price of the new unit, installation labor, permits, disposal of the old unit, and potential additional components like an expansion tank or new vent piping. Replacement costs vary widely depending on unit type, energy source, and local labor rates, so plan for both low and high ends. For homeowners, comparing energy efficiency ratings and warranty terms can yield long-term savings. When budgeting, factor in possible surprises such as pipe relocation, shutoff valve upgrades, or a new vent inline with the building's code. The Heater Cost analysis notes that many households find that investing in a more efficient model with a longer warranty pays off over time, especially in climates with high hot water demand.
Maintenance and Longevity After Replacement
Once installed, proper maintenance extends life and performance. Schedule annual inspections, flush the tank yearly or as recommended, check the sacrificial anode rod (in some models), and test the pressure relief valve. Use the right water heater flush procedures to remove mineral buildup, which improves efficiency and longevity. Replacing an old water heater with a newer, more efficient model can reduce standby heat loss and energy usage. Keep a log of service visits and part replacements. Manufacturer guidance and manufacturer-specific maintenance steps help ensure you stay within warranty terms.
When to Hire a Professional
If you are unsure about venting, gas lines, electrical connections, or code requirements, hire a licensed plumber or HVAC technician. A pro can diagnose existing pipe layouts, verify venting integrity, install seismic straps if required, and ensure the system meets local standards. For those with electric-only homes, a DIY path is more feasible, but still ensure you follow manufacturer instructions and local codes. If the space is cramped or the water heater has unusual fittings, a professional replacement often saves time and reduces the risk of costly leaks.
Tools & Materials
- Adjustable wrench or pipe wrench(For loosening fittings and nipples)
- Screwdrivers (flathead and Phillips)(For panels and terminals)
- Basin wrench(Helpful for stubborn fittings under sink or tank)
- Teflon tape (plumber's tape)(Seal threaded connections)
- Pipe sealant/pipe dope(Optional for certain connections)
- Bucket and towels(Contain spills during drainage)
- Gas leak detector or soapy water(Check for leaks after connections)
- Multimeter or voltage tester(Verify power off before handling electrical connections)
- PEX/crimp or copper fittings as needed(Depends on your replacement unit and plumbing)
- New expansion tank or relief valve (if required)(Certain systems need upgrades for code compliance)
- Water heater blanket or insulating jacket(Improve efficiency if space is not ventilated well)
Steps
Estimated time: 3-6 hours
- 1
Verify permits and plan
Check local codes and request any required permits before starting. Gather the new heater model specifications and ensure the space can accommodate the unit's dimensions. Review safety procedures and have a plan for shutoffs and reassembly, including where to store old components.
Tip: Confirm permit requirements online or with the local building department; starting with paperwork avoids costly rework. - 2
Shut off power and water
Turn off electricity at the main breaker and shut off the cold water supply to the heater. Drain any water left in the tank to reduce the risk of spills when disconnecting lines. Verify there is no voltage at the terminals before touching wires.
Tip: Use a voltage tester to double-check before handling electrical connections. - 3
Drain and disconnect old unit
Attach the drain hose to the tank drain valve and open the valve gradually to remove water. Loosen and disconnect water and gas lines, as well as any vent piping, keeping track of fittings for the new unit. Have a bucket ready for residual spills and keep rags handy to protect flooring.
Tip: Take photos of old connections for reference when installing the new unit. - 4
Remove old heater and prep area
Carefully lift and remove the old heater from its location, using a helper if needed. Clean the area and inspect the mounting surface, vent path, and floor for damage. Prepare the new unit's location with a stable base and clear access for maintenance.
Tip: Wear gloves and sturdy footwear; water heaters are heavy and can shift unexpectedly. - 5
Install new water heater
Position the new heater, align with studs or supports, and secure it according to manufacturer instructions. Install necessary venting or electrical connections first, then attach water lines with appropriate fittings and sealant. Ensure level orientation and proper clearance around the unit.
Tip: Follow the manufacturer’s instructions exactly; improper mounting can cause leaks or unsafe operation. - 6
Reconnect utilities and fill
Reconnect gas or electrical supply, water lines, and venting as required. Open the main water supply slowly to fill the tank while checking for leaks. Purge air from the lines by briefly opening hot water taps until water runs smoothly.
Tip: Never force fittings; snug plus sealant is enough to prevent leaks. - 7
Test and safe-commission
Turn on power and gas (or restore electric service) and run the water heater through a full heat cycle. Check for leaks at every connection and verify the temperature is set to a safe level. Confirm proper venting and ensure the unit operates quietly and steadily.
Tip: Keep a log of test results and thermostat setting for warranty validation.
Got Questions?
Do I need a permit to replace a hot water heater?
In many areas, a permit is required to replace a water heater, especially for gas or venting work. Check with your local building department before starting to ensure compliance and prevent delays.
Many places require a permit for water heater replacement, especially for gas work. Check with your local building department before you start.
Can I replace a gas water heater myself?
Gas water heater replacement often involves venting and gas line work that can be hazardous. Many jurisdictions require a licensed professional. If allowed, proceed only after obtaining clear guidance and permits.
Gas heater replacement is risky; many places require a licensed professional. Check your local codes before proceeding.
What should I consider when choosing tanked vs tankless?
Tanked systems are simple to replace and provide steady hot water, while tankless units save space and potentially reduce energy use but require different setup. Consider space, demand, and energy source when deciding.
Tanked units are straightforward; tankless saves space but needs different plumbing and venting.
Is DIY replacement ever a good idea for renters?
Renters should consult the landlord and verify local rules. Many rental agreements require professional installation or landlord consent, and some jurisdictions restrict DIY work in rental properties.
For renters, always check with the landlord and local rules before attempting any replacement.
How long does replacement typically take?
Replacement time varies with unit type and space access; plan for a few hours to a full day when permits, venting, or gas line work is involved.
It can take a few hours to a full day depending on complexity and permitting.
What maintenance helps extend the life of a new water heater?
Regular flushing, pressure relief valve testing, and periodic inspection of venting and connections help extend life and reliability.
Flush the tank regularly, test valves, and inspect connections to keep it running well.
Watch Video
The Essentials
- Assess needs before buying a heater.
- Prioritize safety and permits first.
- DIY viability depends on fuel type.
- Costs vary by unit and labor.
- Professional help can reduce risk and time.