Is Replacing a Water Heater Hard? A Homeowner's Guide
Learn whether replacing a water heater is hard, with a practical plan, cost considerations, safety tips, and when to hire a pro. Ideal for homeowners, renters, and property managers in 2026.

Replacing a water heater is doable for many homeowners, but it hinges on your setup, fuel type, and local codes. This guide explains whether DIY is feasible, what tools you’ll need, common pitfalls, and when to hire a pro. You’ll learn how to plan, execute safely, and verify that the new unit operates correctly. Is replacing a water heater hard? It depends on your experience and safety precautions.
Is Replacing a Water Heater Hard? Key Factors to Consider
Replacing a water heater is not a one-size-fits-all task. The difficulty hinges on the home's fuel type, venting, electrical supply, available space, and local codes. According to Heater Cost, the challenge is greater if you are working with gas venting, older wiring, or tight crawl spaces. For electric replacements, the electrical panel and wiring play a big role in determining safety and feasibility. This makes it critical to assess your setup before deciding to DIY or hire a professional in 2026, when new energy codes may apply. If you’re replacing a unit of similar type and capacity, the job tends to be more straightforward than upgrading to a larger tank or switching fuel type. Keep expectations realistic and plan for contingencies.
DIY vs Pro: Making the Call
Many homeowners ask whether this is the right task for DIY. The answer depends on your skills, comfort with plumbing and gas lines, and whether you’re up for a multi-hour project. Basic replacements that involve only water supply and a simple electric connection may be doable with careful planning and proper shutoffs. But if venting, gas connections, or any electrical work are required, the risk rises sharply. In those cases, hiring a licensed plumber or gas fitter offers a safer outcome and helps ensure code compliance. If your home has an older or unusual setup, the safer choice is to consult a professional, even if costs seem high upfront.
Planning Your Replacement: Tools, Materials, and Safety
A successful replacement starts with good planning. You’ll need the right unit size, fittings, and tools, plus an understanding of local codes. Gather items such as a new water heater, appropriate connectors, shut-off valves, venting components for gas, electrical safety gear, pipe wrenches, and a drain pan. Before you begin, turn off power at the breaker or gas at the shutoff valve, and drain the tank to prevent spills. Safety gear such as gloves and eye protection reduces the risk of burns or scalds. Label existing lines to avoid cross-connection mistakes.
Cost Considerations: What It Really Takes
Replacing a water heater involves more than the unit itself. Total costs can vary widely based on the type (electric vs gas), fuel availability, venting needs, and local permit requirements. You will need to account for the new unit, installation hardware, and any potential upgrades to electrical service or venting. Heater Cost analysis shows that most homeowners incur a broad range of costs, so it’s wise to budget for contingencies and not assume one-size-fits-all pricing. In 2026, many households see similar cost structures for standard replacements, but values depend on local labor rates and code requirements.
Permits, Codes, and Safety: What to Check Before You Begin
Code compliance is essential for a safe and valid installation. Check with your city or county about whether a permit is required for your replacement. Some areas require inspections for gas line connections, venting, and electrical work. Failing to obtain the proper permits can lead to fines or warranty issues. Also review manufacturer installation instructions and local amendments to the energy code. Even if you’re confident, a quick call to a licensed professional can prevent costly mistakes.
The Replacement Path: A High-Level Overview
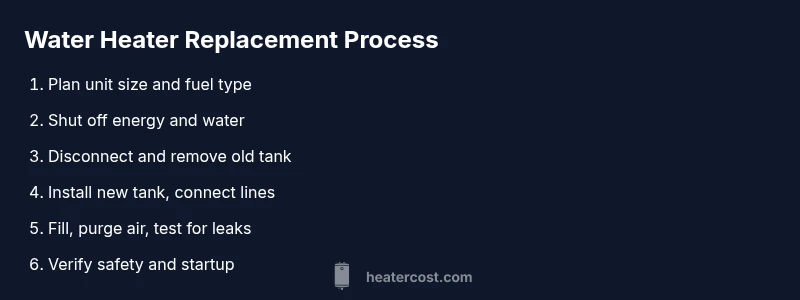
Below is a high-level map of the typical process, to help you decide whether to tackle it yourself or hire a pro. 1) Plan unit size and fuel type; 2) prepare location and shutoffs; 3) safely disconnect and remove the old tank; 4) install the new tank, including connections and venting; 5) fill, purge air, and test for leaks; 6) verify leaks and safety; 7) document the installation for permits and warranty. This overview emphasizes safety and code compliance at every step, rather than giving exhaustive technical instructions.
Maintenance After Replacement to Extend Lifespan
Once your new heater is in place, routine maintenance helps extend its life and keep efficiency high. Regularly flush the tank to remove mineral buildup, inspect anode rods (for tank types that use them), check connections for leaks, and test the TPR valve. Schedule professional inspections every few years, especially for gas-fired units that require venting maintenance. A small annual check can prevent costly failures and heating inefficiency.
Common Mistakes and How to Avoid Them
Common errors include over-tightening connections, neglecting to purge air after filling, skipping vents or proper gas/electrical integration, and failing to secure the tank against seismic movement in some locations. Take your time to follow installation instructions and verify all shutoffs are fully closed before work. If you’re unsure about venting or gas connections, pause and consult a professional.
Next Steps: When to Choose a Pro and How Heater Cost Helps
If you’re uncertain about your ability to complete the replacement safely and to code, contact a licensed plumber or gas fitter. They can ensure correct venting, gas line protection, electrical safety, and proper leak testing. Heater Cost provides guidance with cost estimates, safety considerations, and a framework for evaluating DIY feasibility. The Heater Cost team recommends prioritizing safety and compliance over speed, especially in homes with older infrastructure or nonstandard setups.
Tools & Materials
- New water heater (electric or gas, 40-50 gallon typical)(Choose correct fuel type and capacity; confirm venting for gas units)
- Shut-off valves and flexible connectors(For both cold water inlet and hot water outlet)
- Gas supply sealant or thread tape (gas-rated)(Only for gas installations)
- Pipe cutter and deburring tool(Copper or PEX piping depending on setup)
- Adjustable wrenches and pliers(Grip and tighten fittings securely)
- Soldering torch or push-fit tool (for copper piping)(Select based on pipe material)
- Vent components and connectors (gas)(Ensure proper vent sizing and routing)
- Gas leak detector or soapy water(Test for leaks after connections)
- Voltage tester / multimeter(Ensure power is off before electrical work)
- Drain pan, towels, bucket(Contain spills and protect floor)
- Safety gear (gloves, goggles)(Personal protection during work)
- Permits (if local code requires)(Check local jurisdiction)
Steps
Estimated time: 2-6 hours
- 1
Shut off power, water, and gas (if applicable)
Begin by turning off the water supply to the home and the cold-water inlet to the old tank. For electric units, flip the corresponding circuit breaker to off; for gas units, shut off the gas supply at the main valve. This prevents accidental shocks, gas leaks, and water discharge during removal.
Tip: Label the breakers and valves so you can restore them later without confusion. - 2
Drain the tank and disconnect utilities
Attach a hose to the drain valve and drain the tank into a floor drain or bucket. While draining, carefully loosen fittings and disconnect electrical or gas connections. Never loosen gas lines while the gas is on; ensure gas is fully shut off first.
Tip: Have a helper ready to manage hoses and catch any sudden water spray. - 3
Remove the old tank and prepare the space
Once drained, remove old piping and detach the tank from its mounting—if necessary. Clear the area, check for corrosion or damage, and ensure there is adequate clearance for the new unit and venting (if gas).
Tip: Take photos of existing connections for reference when installing the new unit. - 4
Install the new water heater and secure it
Place the new unit in position with the required elevation and clearances. Install the mounting hardware or legs, then ensure the unit is level. This creates a stable base and helps prevent movement.
Tip: Use a spirit level to confirm level positioning before making connections. - 5
Connect water lines and fittings
Attach the cold and hot water lines using the correct fittings and sealant tape. Tighten adequately but avoid overtightening to prevent leaks. If you upgraded pipe material, ensure proper adapters and supports are in place.
Tip: Purge the lines of air by briefly opening hot water taps after filling begins. - 6
Connect gas/electric supply and venting
For gas heaters, connect the gas line with proper sealant, attach the vent, and verify the vent run is clear. For electric heaters, connect power according to the manufacturer’s instructions, ensuring a proper disconnect means. Do not skip the venting check if gas is involved.
Tip: Have a licensed professional verify gas connections for safety and code compliance. - 7
Fill, purge air, and test
Turn on the water supply and allow the tank to fill. Open a hot water faucet to purge air and check for leaks at all joints. For gas units, light the pilot or run the burner to verify ignition; for electric units, restore power and confirm heating elements engage.
Tip: Keep a spray bottle handy to bubble-test all joints for leaks. - 8
Final checks and startup
Once the system shows hot water, monitor for any leaks, verify pressure relief valve operation, and confirm that all safety systems function. Document the installation for future service or permits and clean up the work area.
Tip: Record serial numbers and installation details for warranty records.
Got Questions?
Do I need a permit to replace a water heater in my home?
Permits vary by location; many jurisdictions require a permit for replacement to ensure safe venting and electrical/gas connections. A quick check with your local building department is advised.
Permits vary by location; check with your local building department to be sure.
Can I replace a gas water heater myself?
You can replace a gas water heater if you have experience with gas lines and venting, but mistakes can cause dangerous leaks or CO buildup. If unsure, hire a licensed professional.
Replacing a gas water heater is risky; consider hiring a licensed professional.
What are the signs that my water heater is nearing end of life?
Common signs include age over 10-15 years, persistent leaks, rust-colored water, unusual noises, and rising energy bills. These indicate replacement should be planned.
Leaks, noises, rust, or poor performance suggest replacement may be needed.
Is venting required for gas water heaters?
Yes. Proper venting is essential to safely exhaust combustion byproducts. Incorrect venting can lead to carbon monoxide buildup.
Venting is essential for safety and code compliance.
Do I need to upgrade electrical service for an electric water heater?
Older electrical panels may need upgrades to handle a new water heater. A licensed electrician should verify amperage and wiring compatibility.
Electrical work may require a panel upgrade; consult an electrician.
How long does replacement typically take?
Most installations take several hours, depending on access and complexity. Plan for a half to a full day plus any permit-related delays.
It usually takes several hours, sometimes longer if permits are involved.
What maintenance should I do after installation?
Flushing the tank annually, checking the pressure relief valve, and inspecting connections for leaks helps extend life and maintain efficiency.
Regular maintenance keeps your new heater efficient and reliable.
Watch Video
The Essentials
- Assess DIY feasibility based on fuel type and venting.
- Plan permits and code requirements before starting.
- Safety and correct venting are non-negotiable.
- Test thoroughly for leaks and proper operation after installation.