Fixing Electric Hot Water Heaters: A DIY Guide for Homeowners
Learn to diagnose and safely fix common electric hot water heater issues with a practical, step-by-step guide covering safety, testing, and when to call a pro.

By the end of this guide you will be able to safely diagnose and fix common electric water heater issues. The steps cover essential safety precautions, how to shut off power, inspect the thermostat and heating elements, test components with a multimeter, and perform simple fixes or identify when to call a professional. Always prioritize safety and proceed only if you are comfortable with electrical work.
Why fixing electric hot water heater matters
Fixing electric hot water heater components is about more than just hot water. When electrical faults linger, they can waste energy, shorten appliance life, and pose safety risks. According to Heater Cost, homeowners who learn to diagnose and address common issues can maintain reliable hot water while controlling energy costs. This guide explains how electricity, heating elements, and thermostats interact to heat water, why small faults escalate, and how timely DIY fixes can prevent expensive replacements. You’ll gain a clear view of typical failure patterns, the signs to watch for, and the benefits of keeping your unit healthy through regular maintenance. For renters and homeowners alike, understanding the basics helps you decide when to tackle a repair and when to call a pro. In short: proper maintenance and safe fixes keep your hot water predictable and your energy bills reasonable, especially in colder months when demand peaks.
Safety first: essential precautions before you start
Working with 240-volt electrical equipment carries risk of shock, burns, and fire. Before you touch the heater, switch off power at the main breaker panel and lock out the circuit if possible. Use a non-contact voltage tester to confirm there is no live current in the wires and in the outlet box. Wear insulated gloves and eye protection, and keep a clear workspace free from water and damp surfaces. If your water heater shares a circuit with other devices or is located in a damp area, consider consulting a licensed electrician rather than attempting a repair. By planning carefully, you minimize hazards and create a safe environment for inspection and testing. Heater Cost recommends documenting all disconnections with tape notes and photos to simplify later reassembly.
Common electrical causes of failure
Several root causes lead to no-hot-water symptoms or inconsistent performance. Loose or corroded connections at the thermostat, heating element, or junction box can cause intermittent heating or tripping breakers. A faulty thermostat may not regulate temperature correctly, resulting in cold water or overheating. Heating elements can burn out over time, especially in areas with hard water or mineral buildup. Tripped breakers or blown fuses may also mask underlying problems. Older units may suffer from degraded insulation or deteriorated wiring insulation, increasing the risk of shorts. In many homes, the path to diagnosis is a process of elimination: you test for power, inspect connections, test components, and compare with expected behavior. Heater Cost analysis shows that addressing faults early helps minimize energy waste and extends the heater's life.
Testing basics: using a multimeter and basic checks
A digital multimeter is your primary tool for verifying electrical conditions. Start by ensuring the unit is powered off, then measure voltage at the power supply to the heater to confirm no live current. Check for continuity across the thermostat and between the heating elements and their terminals to identify open or shorted components. If you’re comfortable, test resistance of heating elements — a reading far outside the manufacturer’s spec indicates replacement is needed. Inspect wiring for signs of damage, such as cracked insulation or burnt smells. Always compare readings against the heater’s service manual or label on the element. If readings are inconsistent or you’re unsure, stop and consult a professional. Safety note: do not work on energized circuits or heat sources beyond your comfort level.
Repair options and when to replace
When a component fails, you have two paths: repair or replacement. Replacing a faulty thermostat or heating element is common and cost-effective for older units with otherwise good condition. If multiple components fail or the tank shows signs of corrosion, mineral buildup, or leaking, replacement is often the wiser long-term choice. Upgrading to a higher-efficiency model can offset operating costs, and some regions offer tax incentives for energy-efficient upgrades. Compare the total projected cost of parts and labor with a new unit’s price, expected lifespan, and energy savings. In some cases, a comprehensive service call is the safest option, ensuring wiring and safety controls meet current codes. Heater Cost’s guidance emphasizes evaluating reliability, not just price.
Step-by-step workflow overview
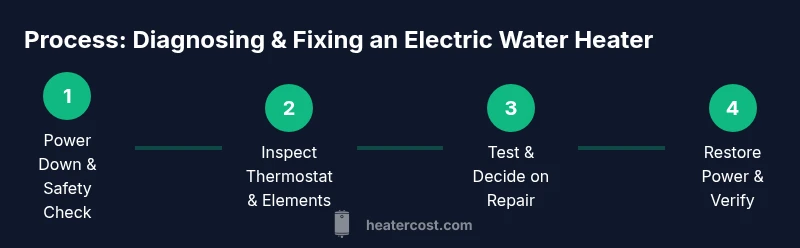
This section outlines a high-level sequence for diagnosing and addressing issues, without detailing unsafe actions. First, confirm a de-energized state and document the current condition. Next, inspect accessibility of the thermostat, elements, and wiring. Then verify there are no exposure risks and test critical components with appropriate equipment. Finally, act on the findings by replacing a failed part or scheduling a professional assessment if a fault lies beyond basic repair. This overview helps you plan your approach and avoid unnecessary disassembly. The actual hands-on steps are provided in the dedicated STEP-BY-STEP block to keep you safe.
Maintenance to prevent future issues
Regular maintenance is cheaper than frequent repairs. Schedule an annual inspection to check connections, test safety devices, and remove mineral buildup from the tank and temperature sensors. Flushing the tank helps reduce mineral scale that can shorten element life. Consider a professional water heater flush every 1-2 years for hard water areas. Replace anode rods as recommended by the manufacturer to prevent tank corrosion. Use a thermostat setting that balances comfort and energy use. By staying proactive, you can extend service life and keep energy costs predictable, especially in winter months. Heater Cost notes that early intervention saves money over time.
Quick reference troubleshooting checklist
- Power: verify the circuit breaker is on and the unit shows a powered supply.
- Temperature: confirm thermostat setting matches hot water needs.
- Elements: test safety and resistance; replace if outside spec.
- Wiring: inspect for loose connections or damaged insulation.
- Safety: ensure proper venting and absence of water near electrical components.
- When in doubt: shut off power and call a professional to avoid shock or fire risk.
Tools & Materials
- digital multimeter(Auto-ranging preferred; set to resistance and voltage as needed)
- non-contact voltage tester(Confirm absence of live voltage before touching wires)
- screwdriver set(Phillips and flat-head for access panels)
- needle-nose pliers(Helpful for wiring work and small components)
- wrench or socket set(Useful for mounting hardware or tanks (model dependent))
- replacement thermostat or heating element(Only if you have confirmed a faulty part; carry model-specific replacements)
- wire nuts and electrical tape(Secure splices and insulate connections)
- bucket or towels(Catch residual water during draining steps)
- gloves and eye protection(Personal protective equipment)
Steps
Estimated time: 60-90 minutes
- 1
Power down and verify safety
Locate the main breaker and switch off the circuit feeding the water heater. Use a non-contact voltage tester to confirm there is no live current in the wiring. This step prevents shock and creates a safe work environment for inspection.
Tip: Double-check that both the hot and cold supply lines are de-energized before touching any components. - 2
Access thermostat and heating elements
Remove access panels and insulation to reach the thermostat and heating elements. Take pictures or label wires to simplify reassembly. Work methodically to avoid disturbing unrelated components.
Tip: Keep track of which screws came from which panel to avoid mix-ups during reassembly. - 3
Inspect terminals and wiring
Examine all terminals for corrosion, burn marks, or loose connections. Tighten only to the manufacturer’s specified torque. If you see damaged insulation, plan for replacement and avoid reusing compromised wiring.
Tip: Do not overtighten terminals; apply just enough torque to secure a solid connection. - 4
Test thermostat and element continuity
With the power still off, set the multimeter to continuity and test between the thermostat terminals; test each heating element for continuity to ground and across its terminals. Abnormal readings indicate a faulty part that may need replacement.
Tip: If you’re unsure about readings, compare with a known-good component from a similar model. - 5
Decide on repair vs replacement
If a single component tests bad, replace that part and re-test. If multiple parts show wear or the tank shows corrosion, consider replacement. Weigh upfront costs, expected lifespan, and energy savings when deciding.
Tip: Document the parts you replace for warranty or future reference. - 6
Restore power and verify performance
Reassemble panels, restore power, and run the hot water tap to confirm operation. Check for leaks and ensure the unit maintains the set temperature. Monitor for any abnormal sounds or tripping breakers during initial use.
Tip: If hot water is inconsistent after test runs, re-check wiring and component specs.
Got Questions?
Is it safe to attempt fixing an electric hot water heater myself?
DIY fixes can be safe for basic checks if you strictly shut off power and follow basic safety steps. Many repairs involve high voltage or must comply with local codes, so know your limits. If you’re unsure, consult a licensed electrician or plumber.
DIY fixes can be safe for simple checks if you shut off power and follow safety steps, but for many repairs you should consult a professional.
What are common signs that a heating element needs replacement?
Cold water, inconsistent temperatures, or sudden loss of hot water often indicate a failed heating element. A reading outside the manufacturer’s resistance range on a multimeter confirms the need for replacement.
Active signs include cold water or uneven temperatures, and a meter check outside spec confirms replacement needs.
Can a faulty thermostat cause no hot water?
Yes. A faulty thermostat can prevent the heater from reaching the set temperature. Testing continuity and proper resistance helps determine if replacement is required.
Absolutely—if the thermostat isn’t regulating, you won’t get hot water even if other components are fine.
How long does a typical heating element replacement take?
For a skilled DIYer, replacement can take about 30-60 minutes per element, depending on accessibility. If you’re hiring a pro, schedule accordingly.
Usually 30 to 60 minutes per element when done by someone who’s experienced.
What maintenance can prevent future failures?
Annual inspections, flushing to reduce mineral buildup, checking anode rods, and adjusting the thermostat for efficiency can greatly extend life and reduce breakdowns.
Regular checks and flushing the tank help prevent future failures and save energy.
Are energy costs affected after fixing faults?
Yes. Fixing faults that cause overheating or continuous running can reduce energy waste and stabilize monthly bills. A well-maintained heater operates more efficiently.
Fixes typically improve efficiency, which can lower energy costs over time.
Watch Video
The Essentials
- Power off before inspection and testing
- Test thermostat and elements with a multimeter
- Replace failed parts rather than forcing repairs on an aging tank
- When in doubt, consult a licensed professional