Electric Water Heater Fix: A Homeowner's Step-by-Step Guide
A comprehensive, safety-first guide to diagnosing and fixing common electric water heater problems, including tripped breakers, faulty thermostats, and worn heating elements. Step-by-step instructions, tool lists, and maintenance tips for homeowners, renters, and property managers.

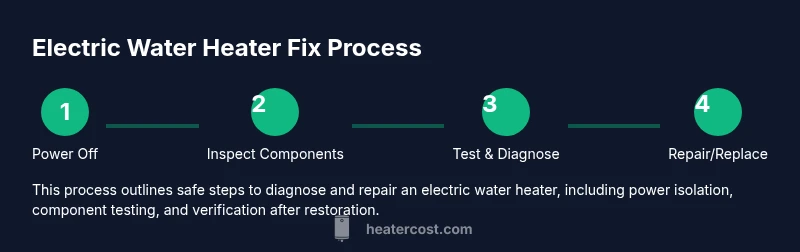
This guide helps homeowners safely diagnose and fix common electric water heater issues, from tripped breakers to faulty thermostats and heating elements. You’ll learn safety steps, how to test components, and when to replace parts or call a licensed electrician. Follow the step-by-step process and avoid risks with proper disconnection and testing.
Why electric water heater problems happen
Electric water heaters are common in homes and rentals, delivering a reliable supply of hot water when properly maintained. Most failures stem from wear on electrical components, mineral buildup, and voltage irregularities. According to Heater Cost, aging components and inconsistent electrical supply are frequent culprits in electric water heater faults. Sediment from hard water can coat the bottom of the tank and reduce heating efficiency, while thermostats and heating elements degenerate over time. When these parts wear, you may notice uneven water temperatures, longer heating times, or frequent cycling of the unit. Understanding the common failure modes helps you diagnose the issue more quickly and decide whether a DIY fix is appropriate or if professional service is warranted.
Safety first: shutdown procedures and hazard awareness
Before you touch any electrical components, power must be removed from the heater. Start by turning off the circuit breaker that serves the unit, and switch off the unit’s dedicated disconnect if you have one. Use a non-contact voltage tester to confirm there is no live power in the wires feeding the thermostat and elements. If water is present, shut off the cold-water supply to minimize pressure and leakage while you inspect. Wear insulated gloves and safety glasses, and work in a dry area. If you feel unsure at any point, stop and call a licensed electrician. These precautions protect you from electric shock and avoid creating a hazardous situation.
Common issues and quick checks
- Tripped circuit breaker: Isolate the breaker and reset; if it trips again, there may be a short or element fault.
- No hot water or insufficient hot water: Thermostat misadjustment or element wear.
- Temperature fluctuations: Thermostat cycling or sensor issues.
- Strange noises or banging: Sediment buildup causing overheating.
- Leaks around the tank: Seals or tank corrosion; may require replacement.
- Rusty or discolored water: Anode rod wear and rust may contribute.
These issues cover the most frequent faults homeowners encounter and help you prioritize which component to test first.
Diagnosing with basic tests
Start with a visual inspection of all wiring, panels, and connections for signs of wear or corrosion. Use a multimeter to test heating elements for continuity and resistance, ensuring power is off before touching any terminals. Check the thermostat by confirming it is set correctly and testing for consistent response when changing the setpoint. If you find an element that shows no continuity or a thermostat that does not respond, plan for a replacement. For complex tests, consult the equipment manual or a professional to avoid misdiagnosis.
Replacing a faulty heating element or thermostat
If a fault is confirmed, replace the component with an identical rating and mounting style. Disconnect power, remove the access panel, and detach the wires from the faulty part. Install the new element or thermostat, rewire exactly as the old one, reseal the panel, and restore water flow. After replacement, fill the tank, purge air from the lines, and turn the power back on. Observe hot water delivery for a full cycle to ensure stability and safety.
When to call a professional
If you encounter signs of a compromised tank, gas odors (for hybrid setups), or if the unit is old and showing multiple faults, professional service is prudent. A licensed electrician or HVAC technician can perform advanced diagnostics, verify electrical code compliance, and ensure safety shutdowns are correctly implemented. Given the potential for electric shock and water damage, err on the side of caution when unsure about the fault or the unit’s age.
Cost considerations and maintenance tips
Repair decisions depend on component availability, age, and anticipated longevity. Based on Heater Cost analysis, replacing a faulty element or thermostat can extend service life if the unit is relatively new, whereas older tanks may warrant replacement for future reliability. Regular maintenance, such as annual checks and periodic flushing to remove sediment, reduces mineral buildup and prolongs efficiency. Always use compatible parts and keep documentation for future service.
Quick preventive maintenance checklist
- Test the power supply and safety disconnect before any work
- Inspect connections for corrosion and tighten as needed
- Flush the tank annually to reduce sediment buildup
- Check the anode rod and replace if corroded
- Keep the area dry and ensure adequate ventilation
- Label all wires when performing DIY maintenance for future reference
Tools & Materials
- Multimeter (for measuring continuity and voltage)(Set to ohms for resistance checks; probe tips insulated.)
- Non-contact voltage tester(To verify power is truly off.)
- Screwdrivers (flathead and Phillips)(For removing access panels and wiring screws.)
- Adjustable wrench or heating element wrench(For loosening heating element nuts.)
- Bucket or towels(To catch leaks when draining slightly.)
- Safety gloves and eye protection(Protects from shocks and debris.)
- Replacement parts (thermostat, heating element)(Only if you have diagnosed a faulty component.)
Steps
Estimated time: 60-120 minutes
- 1
Turn off power at the breaker
Access the main panel and switch off the circuit serving the water heater. This isolates all electrical supply to the unit and prevents shocks during inspection.
Tip: Double-check with a tester before touching wires to confirm no voltage. - 2
Confirm power is off with a tester
Use a non-contact tester on both the thermostat terminals and heating element screws to verify there is no live current.
Tip: If you feel unsure, stop and consult a pro before proceeding. - 3
Shut off the cold-water supply
Turn the cold-water valve to prevent more water from entering the tank while you work. This reduces pressure and leakage risk.
Tip: Place a bucket beneath the drain valve in case water leaks during inspection. - 4
Remove access panels and inspect
Carefully remove the insulating covers to expose the heating elements and thermostat wiring. Look for obvious signs of damage or loose connections.
Tip: Take a photo of wiring before disconnecting to help with reassembly. - 5
Test heating elements for continuity
With power off, disconnect the wires from the element and test across its terminals with a multimeter. No continuity indicates a bad element.
Tip: Do not touch exposed terminals while testing. - 6
Test thermostat and high-limit switch
Check that the thermostat responds to temperature changes and that the high-limit switch closes when heated. Use the manual for exact testing procedures.
Tip: If the switch feels loose or shows signs of wear, replace it with an identical part. - 7
Replace component and reassemble
Install the new heating element or thermostat if the tests indicated a fault. Reconnect wires exactly as they were, reattach panels, and seal.
Tip: Avoid over-tightening fittings to prevent thread damage. - 8
Restore power and test full operation
Turn the water heater back on at the breaker, allow the tank to fill and vent air, then verify hot water delivery and stability across cycles.
Tip: Monitor for 15-30 minutes of normal operation to confirm reliability.
Got Questions?
Is it safe to attempt an electric water heater fix yourself?
Some simple, non-technical fixes are doable if you strictly follow safety steps and stay within your skill level. For any live electrical work or uncertainty, hire a licensed electrician.
You can do basic safety checks if you follow the steps, but for electrical work you should hire a professional.
What are common signs of a heating element failure?
Lack of hot water or inconsistent temperatures often points to a failing heating element. Use continuity testing to confirm if the element is open or shorted.
If you have no hot water or erratic temps, the element may be failing and should be tested for continuity.
How do I reset a tripped breaker for my water heater?
Locate the home's service panel, reset the breaker fully to the off position, then back to on. If it trips again, there may be an electrical fault requiring inspection.
Reset the breaker and see if it trips again; if it does, you likely have a fault that needs a pro.
Should I replace or repair when the heater is old?
Consider the unit's age, cost of parts, and the likelihood of future failures. A professional can help weigh the options and may recommend replacement for long-term reliability.
If the unit is old and several faults appear, replacement may be more reliable than ongoing repairs.
What maintenance can prevent future failures?
Regular flushing, checking anode rods, and periodic inspection of wiring reduce sediment buildup and extend life. Keeping the area dry and vented helps as well.
Regular flushing and checks prevent many common issues and keep the heater running longer.
Watch Video
The Essentials
- Power off before any inspection.
- Identify faults with basic tests to avoid unnecessary replacements.
- Replace only with matching-rated parts for safety.
- Test hot water and system after repair to verify proper operation.