Can a Leaking Water Heater Be Fixed? Urgent Troubleshooting Guide
Urgent guide on can a leaking water heater be fixed. Diagnose, safety steps, common causes, fixes, and when to replace. Act quickly to protect your home.

Yes. A leaking water heater can often be fixed, especially for valve or connection issues. Start by turning off power and the water supply, then drain the tank and inspect fittings for tightness or corrosion. If the leak persists or you see rust, contact a licensed plumber or consider unit replacement.
Can a Leaking Water Heater Be Fixed — Key Signs You Can Repair
A leak from a water heater can feel alarming, but many leaks are fixable. If the water is dripping from the drain valve, inlet/outlet fittings, or the temperature and pressure (T&P) relief valve, you may have a repairable issue. Inspect the area carefully; leaks that only occur after pressure spikes or when the unit is used hint at fittings rather than a failed tank. Remember: can a leaking water heater be fixed? In many cases, yes, you can address the root cause without replacing the whole unit. However, if you see rust, dampness that persists after tightening connections, or liquid around the base of the tank, the tank may be compromised and replacement is likely the safer option. This guide will walk you through immediate safety steps, common causes, and practical fixes so you can decide whether a DIY repair is appropriate or a professional visit is warranted.
Immediate Safety First: Shut Off Power and Water
Dealing with a leaking water heater requires swift safety actions. For electric models, flip the circuit breaker to the OFF position and avoid touching any cool metal parts with wet hands. For gas models, shut off the gas supply at the valve and ventilate the area if you smell gas. Then close the cold water inlet valve to stop more water from entering the tank. Place towels or a basin under the leak to minimize water damage, and never attempt to bypass safety devices. If you notice a strong gas odor or hissing, evacuate immediately and contact emergency services.
Common Causes of Leaks and What They Mean
Leaks usually come from fittings or wear rather than a doomed tank. Common causes include a loose drain valve, loose hot or cold water fittings, a faulty T&P relief valve, worn gaskets or washers, or corrosion at the base of the tank. A small drip at the drain valve often indicates a simple tightening or replacement of a washer. Leaks around the T&P discharge pipe can signal pressure issues. If the tank or surrounding area shows rust, this points to more serious deterioration that may require tank replacement.
Diagnostic Checklist: Where to Look First
Start with the easiest checks and work toward the more involved ones. Look for water pooling around the drain valve and tighten if directed by manufacturer. Inspect all visible connections on the hot and cold water lines for moisture or staining and ensure fittings are snug but not overtightened. Check the T&P relief valve discharge pipe for corrosion or a leak at the joint. Inspect the tank’s base for rust or corrosion and look for dampness along the seam. Finally, test the unit by slowly restoring water flow and watching for fresh leaks while the system is pressurized.
How We Assess Repair vs Replacement: Cost and Longevity
Deciding between repair and replacement hinges on the leak source, the tank’s age, and the repair cost relative to replacement. Minor valve or gasket fixes typically cost only a fraction of a full replacement, often in the low hundreds of dollars including parts and labor. If the tank is old (approaching its expected lifespan) or shows significant corrosion, replacement may be more cost-effective in the long run. Remember to factor in energy efficiency improvements when evaluating options; newer units can reduce operating costs over time.
Step-By-Step Fixes for the Most Common Causes
This section covers practical, non-destructive fixes for frequent leak sources. Begin with the simplest remedy and escalate only if needed. Tightening a loose drain valve or fittings is often all that’s required. If components wear out, replace gaskets or the valve itself. For a faulty T&P valve, replacement by a qualified technician is recommended to ensure safety. If corrosion is present on the tank, plan for a full replacement rather than patchwork repairs, as the tank’s integrity is compromised. Finally, always re-test after completing each fix and monitor for new leaks.
Maintenance to Prevent Future Leaks
Preventive care matters. Flush the tank annually to remove sediment that can cause corrosion and reduce efficiency. Inspect anode rods and replace as needed to slow tank corrosion. Consider installing an expansion tank if you have high incoming water pressure. Schedule professional inspections every 2–3 years to catch developing issues early. A proactive approach minimizes the chance of sudden leaks and extends the life of your heater.
Steps
Estimated time: 60-120 minutes
- 1
Power and water off
Locate the correct power switch or breaker and switch OFF. For gas models, shut off the gas supply. Then close the cold water inlet valve to stop more water from entering the tank.
Tip: Label the switch and valve for future reference to avoid mistakes. - 2
Relieve pressure and drain
Open the drain valve and allow the tank to drain to below the outlet pipe level. Keep a bucket ready for water and monitor for sudden bursts that indicate high pressure.
Tip: Do not stand directly in front of the valve, and wear eye protection. - 3
Inspect drain valve and fittings
Check for moisture around the drain valve stem and fittings. Tighten gently with the appropriate wrench; replace washers if needed and apply plumber’s tape where appropriate.
Tip: If the valve is stubborn or corroded, stop and proceed to a professional replacement. - 4
Check the T&P valve
If the T&P valve is leaking, test discharge briefly to confirm, and plan replacement if it continues after testing. This task can be hazardous, so consider a pro if you’re unsure.
Tip: Never cap or disable the T&P valve; it protects against dangerous pressure. - 5
Inspect tank exterior and connections
Look for rust, soaking, or staining on the tank body and joints. Check hot and cold inlet/outlet connections for leaks and reseal or tighten as needed.
Tip: Small leaks near the tank are often a sign to replace the unit rather than patching. - 6
Refill and test
Close the drain valve, refill the tank with water, restore power or gas, and observe for new leaks. If any leak returns, stop and call a pro.
Tip: Monitor for several hours after restoration to ensure stability.
Diagnosis: Visible leak or dripping from the water heater area
Possible Causes
- highLoose drain valve or fittings
- mediumFaulty T&P relief valve or discharge pipe
- mediumWorn washers or gaskets
- lowTank corrosion or base rust
Fixes
- easyTighten drain valve and fittings to manufacturer specification
- easyReplace worn washers or gasket seals
- mediumReplace faulty T&P valve or repair discharge line
- hardAssess tank corrosion and replace the unit if needed
Got Questions?
Can a leaking water heater be fixed without replacing the entire unit?
Many leaks from valves or fittings can be repaired without replacing the entire unit. If the tank itself is corroded or cracked, replacement is often the safer option.
Most leaks from valves can be repaired without replacing the whole heater, but a cracked tank means replacement is usually necessary.
What should I do right away if I find a leak?
Turn off power, shut off the cold water supply, and place towels or a bucket under the area. If you smell gas, evacuate and call emergency services.
Turn off power and water, clean up safely, and call for help if you smell gas.
Is it safe to repair a gas water heater myself?
Gas heaters require careful handling; disconnecting or modifying gas lines is hazardous. Hire a licensed plumber or technician for repairs involving gas connections or the T&P valve.
Gas heaters involve risks; for any gas-related repairs, hire a licensed pro.
How much do repairs typically cost?
Repair costs vary by part and job. Minor valve replacements might be a few hundred dollars; full tank replacement could range higher, with labor and parts considered.
Repair costs depend on the part; expect a few hundred dollars for simple fixes or higher for a full replacement.
When should I replace instead of repair?
If the tank shows significant rust, the unit is near or past its life expectancy, or multiple components fail, replacement is usually the best option.
If the tank is heavily corroded or old, replacement is often the safer choice.
Do I need to drain the tank completely to fix a leak?
Not always. Some fixes require draining to below the leak height, but full drainage is only necessary for certain repairs or replacements.
You don’t always need to drain the tank fully; it depends on the fix.
Watch Video
The Essentials
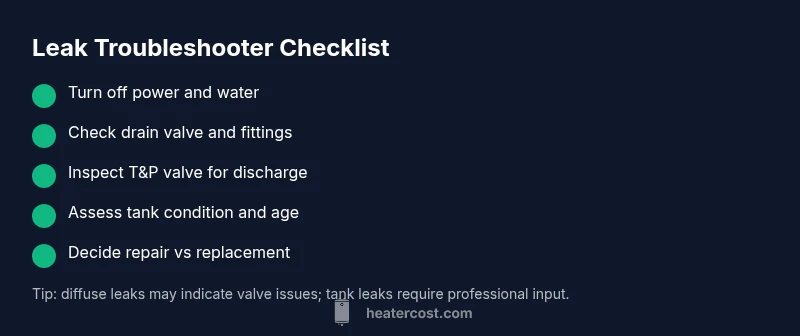
- Shut off power and water immediately when you detect a leak.
- Most leaks come from valves or fittings, not the tank itself.
- Rusty or damaged tanks usually require replacement for safety.
- Schedule annual maintenance to prevent future leaks.