What to Do for Water Heater Maintenance
Master essential water heater upkeep with monthly checks, flushing, safety tests, thermostat checks, and guidance on when to call a pro. A Heater Cost guide for homeowners, including practical steps and safety reminders.

Regular water heater maintenance helps prevent breakdowns, extend lifespan, and keep energy costs predictable. In a few simple checks, homeowners can catch leaks, test safety devices, and improve efficiency. This guide walks you through monthly tasks and seasonal care. According to Heater Cost Team, routine upkeep reduces the risk of costly outages.
Why Water Heater Maintenance Matters
Regular maintenance helps prevent costly breakdowns, extend the life of your unit, and keep energy use predictable. The Heater Cost Team notes that routine upkeep can reduce emergency repairs and improve overall system reliability. Sediment buildup, worn safety devices, and aging tanks are common failure points; addressing them early protects your home from cold showers and expensive repairs. By investing a little time each season, homeowners can catch issues before they escalate, maintain consistent hot water, and preserve home value. This section explains the core reasons to maintain your water heater and lays the groundwork for a practical care plan.
According to Heater Cost analysis, regular checks also help you spot leaks early, reducing the chance of water damage and mold in nearby areas. A proactive approach keeps your system running smoothly and gives you confidence to plan around seasonal weather in your home.
Quick Monthly Checks You Should Do
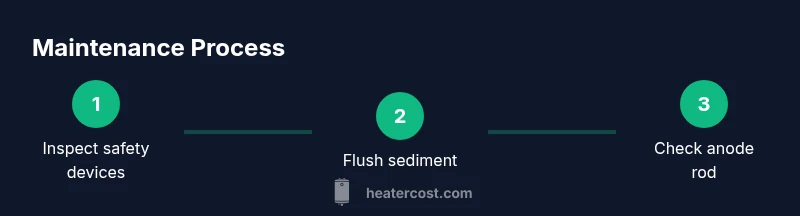
Monthly checks are lightweight but highly effective. Start by visually inspecting the area around the heater for dampness or leaks and listening for unfamiliar banging sounds that can indicate sediment buildup or valve issues. Test the temperature and pressure relief valve (TPR valve) by lifting the tpr lever briefly to ensure water releases and air escapes; if nothing happens, do not force it and call a pro. Check the thermostat setting—most households are comfortable around 120°F (49°C)—and confirm the multi-year anode rod is not excessively corroded. Finally, verify that the area has proper ventilation and that nearby electrical outlets and gas lines are clear of obstructions. These simple checks help you catch issues before they escalate and keep homes safe.
Seasonal Maintenance Tasks
Seasonal maintenance aligns with weather patterns and energy use. In spring, inspect venting and seals, and confirm insulation is intact on the storage tank and pipes. In summer, test electrical connections and switch off power if you hear buzzing or smell burning insulation. In fall, plan for a professional inspection before peak heating demand, and replace any worn gaskets or seals. In winter, ensure the heater is not overworked during cold snaps by balancing demand with other hot-water uses and ensuring the thermostat remains stable. A solid seasonal rhythm gives you predictable hot water and lowers the chance of a surprise outage.
How to Flush Your Tank (Overview)
Sediment accumulation is a common cause of reduced efficiency and shorter tank life. A controlled flush removes mineral buildup and improves heat transfer. Start by turning off power or gas to the unit, shutting off the cold-water supply, and attaching a hose to the drain valve. Open a hot water faucet somewhere in the house to relieve pressure. Open the drain valve slowly to let water flow out, then briefly close and reopen to flush out stubborn sediment. Close the valve, remove the hose, and refill the tank. Finally, restore power or gas and run hot water to purge air from the lines. For safety, never perform flushing with the heater still hot and never force valves that feel stuck.
This overview prepares you for a deeper, step-by-step flush process in the dedicated guide.
Inspect the Anode Rod and Tank Interior
The anode rod protects your tank from corrosive rust. If it is heavily corroded or coated in calcium, replace it to preserve the interior. You’ll need to drain and access the tank, loosen and remove the old rod, and insert a new one with the correct size and threading. Inspect the interior for signs of pitting or heavy rust; if you see advanced corrosion, it may be time to consider replacement options. Regular anode rod checks can extend tank life and deter leaks. Be sure to turn off power/gas and drain safety-prone areas before opening the tank.
Heater Cost team recommends scheduling this inspection with a professional if you’re unsure about rod type or torque requirements.
Safety Considerations: Electrical, Gas, and Venting
Water heaters involve electricity or gas and venting that must be handled safely. For electric units, always shut off power at the breaker before any work and avoid touching wiring or terminals. For gas heaters, verify the gas valve is off before maintenance and use a carbon monoxide detector in the area—if you smell gas or hear hissing, leave the area and call the utility. Ensure the vent is clear and unobstructed to prevent carbon monoxide buildup. If you’re unsure about any step, contact a licensed professional. Following safety protocols protects occupants and prevents damage to the home.
Cost, ROI, and When to Replace
Maintenance costs vary by unit type and service provider, but proactive upkeep typically costs a fraction of an emergency replacement. Regular servicing can reduce energy waste, extend tank life, and minimize downtime. If frequent repairs become necessary, or if the tank shows extensive corrosion, it may be more economical to replace it with a newer, more efficient model. When evaluating replacement, consider energy efficiency, upfront price, installation complexity, and available tax credits or incentives. A well-planned maintenance schedule helps you budget and protects your home investment.
Common Mistakes and How to Avoid Them
A few frequent missteps undermine maintenance efforts: ignoring signs of leakage, neglecting the drain valve, and failing to turn off utilities before work. Another mistake is attempting to flush without properly securing the drain or using a mismatched hose, which can cause spills. Always follow safety guidelines, take your time with each task, and label components for future reference. If you’re unsure about sediment levels or radiator-like noises, consult a professional rather than guessing. A careful, consistent approach beats rushed, ad-hoc fixes.
Tools & Materials
- Wrench set (adjustable)(For fittings and anode rod removal)
- Flat-head screwdriver(For valve components and access panels)
- Bucket (5-7 gallons)(To catch draining water)
- Hose (garden hose)(Attach to drain valve)
- Teflon tape(Seal pipe threads when reassembling)
- Flashlight(Inspect hidden areas and fittings)
- Wet/dry vacuum(Clean around area if there’s minor water)
- New anode rod (proper size)(Replace if corrosion is significant)
- Thermometer or thermometer strip(Verify output temperature)
- Personal protective equipment (gloves, goggles)(Protect from hot water and chemicals)
- Screwdriver with magnetized tip(Assist with small screws)
Steps
Estimated time: 1-2 hours
- 1
Turn off power and water
Power off the unit at the breaker (electric) or switch (gas). Locate and shut off the cold-water supply to the tank. This prevents electric shock and water spray while you work.
Tip: Double-check the power is off by testing a control before touching any components. - 2
Shut off and vent the system
Close any valves feeding the heater and open a hot faucet to vent pressure. This reduces pressure and makes draining safer and quicker.
Tip: Keep the faucet open until steady water flow is observed from the hose. - 3
Test/inspect safety devices
Lift the TPR valve lever to ensure water releases; listen for a damped hiss and water flow. If there’s no release, do not force the valve and consult a pro.
Tip: A malfunctioning TPR valve is a red flag; replace or repair promptly. - 4
Flush the tank
Attach a hose to the drain valve and direct the water to a safe drain. Open the drain valve gradually to flush out sediment, then periodically flush for several minutes.
Tip: If water flow is especially muddy, flush longer and repeat with fresh water. - 5
Inspect/replace the anode rod
Access the anode rod; loosen and remove it, inspect for heavy corrosion, and replace with a new rod of the same size if needed. This protects the tank interior.
Tip: Do not overtighten the new rod; snug is enough to seal without damage. - 6
Reassemble and restore power
Close the drain valve, remove the hose, and refill the tank. Once full, restore power or gas and verify operation by running hot water.
Tip: Bleed air from lines by running hot water until steady flow returns.
Got Questions?
How often should I flush my water heater?
Most tanks benefit from flushing once a year. If you have hard water with heavy sediment, consider flushing twice yearly and after any long periods of non-use.
Most tanks should be flushed once a year, more often if you have hard water. If you notice sediment or reduced hot water performance, flush sooner.
Can I replace anode rod myself?
Yes, with basic tools and proper safety precautions. Shut off power/gas and water, drain as needed, and install a new rod of the same size.
Yes, you can replace the anode rod yourself if you’re careful and follow safety steps. If unsure, hire a pro.
What are signs my water heater needs service?
Rusty water, banging noises, fluctuating temperatures, leaks, or frequent shut-offs are indications you should seek service.
Look for rusty water, noises, leaks, or temperature swings and schedule service when you notice them.
Is it safe to adjust the thermostat yourself?
Small adjustments are generally safe, but do not go above 120°F (49°C) to reduce scalding risk. If in doubt, consult a pro.
You can adjust the thermostat a little, but don’t set it above 120 degrees for safety.
Should I replace a tank with a tankless model?
Tankless units save space and may reduce energy use, but upfront costs and installation differ. Evaluate home needs and budget before choosing.
Tankless can save space and energy, but compare upfront costs and installation needs before deciding.
Do electrical issues require a pro?
Yes. Electrical work around a water heater should be handled by a licensed professional for safety and code compliance.
Yes—leave electrical problems to a licensed pro to stay safe and code-compliant.
Watch Video
The Essentials
- Schedule regular checks to prevent outages.
- Flushing removes sediment to restore efficiency.
- Inspect and replace the anode rod as needed.
- Follow safety steps to avoid shocks, leaks, or fire hazards.