Maintenance for Water Heater: A Complete How-To for Homeowners
Learn practical maintenance for your water heater to boost efficiency, prevent leaks, and extend its service life with safe, step-by-step tasks.

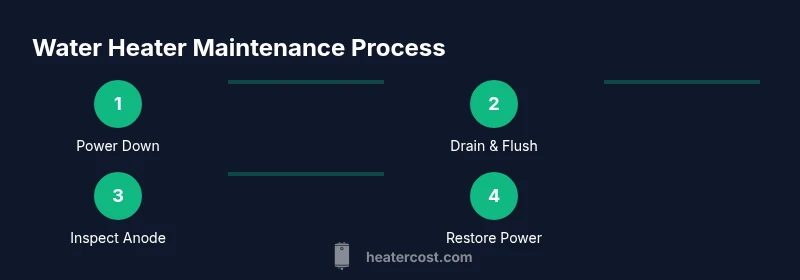
Regular maintenance for a water heater means flushing sediment, checking the valve, inspecting the anode rod, and verifying thermostat settings. These actions prevent corrosion and energy waste, and help you avoid costly repairs over the system's life. The process is achievable with basic tools in about 60-90 minutes for most homes.
Why Regular Maintenance Extends Your Water Heater's Lifespan
According to Heater Cost, routine maintenance helps extend a water heater's lifespan, keep energy use steady, and prevent unexpected failures. Sediment buildup from minerals slowly wears down heating elements and reduces efficiency, which can drive higher bills and shorter heat cycles. Regular checks also help you identify signs of wear in parts like the anode rod, tank lining, and safety valves before they fail. Whether you have a gas or electric unit, consistent maintenance reduces risk and improves reliability over time. In this section, we explore why maintenance matters, what it covers, and how a simple schedule fits into everyday home care.
A practical maintenance plan centers on two ideas: prevent problems before they arise and optimize performance so your system runs smoothly year after year. The Heater Cost team emphasizes that most issues start with sediment, corrosion, and poor settings. By combining visual inspections with simple tests, homeowners gain a clear picture of current condition and next steps. The goal isn't to overhaul the system but to keep it operating at safe, efficient levels. You'll learn what tasks to perform, how often to do them, and what tools and safety steps to use. You'll also see how maintenance ties into total home costs, energy use, and comfort.
What to Do Monthly vs Annually
Monthly checks are quick, low-risk, and highly impactful. Start by verifying the thermostat or temperature setting to around 120°F (49°C) for safety and energy efficiency. Inspect for leaks around connections and fittings; a small drip now can become a bigger problem later. Listen for unusual noises, which can indicate sediment movement or heating element issues. Wipe down the exterior and ensure the access panel is secure. These tasks take 10-20 minutes and create a reliable baseline.
Annually, schedule a deeper inspection. Begin with a tank flush to remove sediment, which helps the heat transfer process and reduces nuisance cycling. Examine the anode rod and replace if heavily corroded or worn, since it protects the tank from corrosion. Test the Temperature and Pressure Relief (TPR) valve by lifting the test lever and re-seating it—if water flows freely through the discharge pipe, the valve is functioning. Check insulation on pipes and the tank, and inspect gas lines or electrical connections depending on your unit. The annual cadence catches wear before it causes failure and supports efficiency.
How to Flush Your Water Heater: Overview
Sediment can hinder heating efficiency and shorten the tank’s life. Flushing is a straightforward procedure that removes mineral buildup from the bottom of the tank and clears the water lines. You’ll typically drain the tank, purge with cold water to loosen sediment, and refill with fresh water. Before you begin, turn off power to electric units or shut off the gas valve, close the cold-water supply, and relieve pressure by opening a hot faucet. Use a bucket and a garden hose to collect and dispose of water and sediment. While the basic concept is simple, details vary by tank size, heater type (gas or electric), and local plumbing codes. If you’re unsure, consult a pro or manufacturer’s instructions. The goal is a clean tank and stable water temperature without compromising safety.
Inspecting the Anode Rod and Tank Interior
The anode rod protects the steel tank from corrosion by attracting corrosive elements. Checking it yearly helps preserve the tank’s integrity and prolongs life. To inspect, shut off power or gas, drain a small amount of water to relieve pressure, and remove the anode rod from the top of the tank. If it’s heavily corroded (often gray, black, or crumbly) and has less than 1/3 of its original diameter, replace it. While you’re in, look for signs of internal corrosion or pitting on the tank walls near the bottom; bright, clean metal indicates a healthier tank. Reinstall with Teflon tape on threads and hand-tighten before restoring power and water supply. If you notice leaks or rust around the top fittings, call a pro.
Checking the Temperature and Pressure Relief Valve (TPR Valve)
The TPR valve is a critical safety component that prevents dangerous pressure buildup. You should test it annually and after any major water temperature change. To test, place a bucket under the discharge pipe, carefully lift the valve’s lever, and listen for the release of water. If water flows or leaks persist, the valve may be worn and should be replaced. Do not keep the valve open or remove the pipe; instead, contact a licensed plumber if you’re unsure. Regular testing can prevent costly water damage and tank failure.
Sediment Build-Up, Flushing, and Tank Maintenance
Sediment accumulation is the most common reason for inefficiency, loud operation, and shortened tank life. Over time minerals settle to the bottom, insulating the heating element and increasing energy consumption. Regular flushing, combined with anode rod checks, gives you a good chance of maintaining thermal efficiency. In addition to flushing, inspect the cold inlet and hot outlet pipes for leaks, insulate exposed run pipes to minimize heat loss, and ensure the drain pan for the unit is present and dry. If you have hard water, you may need to flush more often; soft water may reduce buildup but still requires a cadence. A simple annual flush goes a long way toward reliable service.
Temperature Settings, Efficiency, and Noise
Most energy guides recommend setting your water heater around 120°F (49°C). This reduces the risk of scalding and minimizes standby heat loss, while still delivering adequate hot water. If you notice excessive cycling, fluctuating temperatures, or noisy operation, inspect for sediment, check the thermostat calibration, and ensure wiring or gas connections are secure. Temperature control failures can cause wasted energy, increased bills, and uncomfortable showers. Small adjustments can yield noticeable improvements in comfort and efficiency, especially in homes with high hot-water demands or larger families.
Expanding Systems: Expansion Tank, Insulation, and Replacements
Some systems benefit from an expansion tank or properly insulated pipes. An expansion tank accommodates water expansion during heating, protecting existing fixtures and reducing pressure on the plumbing. If your home is newer or uses a backflow preventer, an expansion tank is more likely to be required by code. Insulation on pipes reduces heat loss and improves efficiency, particularly in unheated spaces. Over time, seals and connections can wear; plan replacements for worn gaskets, fittings, or valve caps as part of routine maintenance. If your water heater is older or showing recurrent leaks, a professional assessment can help determine whether a component or the entire unit should be replaced.
DIY vs Professional Service: When to Hire a Technician and Cost Considerations
Many maintenance tasks are doable for the handy homeowner, but certain tasks are safer and more effective when performed by a trained technician. Flushing, anode rod replacement, and TPR valve testing are commonly DIY-friendly—with caution. More complex jobs, such as diagnosing gas line issues, wiring, or controlling thermostat settings beyond safe ranges, warrant professional expertise. The right choice depends on your comfort, tools, and access to safety equipment. The Heater Cost team recommends scheduling an annual professional inspection if your system is older or exhibits signs of wear, and keeping a record of service visits for warranty compliance. By planning ahead, you can avoid surprise breakdowns and keep energy costs reasonable.
Tools & Materials
- Adjustable wrench(to tighten/loosen valves and fittings)
- Garden hose(to drain and flush the tank)
- Bucket(to catch water and sediment)
- Screwdriver set(flathead and Phillips for panels and screws)
- Teflon tape(for threaded connections)
- Thermometer or temp gun(to verify output water temperature)
- Pliers(useful for stubborn fittings)
- Rags or towels(cleanup and safety)
- Anode rod replacement kit(only if rod shows heavy corrosion)
- TPR valve replacement kit(replacement valve if leaking)
- Pipe insulation(insulate exposed pipes for efficiency)
- Safety gloves and eye protection(protect from scalding and splashes)
- Flashlight(illuminates tight access areas)
Steps
Estimated time: 90-120 minutes
- 1
Power down and prepare safely
Turn off electrical power to an electric water heater at the breaker box, or shut off gas for a gas heater. Remove any storage near the unit and wear protective gloves. Ensure all safety devices are within reach and read the manufacturer’s instructions before starting.
Tip: Double-check that power is off before touching electrical components to avoid shock. - 2
Close the cold-water supply and relieve pressure
Close the cold-water inlet valve to stop new water from entering the tank. Open a hot tap somewhere in the house to relieve pressure and speed up drainage. This minimizes water spray and helps flushing go smoothly.
Tip: Relieve pressure slowly to avoid a sudden burst of hot water. - 3
Attach hose and drain the tank
Connect a garden hose to the drain valve and route the hose to a floor drain or outdoors. Open the drain valve and allow water to flow out steadily while watching for sediment. Keep children and pets clear of the area.
Tip: Protect your skin from splashes and keep the hose pointed away from electrical panels. - 4
Flush sediment and purge lines
Once the tank drains, briefly open and close the cold-water supply to flush out remaining sediment. Repeat until the water runs clear. Close the drain valve when finished and open the cold-water inlet to refill slowly.
Tip: Never force the drain valve; if it’s stiff, consult a pro rather than forcing it. - 5
Inspect/replace the anode rod
Remove the anode rod from the top of the tank, inspect for heavy corrosion, and replace if necessary. Reinstall with new gasket material and ensure the rod is tightened but not overtightened.
Tip: Take photos during removal to reference orientation when reinstalling. - 6
Test the TPR valve
Lift the valve lever to confirm water is released through the discharge pipe. If no water comes out or leaks persist afterward, replace the valve.
Tip: Do not leave the valve open; re-seat it after testing. - 7
Re-fill and re-energize
Close the drain valve, restore the cold-water supply, and allow the tank to fill. Once full, restore power or gas and set temperature to recommended level (commonly 120°F).
Tip: Check for leaks around fittings during refill. - 8
Finalize and clean up
Re-check all connections, wipe surfaces dry, and test hot water delivery. Keep notes of the maintenance for future reference and warranty compliance.
Tip: Keep a maintenance log with dates and tasks performed.
Got Questions?
How often should I flush my water heater?
Most homes benefit from a yearly flush, but hard water or high sediment may require more frequent attention. Use a yearly baseline and adjust if you notice reduced hot water performance.
Most homes should flush once a year, but if you have hard water or heavy sediment you may need to do it more often.
Can I perform maintenance myself or should I hire a pro?
Many basic tasks like flushing and inspecting the anode rod can be DIY with caution. Complex issues, especially gas line or electrical work, are safer with a licensed professional.
You can do basic maintenance yourself if you’re careful; for gas lines or electrical work, hire a pro.
What should I do if the pressure relief valve leaks?
A leaking TPR valve indicates a problem that could lead to overpressure or tank failure. Replace the valve and inspect related piping, or call a plumber.
If the TPR valve leaks, replace it and have the system checked by a plumber if unsure.
How do I know if the anode rod needs replacement?
Inspect the rod for heavy corrosion, breakage, or loss of diameter. Replace if it’s significantly degraded to maintain tank protection.
Look for heavy corrosion or thinning of the rod; replace as needed to protect the tank.
Is it safe to work around a gas water heater?
Working around gas appliances requires caution. If you’re unsure about gas connections or ventilation, contact a licensed technician.
Gas work can be dangerous—when in doubt, call a professional.
Watch Video
The Essentials
- Create a consistent maintenance schedule and stick with it.
- Flush sediment annually to protect efficiency and longevity.
- Regularly test safety valves to prevent overpressure damage.
- Check the anode rod and replace when corroded to extend tank life.
- Decide between DIY tasks and professional service based on safety and skill.