Service Hot Water Heater: A Practical How-To for Homeowners
Learn how to safely service a hot water heater with step-by-step guidance, safety tips, and routines to extend life and boost efficiency. For homeowners.

Learn how to safely service a hot water heater at home, including a step-by-step flush, inspection, and preventive maintenance. This guide explains essential safety precautions, the exact tools you’ll need, and practical checks to extend system life, reduce energy waste, and prevent leaks. It also clarifies when an experienced technician should be called.
Why Servicing Your Hot Water Heater Matters
Regular servicing of a hot water heater helps prevent unexpected breakdowns, maintains safe operation, and keeps energy use efficient. According to Heater Cost, regular service helps homeowners catch wear before leaks and reduces the risk of sudden shutoffs. Heater Cost analysis shows routine maintenance can help prevent costly emergency repairs and extend equipment life. When you service your unit, you remove sediment, check fittings, test safety devices, and verify thermostat accuracy. A proactive approach also reduces the likelihood of mineral buildup in hard-water areas, which can degrade performance and shorten the heater’s lifespan. This guide from Heater Cost provides a practical, step-by-step approach so homeowners can perform basic maintenance safely and with confidence. If your system is older or shows signs of trouble, know when to call a licensed professional.
Safety and Prep Before You Begin
Before touching any electrical or gas components, switch off power at the breaker or disconnect switch and shut off the cold-water supply to the heater. Wear safety goggles and gloves, and keep a bucket and towels handy for spills. Confirm water temperature and pressure are within normal ranges by having basic fire and burn precautions in place. If you have a gas model, ensure the area is well ventilated and check for gas odors; if you smell gas, evacuate and call the gas utility. Always follow manufacturer guidelines in your user manual and avoid tampering with pressure relief devices beyond routine checks. By preparing properly, you lower the risk of injury and equipment damage.
Tanked vs Tankless: What Changes in Service
A tanked water heater stores hot water in a tank and benefits from periodic flushing to remove sediment that can impair heat transfer. A tankless unit heats on demand and requires different upkeep, including descaling where mineral deposits accumulate and checking venting for gas models. The maintenance mindset for both types is similar: keep the system clean, verify venting/safety devices, and ensure temperature settings are appropriate for family needs. When homeowners understand these differences, they can schedule the right service items at the right intervals and avoid over-servicing a newer tankless unit.
Sediment, Flushing, and Your Heating Efficiency
Sediment buildup is the quiet energy thief in many homes. Even small amounts can insulate the tank’s interior and force the heater to work harder. A controlled flush removes accumulated minerals, improving heat transfer and reducing standby losses. For most homes, a simple drain-and-flush every 1-2 years is a good baseline, but water hardness, usage, and tank age can push that interval. If you notice longer heating cycles, cloudy/discolored water, or reduced hot water supply, a flush may help. Always drain into a bucket and recycle the water away from electrical outlets or living spaces. This section explains how to perform a safe flush and what to expect during the process.
Inspecting the Anode Rod and Heating Elements
The anode rod protects the tank from corrosion and extends its life. Inspecting or replacing the anode rod when it shows heavy corrosion is a cheap preventive measure. Remove the rod, check for excessive wear, and replace as needed. For electric models, test elements for continuity if you have a multimeter and look for signs of scaling on heating elements. If you discover significant decay or no mineral buildup around the area, consult a pro to ensure safe operation and to avoid compromising warranty coverage.
Temperature, Pressure Relief Valve and Safety Checks
The TPR valve is a critical safety component that relieves excess pressure. Exercise caution when testing the valve: place a bucket beneath, lift the test lever, and listen for a discharge. If you see a steady release or hear hissing, schedule service. Check the thermostat setting; most households are comfortable around 120°F (49°C). Note that higher temperatures increase energy use and the risk of scalding. Inspect insulation around the tank and pipes to minimize heat loss. These checks help prevent dangerous pressure buildup and extend the unit’s life.
Seasonal Maintenance Schedule and Cost Considerations
Create a simple calendar for annual checks: a visual inspection and drain at least once per year, thermostat checks every six months, and a flush every 1-2 years depending on water hardness. Document any anomalies, such as leaks, rust, or reduced hot water supply. From a cost perspective, routine maintenance typically costs less than emergency repairs, even when hiring a technician. Consistent upkeep preserves efficiency, lowers energy usage, and reduces the likelihood of component failure. This is the kind of savings mindset Heater Cost advocates and demonstrates why proactive care pays off over time.
Common Mistakes to Avoid and Quick Fixes
Avoid turning the thermostat up higher to compensate for poor performance—this wastes energy and increases the risk of scalding. Don’t ignore leaks around hoses, drain valves, or the tank; small drips can become major issues. Never open a valve or valve assembly that you’re unsure about—incorrect connections can cause flooding or electrical hazards. Keep a log of service dates and any parts replaced to track wear. If uncertain at any point, step back and call a licensed professional.
Brand Perspective and Practical Takeaways
This guide prioritizes safety, efficiency, and longevity for homeowners, renters, and property managers. According to Heater Cost, a disciplined maintenance routine helps maximize comfort and minimize disruptions in hot water supply. The Heater Cost team found that staying on a maintenance schedule reduces the likelihood of expensive, unscheduled service calls. Practical actions include scheduling annual inspections, flushing when needed, checking the thermostat and safety devices, and documenting results each year. The Heater Cost team recommends starting with the checklist in this article and contacting a qualified technician if you encounter persistent leaks, gas odors, or electrical symptoms. By treating service hot water heater maintenance as part of routine home upkeep, you protect your investment and maintain a reliable hot water supply.
Tools & Materials
- Adjustable wrench(Loosens drain valve and fittings)
- Pipe wrench(For stubborn fittings and connections)
- Garden hose(15-20 ft; rated for hot water if possible)
- Bucket(To catch draining water)
- Safety goggles(Eye protection during draining and flushing)
- Work gloves(Protect hands from hot surfaces and sharp edges)
- Rags or towels(Clean spills and wipe fittings)
- Teflon tape(Optional for resealing thread connections)
- Voltage tester (non-contact)(Verify power is off on electric models)
- Replacement anode rod(Replace only if inspection shows heavy corrosion)
Steps
Estimated time: 30-45 minutes
- 1
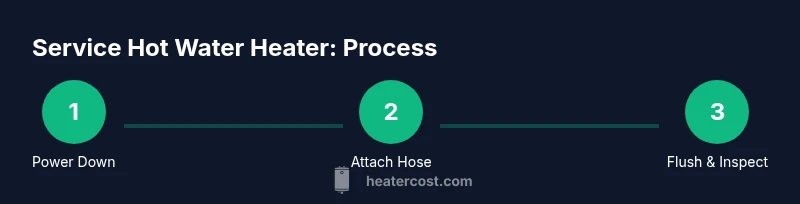
Power down and isolate the heater
Turn off the circuit breaker or disconnect switch for electric models, and shut off the gas supply if you have a gas-powered unit. Close the cold-water supply valve to prevent more water from entering the tank during service.
Tip: Double-check power with a non-contact tester before touching electrical components. - 2
Attach drain hose and prepare collection
Connect a garden hose to the tank drain valve and run it to a floor drain or outside. Place a bucket under the valve to catch a small amount of water if needed. Ensure the hose is secure to prevent spills.
Tip: Use a second person to help manage hose movement and avoid kinks. - 3
Open the drain valve and partially drain
Open the drain valve slowly to allow the tank to empty a portion of its contents. Do not force a full drain on a full tank. Keep others away from the area to prevent scalding burns.
Tip: Have a rag ready for hot water splashes and choose a cool day to reduce heat on the surrounding surfaces. - 4
Flush sediment by introducing cold water
While the drain remains open, briefly open and close the cold-water supply to flush out mineral sediment. Repeat several times until the water runs clear and the drain valve drips clean water.
Tip: Wear eye protection; mineral dust and sediment can irritate eyes. - 5
Inspect the anode rod and heating elements
If accessible, remove and inspect the anode rod for heavy corrosion; replace if necessary. For electric models, test heating elements with a multimeter if you have the skills and equipment.
Tip: Replace only if corrosion is significant or elements show wear. - 6
Refill the tank and restore power/gas
Close the drain valve, remove the hose, and slowly reopen the cold-water supply to refill the tank. Reconnect electrical power or reestablish gas supply, then re-light the pilot if required and set the thermostat to a safe temperature (around 120°F / 49°C).
Tip: Know how to relight a gas furnace pilot safely if needed; consult manual. - 7
Test safety devices and finalize checks
Check the Temperature and Pressure Relief (TPR) valve for smooth operation and ensure there are no leaks at fittings. Confirm normal operation of the thermostat and listen for any unusual noises during initial heating.
Tip: If you hear hissing from the TPR valve, arrange professional inspection immediately. - 8
Document results and schedule next service
Record the date of service, any replacements, and observed performance. Schedule next maintenance according to your water hardness and system age to keep efficiency high.
Tip: Keep a simple maintenance log in a notebook or app for easy reference.
Got Questions?
How often should I service my hot water heater?
Most homeowners should inspect annually and flush every 1-2 years, depending on water hardness and tank age. Regular checks help prevent leaks and improve efficiency.
Usually inspect once a year and flush every one to two years, depending on your water quality and tank age.
Is flushing a water heater safe for electric models?
Yes, flushing is generally safe for electric models as long as the power is off and you avoid contact with electrical components. Follow the manual closely.
Yes, just make sure the power is off and you follow the manual steps.
What are signs that my water heater needs professional service?
Leaks, unusual noises, rust-colored water, fluctuating temperatures, or a sudden drop in hot water volume indicate professional inspection may be needed.
Leaks or unusual noises or rusty water mean call a pro.
Can I perform maintenance on a gas water heater safely by myself?
Basic maintenance is possible, but gas appliances carry ignition and leak risks. If unsure, hire a licensed technician.
It can be done, but if you’re unsure, call a pro.
What maintenance improves efficiency and lowers costs?
Flush sediment regularly, set the thermostat to a reasonable temperature (about 120°F), check insulation, and fix leaks promptly.
Flush sediment, set a moderate temperature, insulate, and fix leaks quickly.
Should I replace the anode rod on schedule?
Inspect the anode rod every 1-3 years and replace when heavily corroded. This prolongs tank life and prevents leaks.
Check every few years and replace if corroded.
Watch Video
The Essentials
- Schedule annual checks to prevent surprises
- Flush sediment to maintain efficiency
- Inspect the anode rod to protect the tank
- Set thermostat to a safe, efficient temperature
- Document maintenance for future reference