Instant Water Heater Maintenance: A Practical How-To
Learn safe, step-by-step instant water heater maintenance for tankless systems. Improve efficiency, extend life, and prevent leaks with practical flushing, filter care, vent checks, and when to call a pro.

You will learn how to perform essential maintenance on an instant water heater, including flushing to remove mineral buildup, cleaning filters, inspecting connections, and safety checks. This guide covers both electric and gas-powered tankless models, plus when to call a professional. It also explains safety precautions, tool requirements, and how to assess when professional service is required.
What is instant water heater maintenance?
Instant water heater maintenance refers to the regular care of tankless, on-demand systems to keep them operating efficiently and safely. Because these units heat water on demand, mineral buildup, sediment, and clogged filters can reduce output and shorten lifespan if left unchecked. In this guide we cover the essential tasks you can perform as a homeowner or renter, plus signs that indicate professional service is needed. From flushing the heat exchanger to inspecting electrical or gas connections, consistent maintenance helps you maximize comfort and minimize energy costs. According to Heater Cost, a routine maintenance plan helps maintain performance and prevent unexpected breakdowns.
Why it matters for homeowners: With proper upkeep, instant water heaters sustain hot water reliability during peak usage and reduce energy waste. Regular care also helps protect warranties by following manufacturer-recommended practices. Heater Cost emphasizes that a proactive approach saves money over the system’s lifetime.
Safety and preparedness
Safety always comes first when performing any maintenance on an on-demand heater. Before you touch the unit, verify that power is off and the water supply is shut, and if the unit is gas-fired, ensure the gas valve is closed. Wear protective gloves and eye protection, keep a dry work area, and work in a well-ventilated space. If you dog-ear a panel or disconnect any wiring, consult the manual and proceed slowly. For propane or natural gas models, never bypass shutoffs or venting safeguards. According to Heater Cost, adhering to safety protocols reduces the risk of burns, shocks, or gas-related hazards while maintaining performance.
Essential checks before you start
Before any disassembly, review the owner’s manual for model-specific cautions. Confirm the model’s type (electric or gas) and identify any unique maintenance ports or filters. Check the exterior for corrosion or leaks, verify mounting hardware is secure, and note any error codes on the display. It’s wise to have a printable maintenance checklist. This stage helps you plan tools, gather materials, and avoid missing critical safety steps later in the process.
How to flush a tankless water heater
Flushing is the core maintenance task for descaled tankless heaters. Connect a descaling solution to a dedicated flushing kit or hoses that fit your unit’s service ports. Circulate the solution through the heat exchanger for the recommended dwell time, then flush with clean water to remove residue. Be sure to capture the waste liquid in a suitable container and dispose of it per local guidelines. Descaling helps restore flow rates and prevents mineral buildup from hindering heat transfer. If you notice heavy scale, repeat the flush or schedule a professional service.
Cleaning and inspecting filters and vents
Tankless units rely on inlet filters to prevent debris from entering the heat exchanger. Remove and clean or replace these filters according to your manual. Inspect air intakes and exhaust vents for obstructions, corrosion, or bird nests near outdoor units. Clean any dust from conical screens, and ensure there is no condensation or pooling near electrical connections. Keeping filters clear supports efficient operation and prolongs the life of heat exchangers.
Inspect electrical connections and controls
Electrical connections should be tight and free from oxidation. With power disconnected, inspect contact points on the control board, relays, and wiring harnesses for wear or discoloration. If you see melted insulation or frayed conductors, stop and seek professional help. For gas units, verify that the ignition and safety interlocks function correctly. A short, careful inspection of controls helps prevent intermittent problems and unsafe operation.
Descale solutions and alternatives
Descale solutions range from consumer-grade products to diluted white vinegar in some cases. Always follow the manufacturer’s recommended concentration and contact time. If a descaler isn’t compatible with your unit materials, opt for a manufacturer-approved alternative. In hard water areas, more frequent descales may be necessary. Note that some models require professional-grade fluids or a service visit for safe use.
Maintenance scheduling and record-keeping
Create a simple maintenance calendar and log tasks performed, dates, and any observations. Recording seasonal checks makes it easier to track wear patterns and plan replacements before failures occur. Keep a copy of your manual and service notes with the unit so future technicians can review your history. Routine documentation supports long-term reliability and can help with warranty inquiries.
Tools & Materials
- Power off switch or circuit breaker(Isolate electrical supply to the unit before any work)
- Descaling solution or white vinegar(Follow manufacturer concentration guidelines)
- Flush hoses and compatible fittings(Match fittings to the unit’s service ports)
- Bucket(To collect flushed liquid and avoid spills)
- PPE: gloves and eye protection(Protect hands and eyes from splashes and debris)
- Screwdrivers/wrench set(For panel access and fittings)
Steps
Estimated time: 60-90 minutes
- 1
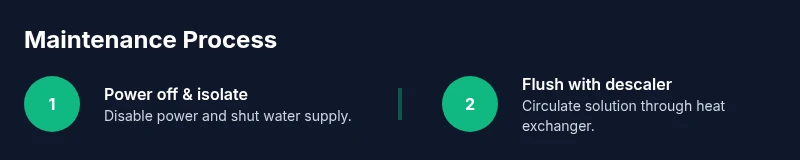
Power off and isolate the unit
Turn off the circuit breaker or power switch dedicated to the water heater. If your unit is gas-fired, close the gas valve and verify there is no ignition source nearby. Confirm the unit is de-energized with a non-contact tester before touching any wires.
Tip: Use lockout/tagout if available to prevent accidental re-energizing. - 2
Shut off incoming water and relieve pressure
Close the cold-water supply valve and open a hot-water faucet in the house to relieve pressure. This prevents backflow and reduces the risk of scalding or leaks while you work.
Tip: Have a bucket ready for any residual water in lines. - 3
Prepare flushing setup
Attach flushing hoses to the unit’s service ports and connect them to a descaling reservoir or bucket. If your model uses a flush kit, assemble it according to the manufacturer’s instructions.
Tip: Double-check fittings for tightness to prevent leaks during flushing. - 4
Flush the heater with descaling solution
Circulate the descaling solution through the heat exchanger for the recommended dwell time. This dissolves mineral scale that can impede heat transfer. After flushing, flush with clean water to rinse the system.
Tip: Do not exceed recommended dwell times or concentrations. - 5
Clean or replace inlet filters
Remove filters and clean with a soft brush or rinse under running water. Replace if damaged or excessively dirty. Reinstall securely to maintain proper sealing.
Tip: Avoid using harsh brushes that could damage the filter mesh. - 6
Inspect vents, lines, and connections
Check venting for obstructions and ensure gas lines and electrical connectors are intact and free of corrosion. Look for signs of wear, loose fittings, or heat damage.
Tip: If you see signs of damage, stop and call a professional. - 7
Test operation and reset if needed
Restore power and water, then run a test cycle to ensure the unit produces hot water consistently. Check for leaks, unusual noises, or error codes and reset the control panel if required.
Tip: Document any codes for future reference. - 8
Document maintenance and plan next service
Record the date, tasks completed, and any observations. Schedule the next inspection based on your water hardness, usage patterns, and manufacturer guidance.
Tip: Keep the log with the unit’s manual for easy access.
Got Questions?
Do tankless water heaters require regular maintenance?
Yes. Regular maintenance helps prevent mineral buildup, maintains efficiency, and reduces the likelihood of unexpected failures. The exact frequency depends on your unit model and local water hardness; always follow the manufacturer’s recommendations.
Yes. Regular maintenance helps prevent mineral buildup and keeps the unit running reliably; follow your manual for the recommended frequency.
Can I flush my tankless water heater myself?
Yes, you can flush a tankless heater yourself if you follow safety steps and use the correct descaler and fittings. For gas units or unfamiliar setups, consult a licensed technician.
You can flush it yourself if you follow safety steps and use the right parts; if in doubt, hire a professional.
What parts should I replace during maintenance?
Filters should be cleaned or replaced regularly. Other components typically don’t require routine replacement unless damaged. Always refer to the manual for your specific model.
Clean or replace the filters; other parts usually only need replacement if there are signs of wear.
Is descaling necessary in soft water areas?
Descaling may still be beneficial even in soft water areas if scale buildup is evident or if the unit is experiencing reduced flow. Check the unit’s performance and do a descale if needed.
Even in soft water, check for buildup and descale if you notice reduced performance.
What safety precautions should I take?
Always turn off power and water, secure any gas shutoffs if applicable, wear PPE, and avoid touching hot surfaces. Work in a dry area and keep children away from the work zone.
Turn off power and water, wear PPE, and avoid hot surfaces. If you smell gas, leave the area and call for help.
How often should I schedule professional maintenance?
Follow manufacturer guidance; many experts recommend annual checks for gas models and periodic checks for electric models, especially in areas with hard water. In high mineral regions, more frequent inspections may be prudent.
Check the manual for your model; annual professional checks are common for gas units, with electric units sometimes needing less frequent service.
Watch Video
The Essentials
- Schedule annual checks for safety-critical parts
- Flush regularly to prevent mineral buildup
- Keep a maintenance log for reference
- Know when to call a professional for complex issues