How to Use a Water Heater: Safe, Efficient Guidance
A practical, step-by-step guide to using your water heater safely and efficiently, with maintenance tips and safety precautions for gas and electric units.

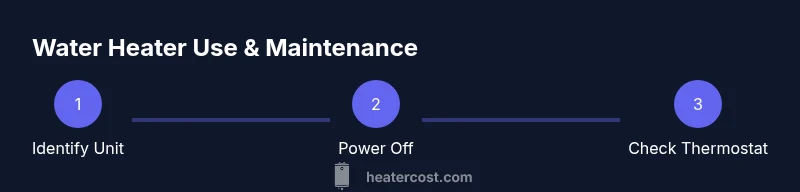
To use your water heater safely and efficiently, identify your unit type, set the thermostat to a safe temperature (about 120°F), shut off power or gas before maintenance, drain a small amount for flushing if needed, and run a test with hot water to confirm proper operation. These practices apply to most homes and help prevent scalding, waste, and leaks.
Getting oriented: understanding your water heater
When homeowners think about using a water heater, they often focus only on drawing hot water. In reality, safe and efficient use starts with understanding the device itself. There are electric storage tanks, gas-fired storage tanks, and tankless heaters, each with different control layouts and safety features. According to Heater Cost, the first step is to identify your unit type and locate the thermostat, energy-saving settings, and safety valves in your model’s manual. Knowing these basics helps prevent scalding, leaks, and wasted energy during showers, dishwashing, and laundry. In this section, we’ll map the core concepts that apply broadly: safe temperature ranges, the purpose of the pressure relief valve, and routine maintenance that keeps operations reliable year after year.
Safety first: powering down and fuel considerations
Before you perform any interaction with your water heater, ensure you understand the exact shutdown procedure for your model. Electric systems require turning off the circuit breaker that feeds the unit, while gas models need shutting off the gas supply at the dedicated valve. This step reduces the risk of electric shock or gas leaks during maintenance. If you smell gas or hear hissing that doesn’t stop, evacuate the area and call your gas provider. Always allow a unit to cool before opening access panels. This safety groundwork protects you, household members, and the home.
Temperature settings: balancing comfort and efficiency
Most experts recommend a hot-water temperature around 120°F (49°C) for homes with children or pets, and slightly higher for households with high hot-water demand. Setting temperature too low can lead to mineral buildup and bacteria growth in some systems, while setting it too high can cause scalding. Use a thermometer to confirm the actual outlet temperature after adjusting the thermostat. For energy efficiency, avoid leaving a heater at its maximum setting all day—adjust to match typical usage (showers, dishwashing, laundry) and revisit the setting seasonally.
Gas vs electric: how daily use differs
Gas water heaters typically use a burner and pilot or electronic ignition, with a temperature control on the front. Electric models rely on elements inside the tank; some are controlled by a single thermostat while others use multiple settings. Daily use differences include ignition behavior, heat-up times, and potential odor or flame indicators in gas models. If you notice persistent sulfur or burning smells, shut off power or gas and consult a technician. Electric units may trip breakers if a component is failing; always inspect the panel for signs of scorch marks and seek electrician help if needed.
Step-by-step daily operation: turning on, using, and monitoring
Start with a quick check: ensure the cold-water supply valve is open, the hot outlet is clear, and the drainage valve is closed. When you need hot water, turn the faucet to hot and let it run for a few seconds to purge any cold water from the line. If the water takes longer than usual to reach a comfortable temperature, you may have sediment buildup or a thermostat drift. After each use, remind yourself to keep a mental note of any fluctuations in temperature or pressure; these are early signs something needs inspection.
Maintenance rituals that extend life
Regular maintenance is essential for longevity and safety. Schedule annual or biannual checks, depending on water quality and system type. This includes inspecting the anode rod (if accessible), checking the TPR valve’s operation, and flushing the tank to minimize sediment buildup. If you have hard water, consider a flushing interval every 1–2 years. These tasks reduce corrosion, improve efficiency, and help water stay within a safe temperature range for longer periods.
Draining and flushing: when, why, and how
Sediment collection reduces efficiency and can shorten equipment life. To flush: turn off power or gas, close the cold-water inlet, attach a hose to the drain valve, open the valve slowly, and let water flow out into a safe drain. Flow should be steady and clear; if it’s muddy or contains debris, flush longer or repeat in stages. Reopen the inlet and restore power; briefly run hot water to ensure the system is functioning after flushing. Schedule this routine at least once a year.
Troubleshooting common symptoms without a pro
If hot water runs out quickly or the water is inconsistent, check the thermostat setting and confirm the power or gas supply is stable. If you notice a rumbling or banging noise, mineral buildup or sediment can be the culprit; flushing can help, or a professional service may be needed if noise persists. Leaks at connections likely indicate loose fittings or worn seals; tighten where safe or call a technician for a more thorough assessment. Persisting odors or discolored water warrant a professional inspection.
Seasonal and energy considerations: maximizing efficiency year-round
Adjust usage patterns with seasonal changes—winter may demand more hot water, summer may reduce it. Insulate hot-water pipes to minimize heat loss, and consider a timer or smart controller to limit standby heat during long absences. If your home uses a tankless system, you may benefit from regular descaling or mineral buildup checks. These practices can stabilize temperatures, reduce energy costs, and extend hardware life.
Authoritative sources and quick-reference guide
For trusted guidance, consult official resources. Energy.gov recommends maintaining a safe maximum temperature around 120°F, testing the temperature relief valve, and scheduling professional inspections as needed. These recommendations align with general best practices across many residential systems. Always refer to your specific model’s manual for exact procedures and safety instructions.
Tools & Materials
- Owner's manual for the specific water heater(Primary reference for model-specific steps)
- Adjustable wrench(Used for valve handles and drain connections)
- Screwdriver set(Open panels and access thermostats)
- Non-metallic bucket(Catch water when flushing or draining safely)
- Hose rated for hot water transfer(Attach to drain valve for flushing)
- Gloves and safety goggles(Protect hands and eyes during maintenance)
- Flashlight or headlamp(Better visibility in panel areas)
- Thermometer or temperature probe(Verify outlet temperature after adjustment)
Steps
Estimated time: 60-90 minutes
- 1
Identify your water heater type
Locate the model label and manual to determine if you have electric, gas, or tankless. Understanding the type informs safety steps and control locations. This initial step prevents mismatched procedures and enhances safety.
Tip: If the label is difficult to read, photograph it for later reference and consult the manual online. - 2
Shut off power or fuel supply
For electric units, switch off the circuit breaker feeding the water heater. For gas models, close the gas supply valve and ensure the area is well-ventilated before touching any components.
Tip: Never touch electrical components with wet hands; wait for the unit to cool before inspection. - 3
Close the cold-water inlet and relieve pressure
Turn the cold-water supply valve to off. If you’re flushing, open the pressure-relief valve or a small relief valve to relieve built-up pressure slowly. This minimizes the risk of scalding and water spray.
Tip: Relieve pressure gradually to avoid a sudden water gush. - 4
Drain a small amount to check for sediment
Attach a hose to the drain valve and drain a small volume into a bucket to inspect the water clarity. Cloudy or muddy water indicates sediment buildup requiring flushing.
Tip: If the drain valve is hard to open, do not force it; check for corrosion or wear and call a pro if needed. - 5
Inspect and adjust the thermostat
Access the thermostat through the panel; adjust to the recommended setting (commonly around 120°F). After adjustments, run hot water to verify the temperature reaches the target range.
Tip: Use a thermometer to verify actual outlet temperature for accuracy. - 6
Flush the tank if sediment is present
With the drain valve open, flush the tank by briefly opening and closing the cold-water supply to rinse sediments. Repeat until the discharge water runs clear.
Tip: Do not flush for too long in one session if you’re unsure; partial flush and examine results. - 7
Reassemble and restore power/fuel
Close any opened valves, reopen the cold-water inlet slowly, and restore power or gas supply. Turn on the unit and observe for proper startup indicators and safe operation.
Tip: Watch for unusual noises or smells during startup; if detected, shut down and seek professional service. - 8
Test hot water at fixtures
Open kitchen or bathroom taps to confirm hot water delivery, and check for consistent temperature. If the water cools quickly, consider repeating the thermostat check or seeking a technician.
Tip: Run both hot and cold lines to verify consistent mixing and flow. - 9
Schedule regular maintenance
Create a maintenance calendar that includes annual inspections, thermostat verification, and sediment flushing as part of your home care routine.
Tip: Set reminders to prevent skipping important maintenance tasks. - 10
Document any issues and plan pro help when needed
Maintain a log of observations such as leaks, noise, or temperature fluctuations. If anything seems abnormal, contact a licensed technician promptly.
Tip: Early intervention saves energy and prevents costly damage.
Got Questions?
What is the recommended temperature for a water heater?
Most experts suggest about 120°F (49°C) for daily use to balance safety and energy efficiency. You can adjust if you have high hot-water demand, but be mindful of scalding risks for children and elderly residents.
Experts recommend around 120 degrees for safe, efficient use. If you have high demand, adjust carefully and test the temperature at fixtures.
Do I need to drain or flush my water heater regularly?
Yes. Flushing removes sediment that can reduce efficiency and shorten the unit’s life. For many homes, a yearly flush is sufficient, but hard water may require more frequent maintenance.
Sediment builds up over time. Flushing once a year is typically enough, but check your water quality and schedule more frequent flushes if needed.
Can I perform maintenance myself, or should I hire a pro?
Many basic checks and a flush can be done by homeowners with basic tools while following manufacturer instructions. For complex tasks, leaks, or gas work, hire a licensed technician.
Minor tasks are doable at home if you follow instructions. For gas work or persistent issues, call a pro.
What should I do if I smell gas near my water heater?
If you smell gas, evacuate immediately and contact the gas utility or emergency services. Do not operate electrical switches or lighting while evacuating.
If you smell gas, leave the area and call for help. Do not flip switches or use electrical devices.
Is there a universal temperature range for all homes?
There isn’t a single universal range due to usage patterns and climate. Start around 120°F and adjust cautiously while monitoring hot-water performance.
There’s no universal setting. Start at 120 degrees and adjust as needed based on your hot-water usage.
What maintenance records should I keep?
Keep notes of thermostat changes, flushing dates, leaks, and parts replaced. A simple log helps track performance and plan future service.
Maintain a simple log of maintenance tasks and dates to stay on top of service.
Watch Video
The Essentials
- Identify your heater type before any intervention.
- Set safe temperature to balance comfort and efficiency.
- Regular maintenance prevents leaks and energy waste.
- Flushing sediment improves efficiency and longevity.
- When in doubt, consult a licensed professional.