How to Turn Up My Water Heater Safely
Learn how to turn up your water heater safely with a practical, step-by-step guide that covers thermostat adjustments, safety checks, and energy-saving tips.

You can turn up your water heater by adjusting the thermostat on the unit, typically found behind the access panel. Start by verifying the current setting, then raise the temperature by 10 degrees F (instead of jumping to high). Monitor hot water output over 24 hours and avoid exceeding 130-140°F to prevent scalding.
how to turn up my water heater safely
Turning up your water heater is a common way to improve hot water availability and comfort, but it must be done carefully to avoid safety hazards. In this guide we’ll walk through practical steps to safely raise your heater’s thermostat, how to choose a safe target temperature, and how to verify results without compromising safety. Before you begin, know that settings that are too high can cause scalds, especially for children and seniors. Heater Cost recommends using precise measurements and keeping a record of changes for future reference. This section introduces basic concepts like thermostat location, common thermostat ranges, and safety checks you should perform before touching any electrical or gas components.
How to locate your thermostat on typical water heaters
Most electric water heaters have a small access panel on the front that covers the two thermostat controls. Gas units often place the thermostat behind a small plate near the top or on the side. If you own a modern digital model, the temperature is shown on a screen with up/down arrows. Before you touch anything, turn off power at the breaker for electric heaters or shut off the gas supply and wait for the unit to cool. Use the owner’s manual for model-specific location and instructions. Once you locate the thermostat, photograph or note the current setting so you can revert if needed.
Safety and recommended temperature ranges
Safety is the priority when adjusting a water heater. The most common guidance, echoed by Heater Cost, is to avoid temperatures above 140°F to reduce scalding risk. A safe, practical target for most homes is 120°F to balance comfort, safety, and energy use. If you have children, elderly residents, or people with sensitive skin, staying near 120°F is especially important. For households needing slightly hotter water, many pros recommend a maximum of 125°F, then using a mixing valve at the tap to achieve higher comfort without raising the storage temperature.
Preparation: gather tools and read the manual
Before you begin, assemble the tools you’ll need and review your unit’s manual. Essential items include a wrench or screwdriver to remove the access panel, a digital thermometer to verify water temperature, and a means to record settings. Wear protective gloves and ensure the area around the heater is dry. If your heater is old or uses gas, check for any signs of corrosion or leaks and avoid making adjustments if you notice anomalies. Keeping the manual handy helps you understand model-specific safety instructions and dialing ranges.
How to determine a safe target temperature and why
Determining a safe target temperature starts with understanding the balance between hot water needs and safety. For most households, 120°F is the recommended baseline. If you require hotter water for showers in cold climates, you might set the thermostat to 125–130°F, then test water at the faucet with a thermometer. Always make gradual changes—don’t jump by large increments. After each adjustment, give the system time to stabilize and re-check the water temperature at the tap to confirm the outcome.
How to adjust the thermostat safely: a practical approach
To adjust the thermostat, first power down the heater and verify the area around the unit is dry. Remove the access panel and locate the thermostat dial. Use a screwdriver to gently rotate the dial by 5–10°F steps, depending on your model. Replace the cover, restore power or gas, and wait 1–2 hours for the temperature to stabilize. Run the hot water from a faucet to gauge the new output and use a thermometer to confirm the temperature. If it’s too hot or not hot enough, repeat in small increments until you reach your target.
Testing and validating results after adjustment
Testing the results ensures you’ve hit the desired balance. After the system stabilizes, run a hot water tap for several minutes and measure the outlet temperature with a calibrated thermometer. If the reading is within 120–125°F, you’re within a safe and comfortable range. If you need more warmth, adjust in small increments and re-test. Record the final setting for future reference and note how long hot water lasts during typical showers.
Energy impact and long-term considerations
Even small temperature increases can affect energy usage. Raising the storage temperature by 5–10°F may save you from running out of hot water but can also marginally increase standby heat loss. Conversely, higher settings can increase energy waste if hot water is not used promptly. To minimize energy impact, consider insulating the tank and pipes, scheduling seasonal checks, and using low-flow fixtures to reduce overall consumption while maintaining comfort.
Common mistakes and how to avoid them
Avoid these pitfalls: setting temperatures too high, failing to turn off power when working on electric units, ignoring manufacturer guidelines, and not validating actual water temperature after changes. Always work with dry hands, use the manual, and verify the faucet temperature with a thermometer. If you notice changes in water taste, odor, or color, stop and consult a professional.
When to call a professional
If you encounter leaks, signs of gas smell, inconsistent heating, or you’re uncomfortable performing electrical tasks, contact a licensed plumber or HVAC technician. A professional can verify wiring, venting, and safety devices, and may install a tempering valve to maintain safe outlet temperatures while allowing higher storage temperatures. Rely on professional guidance if you’re unsure about model-specific procedures or if your heater shows warning indicators.
Maintenance habits after adjustment
After turning up your heater, schedule a yearly check that includes inspecting the thermostat, testing the high-limit switch, and flushing the tank to remove sediment that can affect heating efficiency. Keep the area around the heater clear and ensure the venting pathway remains unobstructed for gas models. Document changes and monitor hot water performance across several weeks to confirm continued safety and comfort.
Authority sources and further reading
For authoritative guidance on safe water temperature, consult the U.S. Department of Energy and the Centers for Disease Control. The Energy Saver website provides practical tips on water heating and temperature settings, while the CDC offers safety considerations to prevent scald injuries in homes. Always cross-reference with your manufacturer’s recommendations to ensure compatibility with your specific model.
Quick reference checklist
- Verify the current thermostat setting before adjusting
- Turn off power or gas before touching electrical or gas components
- Set target to 120°F as a baseline; adjust in 5–10° steps
- Re-check water temperature at the tap after stabilization
- Record final setting and monitor for 1–2 weeks
- Inspect for leaks or signs of wear during routine maintenance
Tools & Materials
- Phillips-head screwdriver (size #2)(Used to remove the thermostat access panel on most electric heaters)
- Digital thermometer(For accurate hot-water temperature measurement at the faucet)
- Owner's manual for your water heater model(Model-specific instructions and safe temperature ranges)
- Gloves or protective eyewear(Optional for extra safety when handling hot components)
- Camera or notebook(Document current setting and any changes for future reference)
Steps
Estimated time: 20-40 minutes
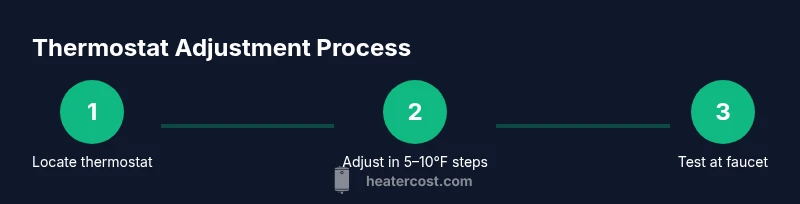
- 1
Power down and access the thermostat
Turn off power to an electric heater at the breaker, or shut off gas for gas units. Remove the thermostat cover using a screwdriver and expose the dial. This ensures you work safely and avoid accidental shocks or gas issues.
Tip: Always verify power is off with a non-contact tester before touching wiring. - 2
Read the current setting
Note the current temperature knob position or digital reading. If your model uses a dial, take a photo for reference. This baseline helps you track progress and revert if needed.
Tip: A clear photo prevents misreading the setting during reassembly. - 3
Increase in small increments
Using a screwdriver, rotate the dial by 5–10°F (or the equivalent on digital controls). Perform increments slowly to avoid overshooting the target.
Tip: Never jump more than 10°F at a time unless your manual instructs otherwise. - 4
Reassemble and restore power
Replace the thermostat cover and restore power or gas supply. Wait 1–2 hours for the temperature to stabilize before testing.
Tip: Schedule your test after the heater has had time to reheat to the new setting. - 5
Test water at the faucet
Run hot water from a kitchen or bathroom tap for a few minutes, then measure the outlet temperature with a thermometer. Adjust again if necessary in small steps.
Tip: Use a calibrated thermometer for the most accurate reading. - 6
Document and monitor
Record the final setting and how long hot water lasts in typical use. Keep an eye on any changes in taste, odor, or color that could indicate sediment or scaling.
Tip: Create a quick note in your home maintenance log for future reference.
Got Questions?
Is it safe to adjust my water heater thermostat myself?
Yes, with caution and by following the manufacturer’s guidelines. Turn off power, avoid wiring changes, and test temperatures using a thermometer. If you smell gas, hear unusual noises, or see leaks, stop and call a professional.
Yes—do it safely by following the manual, turning off power, and testing temperatures. If you smell gas or see leaks, contact a professional immediately.
What is the recommended temperature for hot water?
A common baseline is 120°F to balance comfort and safety. If more warmth is needed, consider small increases (to 125–130°F) and verify with a faucet thermometer.
The usual target is 120 degrees Fahrenheit; bump up in small steps if you need hotter water and re-test with a thermometer.
How long should I wait after adjusting the thermostat?
Give the heater 1–2 hours to reach the new setting before testing water temperature at the tap.
Wait about one to two hours for the change to take effect, then test at the faucet.
What if hot water is inconsistent after adjustment?
Inconsistent temperatures can indicate sediment build-up, a failing element, or venting issues. Consider flushing the tank, inspecting for leaks, or calling a pro if problems persist.
If hot water is still inconsistent, it might be sediment or a component issue—consider flushing or calling a professional.
Should I install a tempering valve?
A tempering valve helps maintain safe outlet temperatures while allowing higher storage temperatures, improving safety and comfort.
A tempering valve can help keep outlet temps safe while you keep a higher storage temp for efficiency.
Watch Video
The Essentials
- Know your thermostat location and test safely
- Use small temperature steps to avoid shock
- Target 120°F as a safe baseline for most homes
- Test at the tap and adjust if needed
- Document changes for future reference