How long to flush water heater: A practical guide
Discover how long to flush a water heater, what affects duration, and a clear, step-by-step process with safety tips and tools from Heater Cost.

Learn how long a water heater flush typically takes, what affects the duration, and how to perform a safe flush using a full, step-by-step guide. This quick overview helps homeowners plan a service window and avoid common mistakes.
Why flushing your water heater matters
Sediment from minerals in your water naturally accumulates in the bottom of any storage-tank heater. Over time, this mineral layer can insulate the water from the burner and the heating element, causing the unit to work harder and use more energy. That extra energy use translates into higher utility bills and more wear on components. Flushing the tank removes mineral buildup, improves hot water delivery, and can extend the life of the heater by reducing corrosion at the tank bottom. For homeowners, renters, and property managers, a regular flush is a simple, cost-effective maintenance task. The Heater Cost team finds that scheduling a flush once or twice a year works for many homes, depending on water hardness and usage. In practice, you’ll notice quicker hot water recovery and less sediment in taps after a flush. While some people worry about the mess, a controlled flush can be clean and straightforward with the right precautions and a bit of planning. In short, flushing your water heater is one of the best ways to protect your investment and keep operating costs in check.
How long to flush water heater: what to expect
The question of "how long to flush water heater" depends on several variables. A typical residential flush can take roughly an hour to an hour and a half from start to finish, including setup, draining, flushing, refilling, and testing. The exact duration varies with tank size (30–40 gallons versus 50–80 gallons), the level of mineral buildup, water pressure, and whether you flush only the tank or also the associated supply lines. If your heater is electric, you’ll also factor in a short wait after power-down to ensure safety before opening any valves. Heavier sediment requires more time to push out through the drain hose, and stiffer drain valves can slow flow. If you’re flushing while you’re working around a busy schedule, plan for some flexibility and allow extra minutes for refilling and re-pressurizing. In general, expect a window of about 60 to 90 minutes, with longer sessions for large tanks or very hard water. According to Heater Cost, planning for this duration helps homeowners minimize disruption and stay safe during the process.
Key factors that influence flush duration
Several practical factors influence how long a flush will take. Tank size matters because larger tanks hold more water and sediment; more water means more time to drain and flush. Sediment depth affects how many flush cycles you’ll need before the water runs clear. Water pressure and the condition of the drain valve also play a role—high pressure can speed drainage, while a clogged valve slows it down. Hose length and end location matter as well: a longer hose reaching a suitable floor drain reduces backpressure and can speed up the flush. If you live in an area with hard water, mineral buildup occurs faster, which may require more frequent flushing. Finally, whether you flush the tank only or also flush the cold-water line upstream can add to the duration. These factors combine to determine whether your session fits into a 60-minute block or spills into a longer window.
Safety considerations and prep steps
Safety should be your top priority before you start flushing. For electric water heaters, switch off the power at the circuit breaker to ensure no heating element is energized. For gas models, set the thermostat to OFF or Pilot and if you’re comfortable, shut the gas supply to eliminate any ignition risk. Close the cold-water inlet valve to stop new water from entering. Attach a sturdy garden hose to the drain valve and route the other end to a floor drain or outdoors. Open a nearby hot-water faucet to vent air from the system, which speeds drainage. Keep a bucket and towels handy for overflow and wear protective gloves to guard against hot water. If the drain valve is stiff, don’t force it—work slowly and consider using a wrench with care. Never flush a hot heater with power on, and never bypass safety controls.
Refill, test, and restart after flushing
When flushing is complete, refill the tank with cold water by fully reopening the cold-water inlet. Monitor the water flow and, once the tank begins to fill, open a hot-water faucet briefly to purge air. When you have a steady flow from the hot-water tap, close the faucet and restore power to an electric heater or re‑ignite the gas valve and set the thermostat to a safe, comfortable temperature. Check for leaks around the drain valve and hose connections. Allow the tank to regain heat, then run hot water from a faucet to confirm proper operation and temperature. If you notice unusual noises or sulfur smells, this may indicate mineral deposits or a degraded anode rod that warrants professional attention.
Common mistakes to avoid
Common missteps can derail a flush and cause damage. Never start a flush with the power on or with the tank hot. Don’t drain only a portion of the tank and assume the rest is clean. Avoid using excessively long hoses or directing water toward electrical outlets, outlets, or sensitive surfaces. Don’t ignore air in the system—air pockets can blunt water delivery and damage the valve. Finally, if you see leaks at the drain valve, stop and reassess; forcing valves can crack fittings and create bigger problems. By following a safe, methodical approach, you’ll get clearer water and longer equipment life.
Maintenance mindset: setting a flushing schedule
To maximize benefit, establish a flushing schedule aligned with your water quality and usage. In areas with very hard water, homeowners and property managers may flush annually or semi-annually; softer water may require less frequent flushing. Keeping notes on when you flushed and any observations about water clarity helps track sediment buildup and plan future maintenance. Regular flushes preserve efficiency, improve hot water quality, and reduce the risk of unexpected repairs. The Heater Cost team recommends pairing flushing with a broader maintenance plan that includes annual inspections of the anode rod (for tank-type heaters) and water-softening checks if you have one installed.
Tools & Materials
- Electrical breaker or gas shutoff for heater(Turn off electric supply or shut off gas to avoid hazards during maintenance)
- Cold-water inlet valve(Close to stop incoming water)
- Garden hose(Attach to drain valve; reach a safe drainage area)
- Drain valve wrench or pliers (optional)(Needed only if the drain valve is stiff)
- Bucket, towels, and rags(Contain overflow and protect surfaces)
- Protective gloves(Guard against hot water and sharp edges)
- Dry clothes or old towels(For spills and clean-up around the work area)
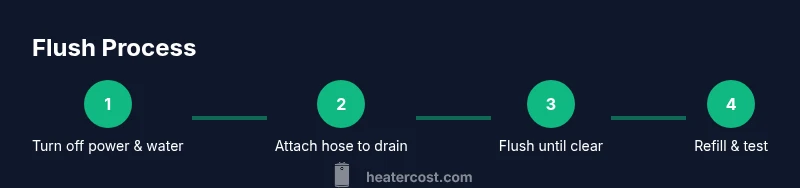
Steps
Estimated time: about 60-90 minutes
- 1
Turn off power and isolate the water supply
Locate the heater’s power switch or circuit breaker and switch it off. For gas heaters, set the thermostat to OFF and, if you’re comfortable, close the gas valve. Then close the cold-water inlet valve to stop new water from entering the tank. This prevents the heater from firing during the flush and reduces the risk of burns or electrical shocks.
Tip: Double-check that the power is truly off by testing at the thermostat or with a non-contact tester. - 2
Attach hose and prepare the drain
Connect a garden hose to the drain valve at the bottom of the tank. Run the hose to a floor drain, outside, or a suitable drainage location. Have a bucket ready for overflow and ensure the hose is secure to prevent detaching during draining.
Tip: Check hoses for cracks or kinks; a secure, straight run minimizes splashing and spills. - 3
Open drain valve and vent
Open the drain valve slowly to start draining the tank. Open a nearby hot-water faucet to vent air; this helps water exit more quickly and reduces pressure build-up. If you hear air or see air bubbles, continue until steady water flow is established.
Tip: Do not force the drain valve—if it sticks, back off and use gentle pressure or a small amount of penetrating oil (follow safety guidelines). - 4
Flush by reintroducing cold water
With the drain valve open, briefly open the cold-water supply to flush out mineral sediment. Watch the water; when it runs mostly clear, you can stop flushing. If water remains discolored, pause, let the tank refill a bit, then repeat the flush, ensuring safety throughout.
Tip: Keep an eye on water clarity; clearing out sediment often requires multiple flush passes. - 5
Refill, restore power, and purge air
Close the drain valve, remove the hose, and fully reopen the cold-water inlet. Allow the tank to refill completely, then re-ignite power or gas and reset the thermostat to a safe temperature. Open a hot-water outlet to purge air, then close when steady hot water flows.
Tip: Run hot water for 60 seconds to purge air and confirm proper operation.
Got Questions?
How long does flushing a water heater typically take?
Most residential flushes take about 60 to 90 minutes from start to finish, depending on tank size and sediment. Large or heavily mineralized tanks can take longer. Always allocate a window for setup, draining, refilling, and testing.
Most flushes take about an hour to an hour and a half, depending on your tank size and sediment buildup.
Do I need to drain my water heater every year?
Many homes benefit from flushing every 1–2 years, especially in hard-water regions. If you have very soft water and minimal sediment, you may go longer between flushes. Use a maintenance schedule to guide you and adjust for usage.
Many homes flush every 1 to 2 years, depending on water hardness and usage.
Is it safe to flush a water heater?
Yes, when done correctly and with the power and water shut off. Following the steps to vent air and protect yourself from hot water reduces risk. If you’re unsure, consult a professional rather than guessing.
Yes, but only if you turn off power and water and vent air properly. If unsure, hire a pro.
What if the water is rusty during flushing?
Rusty water during a flush indicates mineral sediment or corrosion. Continue flushing until the discharge runs clear and consider inspecting the anode rod or replacing the unit if heavy corrosion is present.
Rusty water means sediment or corrosion; flush until clear and consider a professional inspection if corrosion persists.
Can I flush an electric and a gas water heater the same way?
The basic flushing steps are similar for both, but you must safely disable power for electric heaters or shut off gas for gas heaters before starting. Always follow manufacturer safety instructions.
Yes, but you must shut off power for electric units and gas for gas units before starting.
What about flushes for tankless water heaters?
Tankless units require a different maintenance approach outlined by the manufacturer. Always consult the manual or a professional before attempting any flushing on tankless models.
Tankless units need manufacturer-specific maintenance; check the manual or consult a pro.
Watch Video
The Essentials
- Flush regularly to remove sediment and improve efficiency
- Duration varies; plan for 60-90 minutes for a typical flush
- Safety first: power off, water off, vent air before draining
- Refill and test thoroughly after flushing to prevent leaks