Do You Need to Flush Your Water Heater? A Homeowners Guide
Learn when and why you should flush your water heater, step-by-step methods, safety tips, and maintenance strategies to cut costs and extend your unit’s life.

Yes. Flushing your water heater is a common maintenance task for many homes and is typically recommended about once a year, depending on usage and water hardness. The process removes sediment that can reduce efficiency and shorten heater life. If you’re unsure about frequency, check your manufacturer’s guidance and Heater Cost’s recommendations.
Do you need to flush your water heater? Understanding the basics
Sediment and mineral buildup occur naturally as water heats in your tank. Do you need to flush your water heater? In most homes, removing this sediment regularly helps maintain efficient heating, reduce mineral scale, and extend the unit’s life. The decision often hinges on water quality, your heater’s age, and how aggressively you use hot water. If you have hard water or notice longer wait times for hot water, flushing is particularly beneficial.
Frequency and timing: when to schedule a flush
There is no one-size-fits-all schedule for flushing a water heater. People with very hard water or frequent high hot-water use may benefit from annual flushing, while others with softer water could consider every two to three years. Signs that it’s time include cloudy water, visible sediment in the tank, or decreased hot-water delivery. Keep a simple maintenance calendar and note when you last flushed so you stay on track.
What a flush does (and doesn’t) for your system
A flush removes sediment from the bottom of the tank, which can improve heating efficiency and reduce the strain on the burner or heating element. It is not a cure-all for underlying corrosion, leaks, or a failing part. For gas units, it’s especially important to ensure proper venting and safe operation during maintenance. If you notice rust in the water, strange odors, or persistent leaks, stop and call a professional.
Tools, safety, and preparation
Before you begin, gather the essentials: a garden hose long enough to reach a safe drain, towels or rags for spills, and basic hand tools for securing fittings. Important safety notes include turning off power to electric heaters or shutting off gas to gas heaters, allowing the tank to cool if it’s recently heated, and venting any residual pressure slowly. Working on a hot water system can cause scalding, so take precautions and wear gloves if needed.
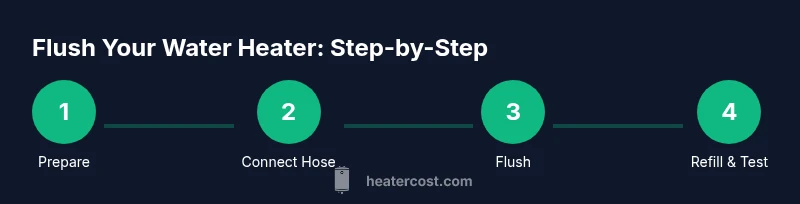
Step-by-step overview (high-level)
A flush involves isolating the tank, draining sediment through a hose, refilling with cold water, and restoring power to the unit. The goal is to flush out accumulated minerals without damaging valves or fittings. This overview provides a framework; a detailed step-by-step guide follows to ensure safe, thorough execution.
Common mistakes and troubleshooting
Common mistakes include flushing too aggressively, using a hose not rated for the valve size, or overflowing the drain pan. Always drain slowly, check for leaks after each step, and avoid forcing fittings beyond their design. If you encounter persistent leaks, strange water discoloration, or the tank doesn’t refill properly, pause and consult a professional.
When to call a professional
If you have a gas heater with a complicated venting setup, if the unit is old and shows signs of corrosion, or if you’re unfamiliar with basic plumbing safety, hiring a licensed technician is a wise choice. A professional can perform a thorough flush, inspect the anode rod, check for mineral buildup, and address any safety concerns that arise during the process.
Tools & Materials
- Garden hose (5/8" or 3/4" diameter)(Long enough to reach a safe drain; 6–8 ft is typical)
- Towels or rags(Place to absorb spills and prevent floor damage)
- Bucket (optional)(Can catch initial drainage or use during setup)
- Safety gloves(Protect hands from hot water or sharp edges)
- Flashlight(Inspect connections and drain area)
Steps
Estimated time: 30-60 minutes
- 1
Turn off power and isolate supply
Set the thermostat to off (electric units) or pilot/low (gas units) and shut off the cold-water supply to the tank. This prevents new cold water from entering while you drain. Allow the tank to cool if recently heated to avoid scalding.
Tip: Never flush a hot water heater—wait until it’s safe to touch and you’ve isolated all heat sources. - 2
Attach the drain hose and prepare the discharge path
Secure a garden hose to the tank’s drain valve and run the hose to a suitable drain or exterior area. Place towels around the area to catch splashes and ensure the hose is secure to prevent leaks.
Tip: Turn the drain valve handle slowly to avoid a sudden surge of pressure that could spray water. - 3
Open the drain valve and start flushing
Open the drain valve gradually and allow sediment to begin flowing out through the hose. If you need to speed up the process, carefully open the cold-water inlet valve to sluice the sediment out, but do not flood a sensitive area.
Tip: If the water is very dirty, let it run for several minutes until it runs clearer. - 4
Close the drain, refill the tank
Close the drain valve and disconnect the hose. Open the cold-water supply to refill the tank. Bleed a hot-water faucet nearby to speed up refilling and to release trapped air until steady water flows.
Tip: Refilling is complete when you see a steady stream and no air sputtering from the faucet. - 5
Restore power and test
Return power to an electric heater or relight the gas burner, then run hot water from a faucet to verify normal operation. Check for leaks around valves and fittings, and observe for a few minutes as the tank heats.
Tip: Keep the faucet running for a minute or two to ensure air is fully purged and the system is pressurized correctly. - 6
Record and assess
Note the date of the flush and any observations about water clarity and hot-water performance. If you notice persistent issues, consider repeating the process or consulting a professional for a closer inspection.
Tip: Maintain a simple maintenance log to track flushes and system health over time.
Got Questions?
Do I need to flush my water heater every year?
Many homeowners flush annually, especially in areas with hard water. Frequency depends on water quality, heater type, and usage. If in doubt, start with yearly checks and adjust as needed.
Most people flush annually, but you can adjust based on your water quality and how hard your water is. Start with yearly checks and adapt as needed.
Can flushing damage my water heater?
Flushing is safe when done correctly. Poor technique or forcing valves can cause leaks. If you’re unsure, hire a professional or follow manufacturer guidelines precisely.
Flushing is safe if you do it right. If you’re unsure, get a professional to help or follow the manufacturer’s steps exactly.
Is flushing the same as draining?
Flushing includes draining and rinsing to clear sediment. Draining simply removes water and some sediment; a full flush proves clearer water and reduced buildup.
Flushing means draining and rinsing to clear sediment; draining alone isn’t as thorough.
Should I hire a professional for flushing?
If your heater is gas with complicated venting, or you’re unsure about the steps, hire a licensed technician. They can safely flush, inspect for corrosion, and address leaks.
For gas heaters or if you’re unsure, it’s wise to hire a professional.
What if I see rusty water after flushing?
Rusty water can indicate corrosion inside the tank or piping. Stop using the heater and contact a pro to assess the tank’s integrity and potential replacement needs.
If rusty water appears, stop using the heater and get an inspection.
Watch Video
The Essentials
- Schedule regular flushing to maintain efficiency and extend life.
- Gather the right tools to reduce mess and delays.
- Refill completely and re-energize the system before testing.
- Watch for leaks and address issues promptly.
- Keep a maintenance log for ongoing care.