Flush Water Heater Service: A Step-by-Step Guide
Learn how to flush your water heater safely to remove sediment, improve efficiency, and extend life. This comprehensive guide covers timing, tools, step-by-step flushing, troubleshooting, and maintenance tips for homeowners, renters, and property managers.

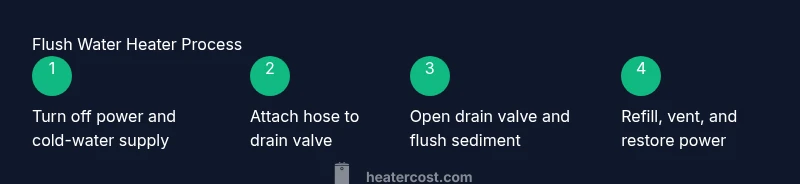
Goal: Learn how to perform a flush water heater service safely and effectively. You’ll prepare with basic tools, shut off power or gas, drain sediment, and refill the tank to restore heat transfer. This quick answer outlines what you’ll accomplish, the key requirements, and the safety precautions you must follow before starting. No special licenses required for typical residential units.
Why flushing water heater service matters
Sediment buildup is a natural byproduct of heating water in a tank-style heater. Minerals such as calcium and magnesium settle at the bottom of the tank over time, forming a sludge-like layer that acts as an insulator and speeds up wear on the heating elements. Regularly flushing the unit helps remove this sediment, improving heat transfer, reducing energy use, and extending the life of the heater. According to Heater Cost, homeowners who perform a simple flush water heater service typically see more reliable hot water temperature and fewer fluctuations in comfort. The Heater Cost team found that sediment removal can also prevent premature tank failure and costly replacements. In this section we’ll explore why this routine maintenance matters, what happens during a flush, and what results you can expect for both electric and gas models. The guidance applies to most residential tanks, with caveats for tricky installations or very old systems.
What happens during a flush
During a flush, water is circulated through the tank to lift and wash out accumulated minerals. You may see cloudy water or a light brown tint as sediment is displaced. A thorough flush helps restore heat transfer efficiency, reduces stress on the heating element or burner, and can improve hot water delivery. In some cases, you may need multiple flush cycles if sediment is heavy. Regular flushing also provides a chance to inspect the drain valve, T&P valve, and general condition of the tank. This block emphasizes why the practice matters and helps you prepare for the actual steps involved.
Consider model differences and safety
Most guidance applies to typical residential tanks, but electric and gas models have different safety considerations. Electric heaters require power disconnection at the breaker, while gas models require shutting off the gas supply and ensuring proper ventilation. Always reference your manufacturer’s manual for model-specific instructions, because some units have unique drain valves or additional sensors. If you ever encounter a gas smell, strange noises, or water leaks that persist after a flush, turn everything off and contact a licensed professional immediately.
Sediment types and long-term impact
Sediment can vary from fine mineral dust to heavier iron oxide if your supply contains rust. Limescale and mineral deposits reduce efficiency by forming an insulating layer around the heat source. Over time, this layer forces the heater to work harder, increasing energy costs and potentially shortening the unit’s lifespan. Flushing removes this sediment, helping maintain stable temperatures and reducing the risk of overheating. For homes with hard water, consider a water softener or conditioner to minimize mineral load and extend the interval between flushes.
How to approach flushing across different setups
On a standard electric or gas tank, the flushing process is largely the same, with minor safety differences. Tankless and multi-tank setups require different maintenance practices, focusing on descaling and heat exchanger care rather than a full tank flush. If you have a tankless system, follow the manufacturer’s descaling procedure and annual service schedule. For larger homes or multi-unit buildings, coordinate with maintenance staff to ensure consistent water quality and to prevent cross-connections during the flush. The key takeaway is to stay patient, follow the steps carefully, and monitor for any signs of trouble.
Restoration and verification after flushing
After completing the flush, refill the tank completely, remove the hose, and re-open the cold-water supply valve slowly. Reconnect power or gas and restore the system to its normal operating conditions. Check for leaks around valves and fittings, and run a few hot water taps to purge air from the lines. You should notice more consistent hot water and stable temperatures after the system returns to normal operation. Keeping a simple log of flushing dates helps you maintain a proactive maintenance schedule.
Tools & Materials
- Drain pan(Place under drain valve to catch sediment and water.)
- Garden hose (5/8" or 3/4")(Attach to drain valve and run to a safe drainage area.)
- Adjustable wrench or pliers(Loosen drain valve coupling if needed.)
- Bucket(Optional for extra catchment.)
- Rubber gloves(Protect hands from hot water.)
- Safety goggles(Protect eyes from splashes.)
- Towels or rags(Cleanup spills and drips.)
- Owner’s manual(Consult model-specific steps if available.)
Steps
Estimated time: Estimated total time: 45-90 minutes
- 1
Power down and isolate the heater
Begin by turning off power at the circuit breaker for electric models, or shut off the gas supply for gas models and set the thermostat to pilot. This ensures there is no active heat source during draining, reducing the risk of scalding or electrical shock.
Tip: Double-check there is no power at the breaker before touching any wiring. - 2
Close the cold-water supply valve
Close the valve that feeds fresh water into the tank to prevent new water from entering while you drain. After closing, place a drain pan beneath the valve to catch any residual water.
Tip: Opening a hot water tap somewhere in the house helps air escape and speeds drainage. - 3
Attach hose and position drainage
Attach the garden hose to the drain valve and route it to a safe drainage area (outdoors or a floor drain). Ensure the hose is secure so it won’t come loose during draining.
Tip: Keep the hose slides light on the drain valve to avoid leaks. - 4
Open the drain valve and flush
Open the drain valve gradually to start the flush. Let the tank drain completely, then flush with a little cold water to rinse remaining sediment. If you see heavy sediment, pause and reattempt after a few minutes.
Tip: Vent air by opening a hot-water faucet elsewhere in the home. - 5
Refill and vent the tank
Close the drain valve, disconnect the hose, and slowly reopen the cold-water supply to refill the tank. Open a hot-water faucet to vent trapped air until water runs steady. This step helps prevent air locks when you restart the heater.
Tip: Do not rush the refill; a slow fill prevents scalding from hot surface water. - 6
Restore power/gas and test
Once the tank is full, restore power at the breaker or re-open the gas valve and relight the pilot if needed. Run several hot-water taps to ensure steady flow and check for leaks around valves and fittings.
Tip: Observe the first few cycles for any abnormal noises or leaks and address promptly.
Got Questions?
How often should I flush my water heater?
Most homes benefit from an annual or biannual flush depending on water hardness and usage. Softer water may extend the interval, but always review the manufacturer's guidance. Regular flushing helps maintain efficiency and extend the unit’s life.
Most homes benefit from an annual or biannual flush depending on water hardness and usage. Check your manual for specifics.
Can flushing damage the tank?
When done correctly with proper shutoff procedures and a secure drain hose, flushing is unlikely to damage the tank. Problems usually arise from forcing water, using an ill-fitting hose, or failing to vent air.
If done correctly, flushing won’t damage the tank. Problems come from improper setup or rushing the process.
What tools do I need for flushing?
You’ll typically need a drain pan, garden hose, adjustable wrench, bucket (optional), gloves, and safety goggles. Having towels on hand helps manage spills.
Grab a pan, hose, adjustable wrench, gloves, and goggles. Extras like towels help with cleanup.
Is flushing safe for gas water heaters?
Yes, but you must shut off the gas and ensure proper ventilation. If you’re uncomfortable with gas appliances, hire a licensed professional to perform the flush.
Gas heaters are safe to flush if you turn off gas and ventilate properly; otherwise call a pro.
What should I do if water won’t drain?
Confirm the cold-water valve is fully open and the drain valve is open. If drainage remains blocked, inspect for valve obstructions or consult a professional.
If drainage is blocked, check valves and consider professional help.
Should I flush a tankless water heater?
Tankless units require descaling rather than a tank flush. Follow the manufacturer’s maintenance schedule and use appropriate descaling solutions.
Tankless systems need descaling per the manual, not a tank flush.
Watch Video
The Essentials
- Shut off power and water before starting.
- Flush removes sediment and improves efficiency.
- Refill slowly and vent air for a safe restart.
- Inspect for leaks after refilling and test operation.
- The Heater Cost team recommends scheduling annual flushes.