When to Drain Water Heater: Timing, Steps, and Maintenance
Learn when to drain your water heater and how to flush sediment safely. This comprehensive guide covers signs, timing, tools, step-by-step flushing, maintenance plans, and expert tips for 2026.

Drain your water heater at the right times to remove sediment, protect performance, and extend the unit's life. For most homes, plan a flush every 12-24 months, or sooner if you have hard water or notice reduced hot water flow. This guide explains when and how to drain safely. It also helps your heater work efficiently between service visits.
Why regular draining matters
Understanding when to drain water heater is a key part of responsible home maintenance. Sediment and mineral buildup accumulate over time in the tank, especially in areas with hard water or water with high mineral content. While sediment may seem harmless at first, it gradually forms a layer on the bottom of the tank that insulates the water from the heat source. That insulation makes the heater work harder to reach your target temperatures, which wastes energy and can shorten the unit’s lifespan. A properly timed drain and flush routine helps restore heat transfer efficiency, reduces standby heat loss, and can prevent temperature fluctuations that lead to uneven hot water delivery. According to Heater Cost, regular flushing is a simple and cost-effective step that can preserve performance and extend life. As of 2026, homeowners who commit to a flushing routine report more reliable hot water delivery and lower operating costs over time.
This section emphasizes the practical rationale behind the practice and sets the stage for a simple, repeatable maintenance habit you can perform on weekends with basic tools.
When to drain: the signs and schedule
Knowing when to drain water heater hinges on both routine timing and observable signs. A common rule of thumb is to flush the tank every 12–24 months for typical residential use, but this interval can shorten with hard water, a recent replacement, or a tank located in areas with high mineral content. If you start noticing slower hot water recovery, reduced flow, or a muddy or rusty appearance in the hot water, those are clear indicators that a flush is due. Noisy operation, such as popping or rumbling sounds from sediment shifting inside the tank, is another warning sign that sediment has built up sufficiently to interfere with heat transfer. In regions with very hard water, you might schedule more frequent flushes, perhaps every 6–12 months. The Heater Cost team notes that regular flushing helps maintain efficiency and reduces the likelihood of long-term performance issues. As you consider your schedule, factor in household size, water usage patterns, and whether you’ve recently had water treatment or a well-water supply that contributes mineral content.
A practical annual plan works best for most homes, but adapt if you see the signs mentioned above. Keep a simple log to track flush dates and any noticeable changes in hot water quality or temperature.
How to prepare: tools, safety, and setting up
Before you drain, gather a few essential tools and take safety precautions to protect you from hot water and scalding. Start by turning off the power to an electric heater or setting the gas valve to the pilot/off position for gas heaters. Close the cold water supply to the tank to prevent refilling during drainage. Place a sturdy, heat-resistant bucket or a large drain pan under the discharge or drain valve, and attach a length of durable drain hose to route hot water to a floor drain or outdoors. Open a nearby hot-water faucet to vent air and speed drainage. Wear insulated gloves and eye protection, and keep kids and pets away from the work area. If a manual drain valve is difficult to operate, avoid forcing it; instead, check for debris in the valve or connection and consider replacing worn fittings. After you’re finished, replace any drain hose and prepare to refill the tank.
The preparation phase is a good time to inspect the drain valve and ensure a proper seal for future flushes, which reduces the chance of leaks when you reopen the valve.
Step-by-step guide overview (high level)
The following section provides a clear, progressive workflow for draining and flushing a conventional residential water heater. It covers turning off power, securing the drain hose, venting air, flushing sediment, and safely restoring full operation. If you prefer a highly structured approach, you can follow the step-by-step section below for a detailed sequence with time estimates and tips.
Common mistakes and how to avoid them
Many homeowners rush the process or skip steps that protect safety and effectiveness. Common mistakes include draining a hot tank (never do this), failing to vent air (air pockets slow drainage), opening the drain valve too quickly (causes splashing and scalding risk), and not flushing long enough (residual sediment can quickly settle again). Another frequent error is reopening the cold-water inlet too quickly, which can cause sudden pressure surges and leaks at fittings. Finally, some people forget to recheck the system after refill, leaving valves partially closed or failing to re-enable power or gas supply. These missteps can negate the benefits of the flush and even damage the tank or plumbing. By following the step-by-step instructions and the safety reminders in this guide, you’ll minimize risk and maximize the value of each drain.
Maintenance plan: create a draining schedule and long-term care
Maintenance is easier when you build it into your calendar. Create a simple yearly plan that aligns with your water quality and household usage. For many homes, a drain/flush every 12–24 months is sufficient, but you may adjust based on sediment taste, water hardness, or well-water variability. Consider pairing a drain with other preventive tasks, such as checking the anode rod, inspecting the T&P valve, and testing the heater’s temperature setting. Keep a log with dates, observed water conditions, and any notes about valve operation. A consistent routine protects efficiency, reduces mineral buildup, and supports longer equipment life. As you implement your plan, remember to document results and adjust the interval to fit your specific water conditions and usage patterns. The Heater Cost team recommends a proactive, predictable schedule to minimize surprises and ensure a reliable supply of hot water throughout the year.
Tools & Materials
- Drain hose (5–6 ft)(Securely connects to the tank drain valve and directs water to a safe outlet)
- Heat-resistant bucket or drain pan(Minimum 5 gallons, placed to catch draining water)
- Adjustable wrench(For loosening fittings or attachments if needed)
- Insulated gloves and eye protection(Protect from hot water and splashes)
- Old towels or rags(Clean spills and protect floor surfaces)
- Screwdriver (flat or Phillips)(Only if you need to inspect or service a stubborn valve)
- Flashlight(Helpful for inspecting the drain area and valve)
Steps
Estimated time: 30-60 minutes
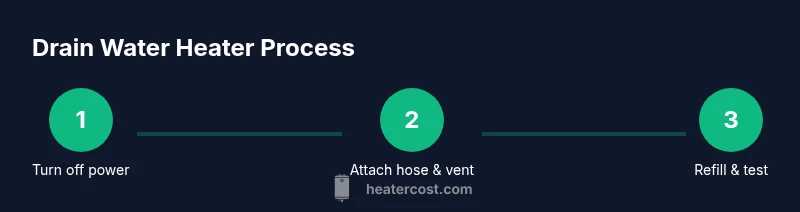
- 1
Turn off power and isolate water supply
Set the heater to OFF (electric) or set the gas control to PILOT/OFF (gas). Close the cold water supply valve feeding the tank to prevent refilling while you drain. If you’re unsure, consult the user manual for your model. This step prevents scalding and pressure buildup.
Tip: Wait 10–15 minutes after turning off power to let the tank cool before starting. - 2
Attach hose and position bucket
Connect the drain hose to the tank’s drain valve and route it to a floor drain or outdoors. Place the bucket underneath the hose end. Ensure the connection is snug to prevent leaks and spills.
Tip: Use a secure clamp or wrap tape to prevent disconnection during drainage. - 3
Vent with a hot-water faucet
Open a nearby hot-water faucet to vent air from the system. This helps air escape as water drains and speeds up the flushing process.
Tip: Choose a faucet in the same room to keep the venting effective and reduce splash risk. - 4
Open the drain valve gradually
Slowly open the tank’s drain valve. If the flow is weak, close and check for kinks or blockages in the hose. Do not force the valve if it feels stiff; obstruction may indicate sediment or a worn valve.
Tip: If the valve sticks, turn the water supply back off and consult a pro before forcing. - 5
Drain until water runs clear
Let the tank drain completely, watching for a transition from brown/red sediment to clear water. This may take 10–20 minutes depending on sediment load.
Tip: If most sediment remains, close the valve and briefly flush with a small amount of cold water before reopening. - 6
Refill while flushing
Slowly open the cold-water inlet to begin refilling the tank. Leave the drain valve open for a gentle flush until the water level runs clear.
Tip: Opening the inlet too quickly can create a pressure surge—refill gradually. - 7
Close drain and restore power
When the tank is full and you see a steady flow from the hot-water tap, close the drain valve and remove the hose. Restore power or gas to the heater and verify there are no leaks at fittings.
Tip: Check the temperature setting after refill to prevent scalding. - 8
Test safety devices
Run a final check on the T&P valve and ensure hot water is returning to normal temperature. If you detect leaks or abnormal noises after startup, shut down and seek professional help.
Tip: Keep a log of the procedure and any anomalies for future reference.
Got Questions?
How often should I drain my water heater?
Most homes benefit from flushing every 12–24 months, but harder water or heavy mineral content can justify more frequent flushes. Monitor for signs like reduced hot water or noises.
Most homes flush every 12–24 months, but harder water can require more frequent flushes. Look for signs like slow hot water or noises to know when to flush.
Is it safe to drain a hot water heater?
No. Allow the tank to cool before draining, and drain slowly with the hot-water faucet open to vent air. Always wear protection and keep the drain area clear.
No. Let the tank cool first and vent air by opening a hot faucet. Wear protection and keep the area clear.
What are signs that require draining sooner?
Sediment-colored water, reduced hot water flow, temperature fluctuations, or rumbling noises indicate a sooner flush may be beneficial.
Sediment-colored water, weak hot water, or rumbling sounds mean you might need to flush sooner.
Can I flush a tankless water heater the same way?
Tankless systems flush differently and often require procedure specific to the model. Refer to the manufacturer’s guidelines for safe maintenance.
Tankless units are different; follow the manufacturer’s instructions for maintenance.
Do I need professional help?
If you’re unsure about electrical or gas connections, or if the unit is under warranty, consult a licensed plumber or the manufacturer’s service line.
If you’re unsure about wiring or gas, contact a professional or the manufacturer.
Watch Video
The Essentials
- Anything sediment-related impacts efficiency; flushing is a preventive measure.
- Plan 12–24 month flush cycles, adjust for hard water.
- Follow a safe, repeatable step-by-step process to drain and refill.