Flushing a Water Heater: A Step-by-Step Guide
Learn how to flush a water heater to remove sediment, boost efficiency, and extend life. This guide covers safety, tools, and a clear step-by-step method for homeowners and property managers.

Flushing a water heater removes sediment that reduces efficiency and shortens tank life. This guide shows you how to safely flush most residential heaters, including required tools, safety steps, and a clear step-by-step method for homeowners and property managers to keep hot water reliably flowing.
What flushing a water heater does and why it matters
Flushing a water heater is a practical maintenance task that helps remove sediment and mineral buildup from the tank. Over time, dissolved minerals settle to the bottom, forming a layer that insulates the heating element and reduces heat transfer. The result can be longer heating cycles, higher energy use, and warmer water with a loss of effective capacity. By flushing the tank, you restore sediment-free contact between the burner or heating element and the water, which improves efficiency, lowers operating costs, and can extend the unit’s life. For homeowners and property managers, regular flushing is a straightforward preventive measure that minimizes the risk of sudden failures and costly repairs. In this guide you’ll learn the process, safety steps, and best practices to perform a thorough flush with common household tools.
Sediment types you might find and what they do
Sediment that collects in a water heater typically includes calcium carbonate, magnesium, and mineral particles carried in the cold-water supply. When water is heated, these minerals precipitate and settle at the bottom of the tank, forming a chalky layer or small sludgy clumps. A thick sediment layer can insulate the heating element, causing longer heat cycles and uneven temperatures. You may also notice cloudy hot water or a metallic taste if sediment displaces dissolved minerals. Flushing helps dislodge and remove these deposits, restoring efficient heat transfer and improving water quality at the tap.
Safety considerations and preparation before you start
Before you touch the heater, prioritize safety. Power off electric water heaters at the circuit breaker, or shut off gas to gas models and set the burner to pilot/off if required. Close the cold-water supply valve to prevent new water from entering the tank. Relieve system pressure by opening a hot water faucet somewhere in the home. Wear sturdy gloves and eye protection, and have a bucket and towels ready. If you feel unsure about any step, stop and consult a professional. Sediment flushing can expose sharp mineral buildup and hot water, so proceed with care and follow manufacturer guidance for your specific unit.
Tools and materials you’ll need
Having the right tools on hand makes flushing safer and smoother. Essential items include a garden hose rated for hot water, a bucket or basin to catch waste, a drain valve wrench or pliers (optional but helpful), and towels or rags for cleanup. A flashlight can aid visibility in cramped spaces, and a secondary container may be useful for venting air. Optional extras include a drain pan, rags, and a rubber stopper for extra peace of mind. Each item should be ready before you begin to minimize delays and reduce the risk of spills.
Understanding the drain valve and water flow
The drain valve at the bottom of the tank is your primary outlet for the flushing process. A hose connects from the valve to a floor drain, outside area, or utility sink. By opening the valve, water exits the tank; allowing air to enter via a hot-water faucet elsewhere helps the water flow freely. It’s common to see mineral sludge dislodge as the water runs. Route the discharge away from living spaces to avoid splashing or staining. If the valve resists, a gentle turn with a wrench may be needed, but avoid forcing it to prevent leaks.
Conceptual overview of the flush process
Flushing a water heater typically involves draining the tank to remove settled sediment, backflushing with cold water to loosen deposits, filling the tank again to displace remaining contaminants, and then restarting the heater. The key idea is to create a controlled flow that carries sediment out through the drain valve while avoiding contamination of the cold-water supply. Backflushing during the flush helps break up deposits, and venting air ensures the tank fills properly. After completing the flush, you reclose the drain, disconnect the hose, and restore power or gas. This sequence minimizes the risk of scalding, leaks, and mineral residue in your hot water.
Common mistakes and how to avoid them
- Skipping safety steps: Always turn off power and the cold-water supply and relieve pressure before you begin.
- Rushing the flush: Sediment removal takes time; flushing too quickly may not remove deeper deposits.
- Not venting air: Failing to vent air can trap air in the tank, causing noisy operation or incomplete refill.
- Using an improper hose: Use a hose rated for hot water to prevent damage and leaks.
- Ignoring leaks: Inspect connections and the drain valve after refilling; leaks require repair before restarting.
Aftercare and maintenance tips
Once the tank is refilled and the heater is restarted, run hot water from a faucet until it runs clear to purge remaining air. Check for leaks around the drain valve and along the supply lines. Reset the thermostat to your preferred temperature and monitor the unit for the first hour of operation. Schedule future maintenance and consider a professional inspection if your water contains heavy minerals or you notice persistent sediment buildup. Regular maintenance helps sustain efficiency and extend the heater’s life.
Tools & Materials
- Garden hose(6-8 ft; rated for hot water; one end connects to drain valve)
- Bucket or basin(large enough to hold several gallons; place under drain)
- Drain valve wrench (optional)(helps loosen stubborn drain valves)
- Adjustable wrench(useful if fittings are tight; avoid overtightening)
- Towels or rags(for spills and cleanup)
- Gloves and eye protection(protect hands from hot water and minerals)
- Flashlight(improves visibility in tight spaces)
Steps
Estimated time: 45-60 minutes
- 1
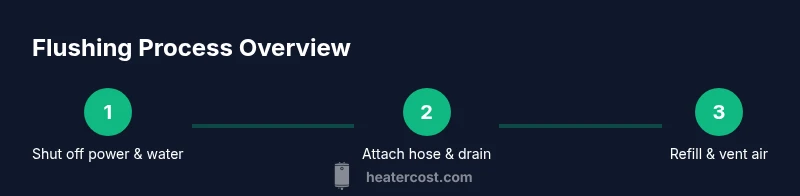
Shut off power and water
Turn off the power to electric heaters at the circuit breaker, or shut off the gas supply and set to pilot/off for gas models. Close the cold-water inlet valve to prevent more water from entering the tank. Relieve pressure by opening a hot-water faucet in the house. This prevents dangerous pressure buildup during the flush.
Tip: Wear heat-resistant gloves and eye protection; hot water can cause burns. - 2
Attach hose to drain valve
Locate the drain valve at the bottom of the tank and thread the garden hose onto it securely. Position the other end of the hose to a floor drain, outside, or a large utility sink. Ensure the connection is snug to prevent leaks during flushing.
Tip: Verify the hose is rated for hot water and won't kink during use. - 3
Open drain valve to start draining
Open the drain valve fully to begin removing water and sediment from the tank. Keep a bucket in place to catch the outflow, and monitor for any leaks. If water spouts or drips unevenly, stop and recheck the hose connection before continuing.
Tip: Open the valve slowly to avoid a sudden surge of hot water. - 4
Backflush with cold water
While the drain remains open, briefly turn on the cold-water supply to backflush the tank. This helps loosen mineral deposits settled on the bottom. Run this backflush for 3–5 minutes, then resume draining.
Tip: Backflushing helps dislodge stubborn sediment more effectively. - 5
Refill and vent air
Close the drain valve and open the cold-water inlet fully to refill the tank. Open a hot-water faucet somewhere in the home to vent air from the line until a steady stream of water flows. Once water runs clear, you can proceed to restart.
Tip: Do not rush the refill; ensure all air is purged from the line. - 6
Restart and verify
Close the hot-water faucet, remove the hose, and reclose the drain valve. Restore power or gas to the unit and set the thermostat to your preferred temperature. Run several gallons of hot water to verify steady flow and check for leaks around connections.
Tip: Watch for leaks at the drain valve and supply lines during initial operation. - 7
Test safety devices and operation
After refill, test the temperature/pressure relief valve (T&P) if accessible, and recheck the area for leaks. Ensure hot water reaches desired temperature and remains consistent. If you notice any lingering sediment, consider repeating the flush or scheduling professional service.
Tip: Never strike or force the T&P valve; if it leaks, d activating or replacing may be required. - 8
Clean up and plan next maintenance
Tidy the area, dry spillages, and store tools. Note when you flushed and plan the next service based on water quality and usage. Regular checks help maintain efficiency and extend the life of the heater.
Tip: Document the date of the flush for future reference and maintenance planning.
Got Questions?
Is flushing a water heater required for all homes?
Flushing is a common maintenance task to remove sediment buildup that can reduce efficiency and shorten the heater’s life. Whether you flush depends on water quality and usage; consult a professional if sediment persists.
Flushing helps remove sediment and keep the heater efficient; consult a professional if you're unsure.
Can I flush a water heater myself, or should I hire a pro?
Many homeowners can flush a standard tank with basic tools by following manufacturer instructions. If you have a gas heater or feel unsure about valves and safety, hiring a licensed plumber is advisable.
DIY is possible for basic tanks, but call a pro if you’re unsure or have a gas heater.
What signs indicate a flush is needed between regular maintenance?
If you notice reduced hot water, longer heating cycles, cloudy water, or a rumbling noise in the tank, sediment buildup is likely and flushing may help.
Watch for reduced hot water and noise, which can mean sediment buildup.
Should I flush after replacing anode rods or repairing a leak?
After major repairs, flushing can help remove debris that may have entered the system. Refill completely and test for leaks before normal use.
Flush after major repairs to clear debris and verify secure connections.
Is flushing safe for tankless water heaters?
Flushing procedures differ for tankless heaters; follow the manufacturer's instructions or consult a pro for model-specific guidance.
Tankless units require model-specific guidance; consult the manual or a professional.
Can flushing improve energy efficiency immediately?
A flush can improve efficiency by reducing sediment-related heat loss and improving heat transfer, but the magnitude varies with usage and water quality.
You may notice improved efficiency after flushing, depending on sediment levels.
Watch Video
The Essentials
- Shut off power and cold-water supply before draining.
- Backflush with cold water to loosen sediment.
- Refill, vent air, and restart safely.
- Check for leaks and proper operation after maintenance.