Water Heater Flush: A Practical Step-by-Step Guide
Learn how to safely flush your water heater to remove sediment, improve efficiency, and extend its life. This step-by-step guide covers tools, safety, and common pitfalls for DIY homeowners.

By the end of this guide, you will know how to safely perform a water heater flush to remove mineral sediment, improve efficiency, and extend your unit’s life. You’ll learn which tools and safety steps you need, how to prepare your space, and how to reassemble and test the system after flushing. According to Heater Cost, regular flushing supports reliable performance and lower energy costs.
Why a Water Heater Flush Is Important
Mineral-rich water leaves behind sediment that settles at the bottom of your tank. Over time, this layer acts as an insulating blanket, making the burner or heat element work harder and wasting energy. A water heater flush how to approach helps remove this sediment and restore efficient heat transfer. Regular flushing can slow mineral buildup, reduce noise, and lower the risk of premature failure. The Heater Cost team notes that neglecting routine maintenance can shorten the life of the unit and increase operating costs. In practical terms, flushing improves recovery rates for hot water and can help maintain consistent water temperature. If you’re trying to maximize comfort while minimizing bills, this maintenance task is worth learning. This guide will show you how to perform the flush safely, what tools are needed, and how to finish with the tank refilled and ready for use. Remember, the goal is to remove sediment without damaging valves or seals. By understanding the process, you can approach the job with confidence and care, even if you’re not a licensed technician.
Safety First: The Essentials
Before you begin, prioritize safety. Turn off the power at the breaker for electric heaters or shut off the gas supply for gas units. Close the cold-water inlet and protect your skin with gloves and safety goggles. Work in a well-ventilated area and keep children and pets away from the work zone. According to Heater Cost, following these safety steps is essential to prevent scalding, burns, or broken connections. Check that your drain path is clear and capable of handling hot water. If you notice any gas smells or leaks, stop immediately and call a licensed professional. Familiarize yourself with your specific model’s manual since some manufacturers require different procedures. This preparation minimizes risk and ensures you can complete the flush without compromising the system.
Understanding Sediment and Its Impact on Efficiency
Sediment, primarily from minerals in water, settles at the tank bottom. This layer can reduce heat transfer efficiency, causing the heater to work longer to reach the same temperature. Over time, sediment can form clumps that stress the tank, contribute to loud operation, and shorten the unit’s lifespan. A water heater flush helps to physically remove this buildup, restoring proper heat exchange and improving overall performance. While you won’t see instant energy savings, a well-executed flush supports consistent hot water delivery and can help maintain steady temperatures. In addition, regular flushing makes it easier to spot leaks and valve wear early, which supports longer-term reliability. The Heater Cost analysis emphasizes that sediment management is a foundational maintenance task for any household relying on a traditional tank water heater.
When and Why to Flush
Flush frequency depends on water hardness, usage, and the age of the unit. If your area has hard water or you use a lot of hot water, flushing more often can prevent buildup from impacting performance. Signs that you should flush include reduced hot water supply, rusty or discolored water, or visible sediment at the drain outlet. Even in mild conditions, a periodic flush is prudent to keep the system clean and running efficiently. The ultimate goal is to maintain consistent heat transfer and avoid scale-induced wear on internal components. Heating efficiency tends to degrade as sediment accumulates, so regular maintenance is a smart, proactive measure. In short, plan a flush as part of routine water heater upkeep, adjusting frequency based on local water quality and how hard you push the system.
Preparing Your Space and Tools
Set up a clean, safe workspace around the water heater. Clear clutter and place a drain pan or bucket under the drain valve to catch the water. Gather all necessary tools and materials before starting to avoid mid-task interruptions. Use protective gloves and eye protection, and have towels handy for spills. Label hoses and valves if you’re mixing different connections, so you can reassemble accurately. A well-prepared environment reduces the risk of accidental scalding and helps you complete the flush smoothly. In this guide, you’ll see exactly which tools you’ll need, and we’ll explain how each item contributes to a safe, effective flush. The Heater Cost team recommends preparing thoroughly to minimize surprises during the process.
What Happens During a Flush (High-Level Overview)
A typical water heater flush involves interrupting the normal flow of water, draining the tank, and flushing out mineral sediment with clean water. You’ll connect a hose to the drain valve and direct the output to a safe draining area. After the tank empties, you refill it with cold water, bleed air from the system, and restore power or gas. This high-level outline shows the sequence without getting into the fine details of each model. Understanding the flow helps you anticipate what comes next and prevents damage to fittings or valves. In the end, a successful flush yields clearer water, steadier temperatures, and a quieter operation. The Heater Cost team stresses that following model-specific instructions is key to a flawless flush.
Post-Flush Maintenance and Troubleshooting
After flushing, reopen the cold-water supply slowly and allow the tank to fill completely. Bleed air by opening a hot water faucet until steady water flow is achieved, then restore power or gas and test the system with a small hot water draw. Inspect all connections for leaks and tighten as needed. If you notice persistent leaks, odd noises, or irregular temperatures, it’s wise to consult a professional. Regular inspection after a flush helps catch issues early and extends the life of the unit. This final stage ensures your system remains reliable and safe, and it sets the stage for routine maintenance moving forward.
Tools & Materials
- Drain pan(Place under drain valve to catch water)
- Garden hose (5-20 ft)(Attach snugly to drain valve; ensure hose reaches a safe drainage area)
- Bucket(Use if a drain pan isn’t available or for extra drainage capacity)
- Rags or towels(For spills and drying surfaces)
- Safety gloves(Heat-resistant if possible; protects hands from hot water)
- Safety goggles(Protect eyes from splashes)
- Adjustable wrench(Only needed for certain valve types)
- Flashlight(Shine light on valve connections for a secure fit)
- Marker or tape(Label hoses/valves for reassembly)
Steps
Estimated time: 60-120 minutes
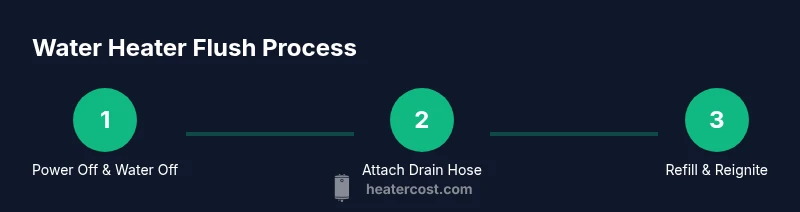
- 1
Power off and close the water inlet
Locate the electrical breaker for the heater (or shut off the gas supply for a gas heater) and switch it to off. Close the cold-water supply valve to prevent more water from entering the tank while you drain. This initial step reduces the risk of shock and scalding and ensures safe, controlled draining.
Tip: Double-check the breaker or gas valve is fully off before touching any components. - 2
Attach the drain hose and place drainage
Connect a sturdy hose to the drain valve and direct the other end into a bucket or suitable drain. Place a drain pan under the connections as a backup. Ensure the hose is secure and cannot kink or dislodge during draining.
Tip: Keep the hose as straight as possible to prevent air pockets that slow draining. - 3
Open the drain valve and begin draining
Slowly open the drain valve to start the tank emptying. If water is slow to come out, use the faucet behind the tank to relieve pressure and aid flow. Stop draining if you notice a strong odor, scorching smell, or unusual noises.
Tip: Do not force the valve open; if resistance is felt, stop and reassess the setup. - 4
Bleed air and flush with water
With the tank partially or fully drained, briefly open the cold-water supply to flush out remaining sediment. This helps dislodge mineral deposits and rinses them out through the hose. Close the drain valve after a few minutes of flushing.
Tip: Opening the cold-water supply slowly prevents a sudden surge that could splash hot water. - 5
Refill and vent air
Close the drain valve and remove the hose. Slowly refill the tank by opening the cold-water inlet fully. When water begins to flow from a hot faucet, open it to vent air and ensure full refilling. This prevents air locks that could damage the heating element.
Tip: Keep a hot-water outlet open until steady, uninterrupted water flows. - 6
Restore power or gas and test
Once the tank is full and air is bled, restore power or gas to the heater and set the thermostat back to your desired temperature. Run hot water from a faucet to confirm consistent heat delivery and check for leaks around the drain valve and fittings.
Tip: Test at multiple taps to ensure even heating and identify any weak points. - 7
Clean up and inspect
Wipe down any spills and store tools. Inspect connections for leaks over the next 24–48 hours. If you notice persistent drips or corrosion, call a professional. Regular maintenance checks help prevent future issues.
Tip: Document your flush date for future reference and schedule the next flush based on water quality. - 8
Document results and plan next steps
Record the date of the flush and any observations (water clarity, hot water consistency, leaks). Use this information to calibrate future maintenance—hard water areas may need more frequent flushing. Respect local code requirements for drainage during disposal.
Tip: Keep a simple log nearby to simplify future maintenance.
Got Questions?
Do I need to flush my water heater every year?
Flushing frequency depends on water hardness and usage. Yearly flushing is common, but adjust based on sediment buildup and performance. If you notice reduced hot water or rust-colored water, flush sooner.
Most households benefit from a yearly check, but adjust if you have very hard water or heavy usage.
What tools do I need for a water heater flush?
You will typically need a drain pan, a garden hose, a bucket, rags, safety gloves, and goggles. An adjustable wrench is optional for certain valve types.
Gather a drain pan, hose, bucket, rags, gloves, and goggles to get started.
Can I flush an electric water heater and a gas water heater the same way?
The basic flushing steps are similar for both, but always follow your specific unit’s manual. For gas heaters, ensure the gas supply is safely shut off; for electric, switch off the power at the breaker.
The approach is similar, but follow model-specific instructions and shut off power or gas first.
What if the water won’t drain or the drain valve leaks?
Check that the drain valve is fully open and the hose is positioned correctly. If leaks persist, the valve may be damaged or the connection loose; avoid forcing it and seek professional help.
If drainage stalls or leaks, stop and contact a professional to avoid damaging fittings.
Is flushing dangerous for tankless water heaters?
Tankless systems require different maintenance procedures. This guide focuses on tank-type heaters; consult manufacturer guidance for tankless models.
Tankless units need different steps; don’t use a tank-based flush method for them.
When should I call a professional?
If you smell gas, detect continuous leaks, see damaged valves, or feel uncertain about connections, contact a licensed technician.
If you’re unsure at any point, it’s safer to call a pro to avoid hazards.
Watch Video
The Essentials
- Turn off power and water before starting.
- Use a drain pan and hose to control spills.
- Refill slowly and vent air to avoid damage.
- Inspect for leaks after the flush and document maintenance.