Descaling a Water Heater: DIY Guide for Homeowners
Learn how to descale a water heater safely, extend its life, and boost efficiency with a practical, step-by-step DIY guide for common residential systems.

Descaling a water heater removes mineral buildup, restoring efficiency, improving hot water delivery, and extending the unit’s life. This guide covers when to descale, what you’ll need, safety checks, and a clear, step-by-step process you can follow for most residential systems. Plan about 60–90 minutes, plus a brief post-descent check.
Why Descaling Water Heater Matters
According to Heater Cost, descaling water heater maintenance is a smart move for most homes. Regular descaling water heater procedures target mineral buildup that forms when hard water circulates through the tank and heat exchanger. As minerals accumulate, heat transfer becomes less efficient, leading to longer heating times and higher energy use. Descaling helps restore proper heat transfer, maintain stable hot water output, and reduce strain on components like the burner, thermostat, and valves. While every home’s hardness level differs, keeping scale in check typically supports better efficiency and longer equipment life. The Heater Cost analysis notes that homeowners who implement routine descaling practices often experience fewer randomly expensive repairs and more reliable hot water performance over time. Remember that the goal is to slow mineral deposition and keep the system operating as intended, not to overhaul the unit in a single session.
If you’re unsure about your water hardness or system type, start with a basic descale and monitor performance over the following months. Regular descale intervals may vary from year to year, but a proactive approach helps avoid cumulative buildup. This guidance focuses on standard tank-based heaters common in single-family homes, but the same principles apply to many electric, gas, and hybrid models. For readers of Heater Cost, the takeaway is clear: descaling water heater systems is a practical, preventive step that can preserve performance and energy efficiency when done safely and correctly.
What you’ll gain from descaling: restored heat transfer, improved hot water consistency, lower energy consumption, quieter operation, and a potential reduction in scale-related leaks or valve issues.
Tools & Materials
- Safety glasses(Protect eyes from splashes and debris.)
- Rubber gloves(Keep hands safe from hot water and chemicals.)
- Bucket (5-10 liters)(Catch water and rinse tools.)
- Garden hose(Attach to drain valve for controlled flushing.)
- Adjustable wrench(May be needed for drain valve fittings.)
- Descaling solution or white vinegar(Use a commercial descaler or household vinegar (5–8% acidity). Avoid mixing with bleach.)
- Sump pump or submersible pump (optional)(Helpful for large tanks or difficult drainage.)
- Towels or rags(Clean up spills and wipe down surfaces.)
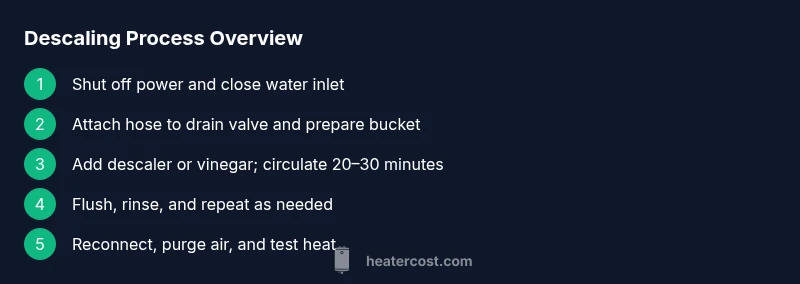
Steps
Estimated time: 60-90 minutes
- 1
Shut off power and close the water inlet
Ensure the heater is powered down (electric switch or circuit breaker) and close the cold water supply to prevent more water from entering the tank. This prevents pressure buildup and keeps the system safe while you work.
Tip: Verify the power is off at the breaker before touching any electrical components; accidental energization is a common hazard. - 2
Attach a hose to the drain valve and place a catch bucket
Run the drain valve’s hose to a floor drain or a suitable bucket. This provides a controlled path for the tank’s water and prevents messy spills during draining.
Tip: Check that the hose pitches downward to avoid backflow and keep the area clear of tripping hazards. - 3
Add descaler or vinegar through the inlet
Pour your chosen descaler or white vinegar into the tank via the inlet or follow the product’s instructions. Allow the liquid to circulate for about 20–30 minutes to help break down mineral deposits.
Tip: If using vinegar, don’t mix with any other cleaners; never use bleach together with acids. - 4
Open the drain valve to flush while circulating
Carefully open the drain valve to flush the tank while the descaler works. Periodically shut and re-open to encourage debris to loosen. This step may take 15–20 minutes depending on capacity.
Tip: Keep hands away from hot water and keep the area ventilated to avoid steam buildup. - 5
Rinse the system with clean water
Close the drain valve, remove the hose, and reconnect the cold water supply. Run cold water through the tank for several minutes to rinse out loosened minerals and any remaining descaler.
Tip: If you notice persistent particles, repeat the flush once more before closing up. - 6
Restore power and test the system
Turn the power back on and gradually run hot water from a nearby faucet to purge air and confirm the unit heats normally. Check for leaks at all fittings and the drain valve.
Tip: Test each hot faucet in the house to ensure air is fully purged and you don’t trap air pockets in the lines. - 7
Inspect and finalize
Inspect the area for leaks, check valve seals, and wipe surfaces dry. Keep an eye on the first few hot-water cycles to ensure consistent performance and no unusual noises.
Tip: Consider replacing an aging valve or gasket if leaks appear after the descale.
Got Questions?
What is the main purpose of descaling a water heater?
Descaling removes mineral deposits that insulate the heating element, reducing efficiency and hot water output. It helps maintain performance and extends the life of the unit.
Descaling removes mineral buildup that hurts efficiency and hot water flow, keeping your heater working well longer.
Can I use vinegar to descale my water heater?
Yes, white vinegar is a common, inexpensive descaler. It’s effective for mineral buildup, but avoid mixing with other cleaners and follow safety guidelines.
Yes, you can use white vinegar, but don’t mix it with other cleaners and follow the safety steps.
How often should I descale a water heater?
Frequency depends on water hardness and usage. Start with a yearly check and adjust based on performance and signs of buildup.
Usually once a year, but adjust based on how hard your water is and how the heater seems to perform.
Will descaling void my warranty?
Descaling itself is a standard maintenance task; follow manufacturer instructions. If you use improper chemicals or void maintenance terms, it could affect warranty.
Descaling done correctly generally won’t void a warranty, but follow the manufacturer’s guidelines and use approved products.
Is descaling the same as flushing the water heater?
Flushing usually involves draining the tank to remove sediment, while descaling targets mineral buildup on components. Many times teams flush first, then descale for thorough cleaning.
Descaling targets mineral buildup on parts, flushing removes sediment from the tank; they’re related but different steps.
Should I call a professional for descaling?
For gas water heaters, units with complex venting, or if you’re uncomfortable with drain tasks, consult a licensed technician.
If you’re unsure about gas systems or venting, it’s safer to call a pro.
Watch Video
The Essentials
- Descaling restores heat transfer and efficiency.
- Follow safety steps to avoid burns and electrical hazards.
- Use the right descaler and proper drainage to minimize mess.
- Always inspect for leaks after reassembly and testing.