Clean On-Demand Water Heater: A Practical Flush Guide
Learn how to safely clean and flush a clean on-demand water heater (tankless) to maintain efficiency, prevent mineral buildup, and extend unit life. Step-by-step instructions, tools, and maintenance tips for homeowners.

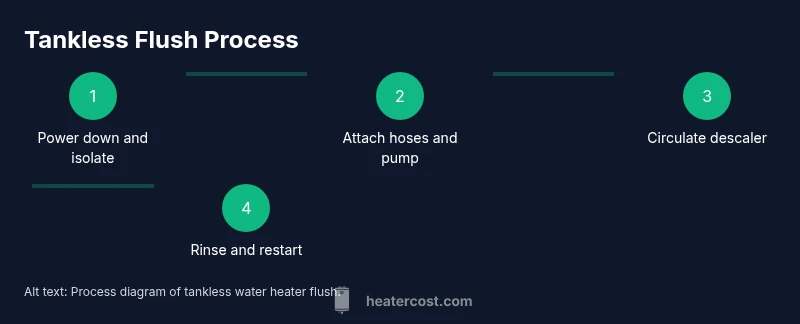
To clean an on-demand water heater, follow a safe flush and descale routine that reduces mineral buildup and keeps your tankless system efficient. Begin by powering off the unit and isolating water supplies, then attach hoses and a descaling solution. Run the solution through the heat exchanger, rinse with clean water, and restart the system.
What is a clean on demand water heater and why maintenance matters
A clean on demand water heater, commonly called a tankless unit, heats water on demand rather than storing hot water in a tank. This design saves space and can improve efficiency, but it is sensitive to mineral buildup from hard water. Regular maintenance keeps heat exchange efficient, avoids scale clogging, and prolongs the unit's life. According to Heater Cost, regular maintenance on a clean on demand water heater helps sustain efficiency and extend lifespan, especially in areas with hard water. A well-timed flush can restore performance and reduce energy use in your home. By staying proactive, homeowners can avoid sudden cold-water surprises and expensive repairs. In this guide, you’ll learn a safe, practical approach to flushing and descaling a tankless system, plus maintenance routines you can fit into a yearly schedule.
Framing the task around a clean on demand water heater emphasizes two core ideas: first, these units heat water on demand with compact design, and second, mineral buildup can erode efficiency. The goal of maintenance is to preserve the heat exchanger’s surface area and fluid flow paths. Heater Cost analysis emphasizes that keeping mineral deposits under control helps maintain BTU output and reduces energy waste. Throughout this guide you’ll see practical steps, safety reminders, and the rationale behind each action, so you can decide whether to tackle a flush yourself or hire help.
For homeowners, renters, and property managers, understanding the fundamentals of a flush empowers you to protect your investment and ensure reliable hot water. If your water is very hard, plan for more frequent maintenance to keep the system operating near peak efficiency. This section sets the stage for the detailed steps that follow and helps you understand why a flush matters for your on-demand system.
Safety-first considerations before you start
Before any work, power down the unit and close the valves to prevent electrocution and water leaks. Wear eye protection and gloves, and ensure the area is dry to avoid slips. Many manufacturers require disconnecting electrical power, and some units have sealed covers that require a specific procedure. Always consult the owner's manual for your model’s flushing instructions. Heater Cost emphasizes that safety should never be skipped; improper flushing can damage components or void warranties. If you’re unsure, consult a licensed technician. Keep kids and pets away from the workspace, and never work on live electrical components with wet hands.
Safety is the foundation of a successful flush. Start with the simplest checks: verify the power is off, confirm that the water side of the system is isolated, and confirm that any expansion tanks or pressure relief valves are addressed per the manual. If your installation includes backflow preventers or cross-connection controls, follow the manufacturer’s guidance for those components. A calm, methodical approach reduces risk and ensures that the flush proceeds smoothly. In many homes, a short preparatory checklist saves time and prevents common mistakes that can lead to leaks or electric hazards.
Tools and descaling options you’ll need
Successful flushing relies on the right tools and solution. A dedicated descaling pump or manufacturer-approved flush kit is essential. You’ll also need hoses with compatible fittings to connect to your service valves, a bucket, towels, safety gear, and a source of descaling solution (or white vinegar in accordance with the manufacturer). Keep the owner’s manual handy for model-specific recommendations. This section provides a baseline list, but check your unit’s instructions for any required proprietary adapters. Having everything ready reduces the chance of leaks or interruptions during the flush. As Heater Cost notes, using the correct solution and maintaining the proper concentration protect internals and prevent corrosion that can shorten the life of a clean on demand water heater.
Recommended items include a small submersible pump (3–5 GPM) or a manufacturer-approved flush kit, two compatible hoses with fittings, a bucket, towels, safety gloves and eye protection, a descaling agent or white vinegar, and the unit’s service valves documented in the manual. If you lack a pump, some kits rely on a gravity-based flush, but a pump generally delivers more consistent flow and faster results. Always choose items that are compatible with your specific model and valve configuration to avoid compatibility issues during setup.
Step-by-step overview for flushing a tankless unit
The flushing process for a clean on demand water heater has several phases: preparation, circulation of descaling solution, rinsing, and restart. In practice, you’ll isolate the unit from the cold water supply, connect hoses to the service valves, and circulate your descaling solution through the heat exchanger for a recommended period. Then you’ll flush with clean water to remove mineral residues, reconnect the power and water, and test. For visuals, refer to Figure 2 in the accompanying guide. This overview is meant to set expectations and is not a substitute for the full step-by-step instructions that follow. Remember to follow your manufacturer’s guidance and never mix chemicals without a plan.
This overview helps you visualize the sequence of actions and align safety measures with practical steps. If your model requires a different connection scheme, adapt the approach to match the valve layout while preserving the same flow path. The core principle remains: introduce the descaling agent into the heat exchanger, and then purge contaminants with clean water before returning the system to service.
Long-term maintenance and preventive care
After completing a flush, schedule regular maintenance to prevent scale buildup. For many homes, annual or biannual descaling is recommended, depending on water hardness and usage. Consider installing a water-softening system or a scale inhibitor if permitted for your home. Keep external components clean and inspect connections for leaks every 6-12 months. Heater Cost analysis suggests that routine upkeep can improve heat transfer efficiency and reduce energy costs over time. Document maintenance dates so you can track your unit’s condition and plan replacements before failures occur.
Routinely checking for mineral buildup around inlet/outlet ports and ensuring venting components remain clear are small but important tasks. If you live in an extremely mineral-rich area, you may want to increase the frequency of checks from annually to every six months. A simple calendar reminder can help you stay on schedule, and keeping a maintenance log provides evidence of care when you go to sell or refinance a property.
Troubleshooting common problems after a flush
If you notice leaks, reduced hot water flow, or error codes after flushing, verify valve positions and ensure hoses are fully tightened. Check for air locks in the line if you experience inconsistent temperatures. If the unit won’t restart after a flush, consult the manual, reset the breaker, or contact a professional if electrical codes appear abnormal. Always turn off power before inspecting connections. Maintaining a simple log helps you identify patterns over time and avoid unnecessary service calls. If the system continues to underperform after a flush, review the water hardness data for your area and consider an additional preventive treatment or a professional assessment.
Tools & Materials
- Pump or descaling kit(A dedicated descaling pump (3-5 GPM) or manufacturer-approved flush kit.)
- Hose set with fittings(Two hoses with compatible fittings for the service valves.)
- Isolation valves or service valve kit(To isolate the unit from the domestic water supply.)
- Descaling solution or white vinegar(Follow manufacturer guidance for concentration and contact time.)
- Bucket and towels(To catch and wipe away any spills.)
- Owner’s manual(Model-specific flushing instructions and safety notes.)
- Safety gloves and eye protection(Protect hands and eyes during handling of chemicals.)
Steps
Estimated time: 60-90 minutes
- 1
Power off and close water supply valves
Switch off the electrical power to the unit at the breaker and close both cold and hot water valves that feed the heater to isolate the heat exchanger. This prevents electrical shock and stops water flow during setup.
Tip: Double-check the power circuit with a non-contact tester and ensure valves are fully closed. - 2
Attach hoses and prepare the flush pump
Connect the two hoses to the service ports on the unit and attach the other ends to the flush pump or descaling kit. Place the pump in a bucket or container with the descaler solution as guided by the manual.
Tip: Tighten fittings securely to prevent leaks and avoid kinks in hoses. - 3
Circulate descaling solution through the heat exchanger
Run the pump to circulate the solution through the heat exchanger for 20–40 minutes, monitoring for leaks and ensuring the solution coverage. Avoid exceeding recommended concentrations.
Tip: Watch for unusual noises or pressure changes; stop if you see leaks or rise in pressure beyond normal levels. - 4
Rinse with clean water until clear
Switch the line to clean water and flush the system for 5–10 minutes or until the effluent runs clear with no visible mineral particles.
Tip: Keep an eye on the flow rate; a slow or bottlenecked flow may indicate valve or hose issues. - 5
Restore power and test operation
Close service valves, remove hoses, restore electrical power and water supply, and run hot water from a sink to verify consistent temperature and flow. Look for leaks during the first tests.
Tip: If a fault code appears, consult the manual and recheck all connections before calling a pro.
Got Questions?
Do I need to flush my tankless water heater?
Flushing is generally recommended to remove mineral buildup and maintain efficiency. Most manufacturers advise a yearly or twice-yearly maintenance schedule based on water hardness and usage. Always consult the model’s manual for guidance.
Yes. Regular flushing helps prevent mineral buildup and keeps your tankless heater performing well. Check your manual for the recommended frequency for your model.
What descaler should I use?
Use the descaler recommended by the manufacturer, or a mild, non-corrosive solution permitted for your unit. White vinegar can be used for mild scale if the manual allows it, but follow the concentration and contact-time guidelines.
Use the descaler your unit’s manual approves. If you’re unsure, stick with the manufacturer’s recommended solution.
Can I flush a tankless water heater myself or hire a pro?
Many homeowners can flush a tankless unit using the manual instructions. If you’re uncertain about your installation, have a complex piping setup, or encounter repeated leaks, hire a licensed technician.
You can usually do it yourself if you follow the manual, but consult a pro if you’re unsure.
How often should I flush if my water is hard?
Hard water often requires more frequent maintenance. Base your schedule on the unit’s manual and water hardness data; you may need to flush every 6-12 months.
Hard water can mean you flush more often; follow your manual for a tailored plan.
What are signs that a flush is needed?
Look for inconsistent hot water, reduced flow, or mineral buildup around outlets. If temperatures fluctuate or you hear strange noises, a flush may be due.
If hot water is erratic or you hear unusual noises, consider flushing.
Is there a risk of damaging the unit during flushing?
Damage risks exist if you use improper concentrations, skip safety steps, or force connections. Always follow the manual and use the recommended equipment.
Yes, improper steps can cause damage; follow the manual or hire a pro.
Watch Video
The Essentials
- Power down and isolate the unit before starting.
- Use manufacturer-approved descaling solutions and follow concentrations.
- Rinse thoroughly until the effluent is clear.
- Restart the unit and test for stable temperature and flow.
- Maintain a regular flush schedule based on water hardness.