What to Do When Water Heater Leaks
Learn practical, safe steps to take when your water heater leaks, including immediate safety actions, shutting off power and water, drainage, inspection points, and when to call a professional for repair or replacement.

Immediate actions when you notice a water heater leak: prioritize safety by turning off electrical power at the breaker (or shutting off gas to a gas heater). Close the cold-water supply valve, place towels or a bucket to catch drips, and drain a minimal amount if you can safely access the drain valve. If the leak is active, contact a licensed plumber.
What to Do Immediately When You Detect a Leak
If you notice water pooling near your water heater, your first question should be safety and containment. According to Heater Cost, the most effective response starts with stopping the source of power and water, then containing the drip while you assess the situation. Knowing what to do when water heater leaks helps prevent flood damage and expensive repairs while you wait for help. Start by visually inspecting for the source of the leak and note whether the dripping seems to come from a fitting, valve, or the tank itself. If the water is hot to the touch or comes with a burning smell, assume a higher risk scenario and evacuate anyone nearby and call emergency services if needed. In many cases, the leak comes from a loose connection or a worn valve; these issues can often be addressed by a professional, but safety must come first. Keep a log of what you see, including the time of day and any sounds you notice on the unit, to share with a technician. Remember, a leak near an electrical appliance requires extra caution to avoid shocks or short circuits. Maintaining a dry, clear space around the heater reduces the chance of slips and makes it easier for responders to access the unit.
Safety First: Turn Off Power and Gas (if applicable)
Safety is non-negotiable when a water heater leaks. For electric water heaters, switch off the circuit at the main panel or the dedicated breaker to minimize the risk of electric shock. If you have a gas-powered unit, you may shut off the gas supply at the valve on the line or at the appliance when safe access is possible. Do not attempt to operate or jiggle controls while wet, and never touch electrical components with wet hands. After turning off power or gas, ensure the area is dry and free from standing water before proceeding with any other actions. If you smell gas, hear hissing sounds, or notice a hissing leak around the gas line, evacuate and call emergency services immediately. Always confirm that the power source is actually off before touching any wiring or components. When in doubt, prioritize safety and contact a licensed professional. During this phase, avoid using phones or other devices near the water until you are in a dry area. The goal is to eliminate the energy source to prevent shock or ignition while you prepare for the next steps.
Shut Off Water Supply and Drain the Tank (if safe)
Next, close the cold-water shutoff valve on the heater's inlet to stop more water from entering the tank. This helps prevent additional leaks and reduces the amount of water that could spill onto floors. If you can safely reach the drain valve, attach a hose and drain a small portion of water to relieve pressure and to check the valve for drips. Do not attempt to drain if you cannot safely access the valve or if you detect significant flooding. In some homes, shutting off the main water supply is warranted if the leak is severe or persistent. While draining, keep towels and a bucket handy to catch any residual water and prevent damage to floors. After draining, re-check the area for changes in the leak pattern and consider contacting a professional for next steps. If you notice sediment or rust in the water, this can indicate tank corrosion and a future failure risk that warrants professional evaluation.
Inspect Common Leak Points and Determine Next Steps
Leaks usually originate at fittings, the drain valve, or the T&P relief valve, or from a corroded tank. Look for dampness around the connections, rust, or puddling under the heater. Tighten loose fittings with the correct wrench, but avoid forcing components; overtightening can damage threads and worsen leaks. If the tank shell itself shows wetness, corrosion, or obvious rust, the unit is near end-of-life and replacement is often the safer, longer-term option. Keep a note of any changes you observe after tightening or reseating fittings so you can communicate details to a technician. Remember that some leaks may be intermittent, appearing only after heavy use or pressure fluctuations. Document the time and conditions when you first noticed the leak to help technicians determine whether the problem is a valve issue or a tank issue.
When to Call a Pro and What to Expect
If you cannot stop the leak by tightening fittings, if the T&P valve is actively discharging, or if you notice rust on the tank, contact a licensed plumber or heating professional. They will perform a thorough inspection for internal corrosion, verify relief valve operation, test the pressure and temperature settings, and discuss replacement options if needed. A professional can also advise on whether an expansion tank is appropriate for your system and whether the current heater should be replaced with a newer, more reliable model. Expect a diagnostic report, an itemized quote for parts and labor, and a safety-focused plan to prevent future leaks. If you rent, your landlord may have specific procedures or preferred contractors; follow those guidelines to avoid liability or warranty issues.
Preventive Steps and Maintenance to Reduce Future Leaks
Once the leak is resolved, implement ongoing maintenance to extend the life of your heater. Schedule annual checks with a licensed technician or follow manufacturer guidance for routine inspections. Replace worn drain valves or faulty fittings proactively, install or service an expansion tank if your system requires it, and ensure insulation on hot water lines to reduce condensation and heat loss. Keeping the area around the heater dry and free from clutter helps you spot problems early and respond quickly. Regular flushing to remove sediment can also reduce wear and improve efficiency, helping to avoid costly leaks in the future.
Tools & Materials
- Bucket with lip(To catch water and prevent floor damage)
- Towels or rags(Have several; dry spills quickly)
- Adjustable wrench(For loosening fittings (cold-water valve, drain valve))
- Flashlight(Inspect dark corners around heater)
- Gloves(Keep hands dry and protected)
- Drain hose (optional)(Attach to drain valve if you can safely drain some water)
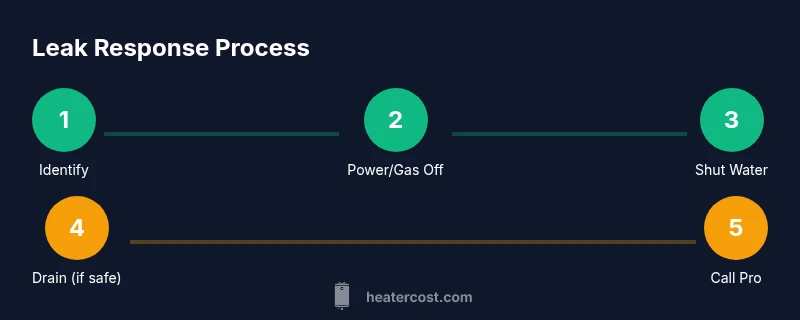
Steps
Estimated time: 25-40 minutes
- 1
Identify the leak and assess safety
Look for where the water is coming from and determine if it’s a loose fitting, a valve issue, or a tank breach. Note the water temperature and any sounds of running water. If you’re unsure, treat it as a potential safety risk and proceed cautiously.
Tip: Take clear photos from multiple angles before making changes. - 2
Power down the heater’s energy source
Turn off electrical power at the breaker panel for electric heaters, or shut off the gas valve for gas-powered units if you can do so safely. Never touch electrical components with wet hands and keep the area dry.
Tip: Verify the power is off by testing with a non-conductive tool away from water. - 3
Shut off the cold-water supply
Close the cold-water inlet valve on top of the heater to stop incoming water. If you’re dealing with a sudden flood, do not attempt to drain yet—focus on containment and safety.
Tip: Use a towel to wipe up any immediate drips around the valve before touching it. - 4
Drain the tank safely (if possible)
Attach a drain hose to the drain valve and drain a small amount of water to relieve pressure once you’ve secured the area. Stop if the drain valve or hose leaks or if water is still actively spraying.
Tip: Only drain if you can access the valve without stepping in pooled water. - 5
Inspect leak points and decide on next steps
Check fittings, drain valve, and the T&P relief valve for dampness. Tighten fittings if needed, but stop if you encounter rust or wet tank shell—these indicate greater failure risk.
Tip: Record observations to share with a professional. - 6
Call a pro and plan replacement if needed
If the leak persists after adjustments, or if the tank shows corrosion, arrange for a licensed plumber. Discuss replacement options and whether an expansion tank is appropriate for your system.
Tip: Get a written estimate before any work begins.
Got Questions?
What causes a water heater to leak?
Leaks typically come from loose fittings, a failing drain valve, a faulty temperature/pressure relief valve, or tank corrosion. Regular maintenance can prevent many of these issues, but a tank leak usually signals replacement is needed.
Leaks usually come from fittings or valves, or from tank corrosion; regular maintenance helps, but a tank leak often means replacement.
Can I fix a leak myself?
Some leaks at fittings or the drain valve may be tightened or resealed by a competent homeowner. If the tank shows rust, or the relief valve is discharging, avoid DIY repairs and call a professional.
Some fittings can be tightened, but if the tank is rusted or the relief valve discharges, call a pro.
Is it safe to operate a leaking water heater?
No. Leaks pose risks of electric shock, water damage, and scalding. Shut off power or gas and water, and consult a professional before turning the unit back on.
No. Shut off power, gas, and water, and have a pro check before you use it again.
How long can I wait before replacing a leaking heater?
If the tank is leaking or shows significant rust, replacement is usually recommended. A professional can assess remaining life and safety, and discuss options.
If the tank leaks or rust is present, replacement is usually best; a pro can advise.
What should renters do if a heater leaks?
Renters should notify the landlord promptly and avoid DIY repairs. The landlord or property manager will arrange professional service and address any insurance considerations.
Tell your landlord right away and avoid trying DIY fixes.
What maintenance helps prevent leaks?
Regular flushing to remove sediment, inspecting fittings, and ensuring proper valve and relief valve operation reduces corrosion and stress on the tank.
Keep up with regular flushing and inspection to prevent leaks.
The Essentials
- Shut off power or gas immediately to stop the risk of shock or ignition.
- Close the cold-water valve to stop new water from entering the tank.
- Inspect common leak points before arranging professional help.
- Document the issue and seek a licensed technician for leaks from the tank.
- Regular maintenance reduces future leak risk and extends heater life.