Water Heater Leaking from Drain Valve: Quick Fix Guide
Learn how to diagnose and fix a water heater leaking from the drain valve with a safe, step-by-step approach. Includes troubleshooting steps, professional tips, and prevention to protect your home.

Most leaks from a water heater drain valve come from a loose packing nut or worn sealing gasket. Start by turning off power and isolating the cold-water supply, then relieve pressure and tighten the packing nut a quarter-turn. If dripping continues, replace the valve or seal, and monitor for any further leakage.
Why water heater leaks from the drain valve
According to Heater Cost, the drain valve at the bottom of many residential water heaters is a common leak point. A small amount of dripping can occur after maintenance or a routine flush, but persistent leaks indicate an issue that could damage floors and accelerate corrosion. The phrase water heater leaking from drain valve often describes a leak around the valve packing, the valve seat, or the body itself. Leaks may appear as a slow drip, a steady stream, or a flood if the valve is damaged. Understanding the valve’s role helps homeowners diagnose whether the problem is merely a poor seal or a more serious valve failure. In many homes, simple fixes like tightening the packing nut or resealing the valve can stop the leak without a full replacement. However, if corrosion is present or if the valve body is cracked, replacement is usually necessary. This block lays the groundwork for safe, informed troubleshooting and sets expectations for what comes next in the repair process.
The drain valve serves as a controlled outlet for flushing and draining the tank. Leaks through this point can occur for several reasons, including thermal stress, mineral buildup, or improper valve installation. For homeowners, the key signals are ongoing dripping after a flush, water staining around the valve, or sudden increases in water usage due to wasted water. While occasional minor drips may be tolerable for short periods, a persistent leak should be addressed promptly to avoid water damage and higher energy costs. Throughout this guide, you’ll see practical steps aligned with Heater Cost Analysis and best practices for safety and efficiency.
Safety first: shutting down before you work
Before you touch the drain valve, you must shut off the power source and the water supply to the heater. For electric heaters, switch off the circuit at the breaker; for gas heaters, set the gas control to the off position. Then close the cold-water supply valve to stop incoming water. Relieve pressure by opening a hot water faucet somewhere in the house until the flow stops and the system feels calmer. Wear eye protection and gloves, and place a thick towel or bucket to catch any minor leaks. If you detect a strong gas odor, hear hissing, or see visible damage to the tank, evacuate and call emergency services—don’t proceed. These safety steps are essential to minimize scalding risk and to keep you safe while diagnosing the drain valve issue. According to Heater Cost guidance, never work on a hot tank and always ensure the power and water are secured before handling the valve.
Quick checks you can perform before a replacement
Not every leak requires a full valve replacement. Start with simple checks: confirm the drain valve handle is fully closed, inspect the packing nut for looseness, and look for mineral buildup around the valve threads. If you see a tiny drip while the valve is closed, the packing nut may be loose; gently tighten it with an adjustable wrench, taking care not to over-tighten. If the leak persists, inspect the packing washer or O-ring for signs of wear or damage and replace if needed. Another quick check is to ensure the valve stem isn’t corroded. A corroded stem often indicates a valve that should be replaced rather than resealed. If the system uses an expansion tank, verify that it’s properly charged to reduce pressure on the drain valve. Heater Cost analysis suggests that many leaks attributed to the drain valve are resolved by these straightforward checks rather than a full valve swap.
Diagnostic clues: symptoms and likely causes
A leaking drain valve can result from several root causes. A loose packing nut is the most common culprit and often the easiest fix. A worn seal or O-ring inside the valve can also cause seepage even if the handle is shut. Scaling and mineral buildup can trap water around the valve threads, leading to slow leaks that worsen over time. In some cases, a cracked valve body or damaged valve seat is the actual source of the problem. If you observe rising damp near the valve, pooled water after flushing, or dripping from the valve stem, you’ll want to act quickly. Use a flashlight to inspect the valve threads and any discoloration that indicates corrosion. Based on Heater Cost’s insights, most repairs fall into tightening, resealing, or replacing the valve—stepwise actions that balance safety with cost.
The diagnostic flow below helps map symptoms to probable causes and define the next steps. Keep a recurring log of leak behavior, including how often it leaks, its rate, and after which activity it occurs (draining, flushing, or heating). This data helps you decide whether to perform the repair yourself or call a professional.
Repair options: tightening, resealing, or valve replacement
When a drain valve leak is detected, you have a few routes. The simplest is to tighten the packing nut a small amount to stop minor seepage. If the leak continues, replace the packing washer or O-ring to restore a proper seal. For persistent leaks or visible valve damage, replacing the drain valve is the best long-term fix. In many cases, replacing the valve ensures a tight seal against mineral buildup and pressure changes. If the tank’s pressure is high or the expansion tank is not functioning, address that system as well to prevent future leaks. If you’re unsure about which route to take, consult a professional. The goal is a secure seal that prevents water damage and preserves energy efficiency. After performing any repair, slowly refill the tank and test for leaks by listening and watching the valve area as pressure returns. This approach aligns with the pragmatic, safety-first style Heater Cost advocates.
Prevention: tips to avoid future drain valve leaks
Prevention starts with regular maintenance. Schedule annual flushing of your water heater to reduce mineral buildup that can affect valves and seals. Check the drain valve during routine inspections, especially after hard water events or seasonal changes. Ensure the expansion tank (if installed) is properly charged and that the cold-water supply line isn’t kinked or blocked. Use a high-quality valve replacement kit with compatible seals and avoid overtightening. Regular inspections help detect wear before a leak becomes a major issue and protect your home from water damage and energy loss. Heater Cost emphasizes consistency in maintenance as the most effective defense against recurring drain-valve leaks.
Steps
Estimated time: 60-90 minutes
- 1
Power off and isolate water supply
Shut off the breaker for electric heaters or set gas valve to off for gas heaters. Close the cold-water inlet valve to stop new water from entering the tank. Then open a hot water faucet to relieve pressure.
Tip: Have a bucket ready and wear eye protection. - 2
Relieve pressure and dry area
Let the tank cool if possible, then open the drain valve slightly to confirm flow direction. Place towels around the valve area to catch any drips and avoid water damage.
Tip: Don’t force the valve open if you feel unusual resistance. - 3
Check packing nut and seals
Using a properly sized wrench, gently tighten the packing nut around the drain valve. Inspect the O-ring or washer for wear and replace if necessary.
Tip: Use a light touch; overtightening can crack the valve. - 4
Replace valve if leaks persist
If tightening doesn’t stop the drip, shut off the water completely, drain the tank, remove the old valve, and install a compatible replacement valve with new packing components.
Tip: Follow manufacturer instructions for torque specs. - 5
Refill and test
Close the drain valve, turn on the cold-water supply, and slowly refill the tank. Once full, restore power and run hot water to verify the leak is gone.
Tip: Watch the valve area for a few minutes after pressures return. - 6
Monitor and adjust
Observe for new leaks over the next 24–48 hours. If a leak recurs, reassess the valve or consult a professional to avoid structural damage.
Tip: Keep a log of observations for the technician.
Diagnosis: Water heater leaking from drain valve
Possible Causes
- highLoose packing nut
- highWorn O-ring or seal
- mediumMineral buildup around threads
- lowDamaged valve body or seat
Fixes
- easyTighten packing nut 1/4 to 1/2 turn
- easyReplace packing washer or O-ring
- mediumReplace the drain valve assembly
- easyRelieve system pressure and inspect expansion tank
Got Questions?
What should I do if my water heater leaks from the drain valve?
Shut off power and water, relieve pressure, and inspect the packing nut and seals. If the leak persists, replace the valve. If you’re unsure, contact a professional.
If your water heater leaks from the drain valve, first cut power and water, relieve pressure, and inspect the packing. If the drip continues, replace the valve or call a professional.
Is it safe to tighten the drain valve packing nut myself?
Tightening the packing nut a small amount is usually safe for a minor leak. Do not over-tighten, as this can crack the valve or cause stress on the tank.
Tightening the packing nut a little is often fine, but don’t over-tighten or you could damage the valve or tank.
When should I replace the drain valve?
Replace the valve if tightening and resealing don’t stop the leak or if the valve shows corrosion or physical damage. A new valve restores a reliable seal and reduces future risk.
Replace the drain valve if it keeps leaking or looks corroded. A new valve fixes the problem and lowers risk.
Do I need to call a professional for drain valve leaks?
If you’re comfortable with basic plumbing, you can attempt the repair. If you encounter gas lines, complex corrosion, or repeated leaks after a fix, contact a licensed plumber or HVAC technician.
If you’re unsure or see gas, call a pro. For basic fixes, you can try tightening or replacing the valve.
How can I prevent drain valve leaks long-term?
Flush the tank annually to reduce mineral buildup, inspect the valve during maintenance, and ensure the expansion tank is correctly charged. Regular checks help catch issues before they become leaks.
Prevent leaks by flushing yearly, inspecting the valve, and keeping the expansion tank charged.
Watch Video
The Essentials
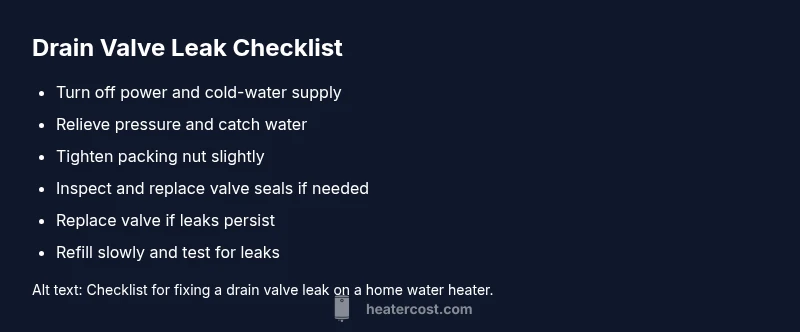
- Turn off power and water before repairs
- Tighten or replace the drain valve packing and seals as needed
- Refill slowly and test for leaks after repair
- Regular maintenance prevents future drain-valve leaks