Leaking Water Heater Tank: Troubleshooting Guide
Urent guide to diagnose and fix a leaking water heater tank. Learn sources, safety steps, DIY checks, and when to call a pro for replacement or repair in 2026.

Shut off the power or gas and close the cold-water supply to the heater. Wipe the area dry and inspect carefully to see whether the moisture is coming from the tank shell, the drain valve, or the pressure-relief valve. According to Heater Cost analysis (2026), most leaks from the tank require replacement or a professional inspection to confirm the source and safety. If the shell is corroded or the valve leaks, expect a replacement or professional assessment as the next step.
Is it really a leak from the tank? Distinguishing from condensation and fittings
When you first notice water around a water heater, it can be alarming. The phrase leaking water heater tank is often used, but the source may be something else. Condensation from the cold inlet line or humid basement air can resemble a leak. A loose drain valve or a small drip from the pressure relief valve may look like a tank problem even if the shell is intact. To assess, wipe the area dry and place a white tissue on the floor to observe fresh moisture versus dampness. Inspect the pipe connections at the top and around the drain valve. The goal is to identify the actual source before planning repairs, which saves cost and reduces risk.
Immediate safety steps you must take
Safety first. Before you do anything else, turn off power or gas to the heater and close the cold-water supply. If you must approach a water heater, wear gloves and use a flashlight to inspect corners and fittings. Keep children and pets away from the area and avoid touching wet electrical components. If you detect scorching heat, a hissing sound, or strong sulfur smells, evacuate and call emergency services. Once the area is safe, dry the surface and determine whether the leak is from the tank shell, a valve, or piping. Heater Cost recommends documenting the signs and contacting a licensed plumber for shell leaks or structural failures.
Common causes of a leaking water heater tank
Leaks usually stem from corrosion at the tank shell, a failing pressure-relief valve, or a faulty drain valve. Mineral buildup and sediment can accelerate corrosion, especially in hard-water areas. Loose or damaged fittings at the inlet/outlet pipes may also leak. Condensation can mimic a leak in warm climates or poorly vented spaces. Based on Heater Cost analysis (2026), shell leaks indicate the unit’s end of life and typically require replacement or professional assessment, while valve leaks may be repaired more easily if caught early.
Step-by-step diagnostic checklist
Run through this quick checklist to locate the leak source: 1) Power off, then shut the cold-water supply and drain any standing water. 2) Wipe dry and inspect the drain valve for drips or looseness. 3) Lift the TPR valve lever gently to see if water releases; note the amount and rate. 4) Examine all top connections and piping for signs of moisture. 5) If you suspect tank corrosion, perform a soap-test around the shell edges to detect tiny leaks. 6) Compare findings with local codes and consider professional help if the source is uncertain.
DIY fixes you can attempt safely
Starting with the easiest fixes keeps you moving quickly. First, tighten a loose drain valve with the system depressurized; do not overtighten. If the TPR valve leaks, replacing the valve or adjusting piping may stop the leak, but ensure you have a proper pressure test afterward. For condensation, improve space ventilation and insulation around pipes. If the tank shell shows corrosion or significant leaks, do not delay—schedule professional replacement. Always rinse and dry the area after any fix and monitor for new moisture over 24–48 hours.
When to replace or call a pro
If the shell shows rust, pitting, or active fluid leakage not from a valve, replacement is usually the safest course. Repairing a severely corroded tank is rarely cost-effective in the long run. For valve leaks, a DIY tightening might suffice, but beyond that you should call a licensed plumber to ensure safe venting, correct pressure, and proper disposal of the old unit. Heater Cost’s guidance emphasizes that aging systems nearing the end of life typically warrant early planning and budgeting for replacement.
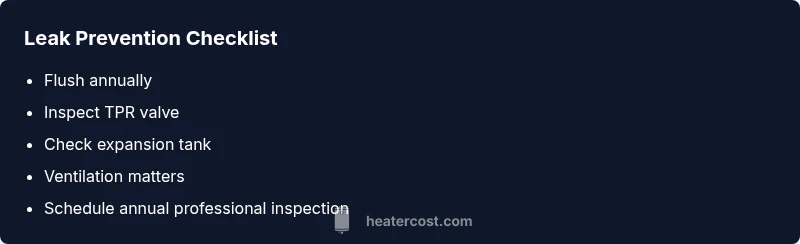
Maintenance to prevent future leaks
Preventive habits lessen the chance of future leaks. Flush the tank annually to remove sediment, inspect anode rods, and replace worn valves promptly. Check the expansion tank if you have a closed water system, as a faulty expansion tank can increase pressure and damage the tank. Use a water-softening or conditioning solution if your water is highly mineral-rich. Regular inspections and proactive maintenance, aligned with Heater Cost recommendations for 2026, help extend the life of your unit and protect your home.
Steps
Estimated time: 60-90 minutes
- 1
Power off and isolate the heater
Switch off the electrical circuit or gas supply to the water heater. This prevents any shock or flame risk while you inspect for leaks.
Tip: Use a non-contact tester to confirm no power is reaching the unit before touching wires. - 2
Shut off water and dry the area
Close the cold-water supply and drain any standing water from the tank so you can observe leaks without pressure.
Tip: Have towels ready and a bucket for a controlled drain if needed. - 3
Inspect drain valve and fittings
Look for obvious drips from the drain valve. Tighten gently if leaks persist and the valve is accessible.
Tip: Do not force valves open or closed; damage can worsen leaks. - 4
Test the pressure-relief valve (TPR)
Lift the test lever to see if water releases. A steady stream or spray indicates the valve is faulty.
Tip: If water continues to leak after release, replace the valve with the correct part. - 5
Examine tank shell and connections
Check for rust, corrosion, or pooling around the tank shell and near the fittings at the top.
Tip: If you see significant corrosion, plan for replacement rather than repair. - 6
Decide on repair vs replacement
Based on findings, choose repair (valves) or replacement (tank shell). Document findings for a contractor.
Tip: Consult a licensed plumber if shell damage is suspected.
Diagnosis: Water around the base of the heater or damp spots on shell or fittings
Possible Causes
- highTank corrosion leading to shell leak
- mediumFaulty temperature/pressure relief valve
- mediumLeaking drain valve or inlet/outlet fittings
- lowCondensation mistaken for a leak
Fixes
- easyTighten or replace a leaking drain valve after depressurizing the unit
- mediumReplace a faulty TPR valve or repair associated piping
- hardIf the tank shell is corroded, plan for full tank replacement
- easyAddress condensation sources (ventilation, insulation) to rule out false alarms
Got Questions?
What is the difference between a tank leak and condensation around a water heater?
A tank leak means water is escaping from the tank shell or fittings, indicating a failure. Condensation is typically moisture from the air or cool surfaces and is not a true leak from the tank. A quick test is to dry the area and observe if new water continues to form.
A true leak comes from the tank or fittings, while condensation is just moisture and usually stops after warming up the area.
Can I fix a leak myself without a professional?
Some valve leaks can be addressed by tightening or replacing a drain valve or TPR valve. Shell leaks, however, usually require a professional replacement due to safety and venting concerns.
You can handle simple valve leaks if you’re comfortable with basic plumbing, but call a pro for shell leaks.
How long does it take to replace a leaking water heater tank?
Replacement duration varies with unit type and location, typically a few hours plus removal time. A pro can provide a precise estimate after inspecting your setup.
A professional can tell you the exact timeline after checking the unit and space.
Is it unsafe to keep using a heater that leaks water?
Yes. Leaks can lead to electrical hazards, water damage, and mold growth. Stop using the heater and seek professional assessment immediately.
Yes—turn it off and call a professional if you see any leak.
What maintenance helps prevent future leaks?
Flush the tank annually, inspect anode rods, check valves, and monitor for corrosion. Ensure proper venting and pressure settings in a closed system.
Regular checks and maintenance can stop leaks before they start.
Should I replace the water heater if it’s more than 10 years old?
Age is a major factor. If leaks begin or you notice frequent repairs, a replacement may be more cost-effective in the long run.
If it’s old and leaking, consider replacing rather than repairing.
Watch Video
The Essentials
- Identify the true leak source before fixing.
- Safety first: power off and water shutoff.
- Shell leaks usually require replacement; valve leaks may be fixable.
- DIY fixes depend on fault type—call a pro when in doubt.
- Routine maintenance prevents future leaks.