Troubleshooting a Hot Water Heater Leak from the Bottom
Learn to diagnose and fix a hot water heater leak from the bottom with a practical, safety-focused guide—covering quick checks, diagnostic flow, repair paths, and prevention.

The bottom leak from a hot water heater is most often caused by a failing drain valve, a loose inlet/outlet connection, or tank corrosion. First, shut off power or gas and the cold-water supply, then place a bucket under the unit and relieve pressure to inspect the valve and fittings. If the leak continues, plan for repair or replacement.
What a bottom leak usually signals when dealing with a hot water heater leak from the bottom
A wet spot at the base usually means more than a simple splash. Most commonly, it points to issues with the drain valve, loose connections, or corrosion that has progressed to the tank itself. Because the tank sits below and near the floor, even a small drip can quickly escalate into a costly water-damage event. The key is to diagnose quickly and separate a valve or connection problem from a genuine tank failure. According to Heater Cost, bottom leaks that appear suddenly after routine use are often linked to valve wear or loose fittings, but aging tanks can also develop corrosion that undermines the shell. Early action preserves structure, reduces damage, and buys you time to decide between repair and replacement options.
Immediate safety steps you should take
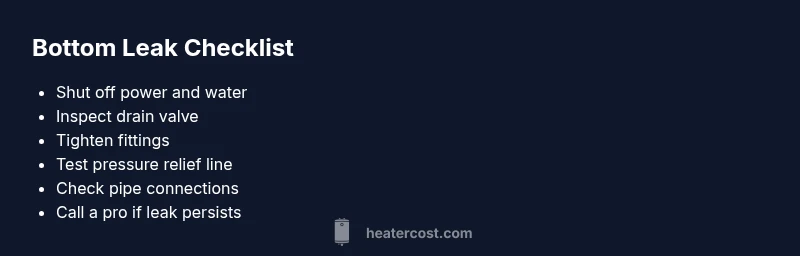
- Power down the unit (electric heater at the breaker, gas valve for gas units) and shut off the cold-water supply. 2) If you can do it safely, place a bucket or pan under the leak to catch water while you inspect. 3) Do not operate the unit if there is a strong gas odor or you notice scorching smells. 4) If there is standing water near electrical outlets or the heater, avoid contact and call a professional right away. 5) Once the area is safe, assess whether the leak is a valve issue, a loose connection, or tank corrosion. A quick test of the drain valve can reveal if it’s the source of the drip.
Common causes of a bottom leak and how to verify
- Drain valve wear or mis-sealing: A common culprit at the bottom. Tightening or replacing the valve with the right washer can resolve the drip.
- Loose or leaking inlet/outlet fittings: Pipes connect to the top and bottom of the heater; leaks can run down and appear at the base.
- Tank corrosion or shell damage near the bottom: Aging tanks may develop weak spots that leak slowly or suddenly.
- Faulty T&P valve discharge line: If the discharge line is blocked or misrouted, water may accumulate near the bottom as it escapes the tank.
Diagnostic approach: how to inspect safely and accurately
Begin with the simplest checks first. Inspect the drain valve for moisture around the threads and the valve stem. If tight, consider replacing the valve washer or the entire valve. Look for moisture at the cold-water inlet and hot-water outlet connections—tighten fittings if you notice dampness. Inspect the T&P valve and its discharge line for signs of leakage or corrosion. If you can see rust or pitting at the tank bottom, that’s a strong indicator of tank failure and replacement may be needed. Finally, run the heater briefly after re-securing valves and fittings to observe if the drip returns.
Repair paths and cost considerations (non-committal guidance)
For a leak at the bottom, you have several routes depending on the source. A tight or replaceable drain valve is the simplest fix and often the first step. Replacing leaking fittings or resealing pipe connections is a moderate fix. If corrosion is evident on the tank bottom or the shell shows significant rust, replacement is generally the recommended path, as attempting a repair on a compromised tank can fail soon after. Since costs vary by unit and region, consider the long-term value of repair versus replacement, especially for older units. Always prioritize safety and professional assessment when you suspect structural tank damage.
Prevention tips to minimize future bottom leaks
- Schedule regular flushing to remove sediment that accelerates corrosion and valve wear.
- Inspect and tighten drain valves and fittings annually.
- Install a properly sized expansion tank and ensure the T&P valve discharge line is clear and correctly routed.
- Keep the area around the heater dry and free of clutter to spot leaks early.
- If your unit is more than 10–15 years old or shows ongoing leaks, plan for a professional evaluation and potential replacement.
Steps
Estimated time: 2-4 hours
- 1
Shut off power, gas, and water
Begin by safely turning off the power to the unit (electric heater at the breaker; switch off gas for gas units). Then close the cold-water supply to stop incoming water. This prevents further flooding during inspection.
Tip: Safety first: never work on energized equipment. - 2
Inspect the drain valve area
Check for moisture around the drain valve threads and stem. If you see a small drip, tighten the valve gently with a wrench and replace the washer if needed. Do not over-tighten, which can strip threads.
Tip: Use a bucket to catch any residual water when loosening the valve. - 3
Check inlet/outlet fittings and lines
Look for damp spots at the cold-water inlet and hot-water outlet connections. Tighten fittings, re-seal with plumber’s tape if necessary, and inspect the discharge line from the T&P valve for blockages or damage.
Tip: Ensure the discharge line is directed to a safe drain and not blocked. - 4
Test the system and observe
With valves re-secured, briefly restore power or gas and water supply to test for leaks. Watch the drain valve and fittings closely for the next 10-15 minutes.
Tip: If you see any persistent moisture, do not continue testing; turn off the power and call a professional. - 5
Evaluate tank condition
If moisture returns from the tank bottom or if you notice rust, scale buildup, or bulging, the tank may be near failure. Plan for replacement and arrange professional assessment.
Tip: A repackaged or reconditioned tank is not a safe long-term fix for a corroded shell. - 6
Decide on repair vs replacement
For a first-time small valve drip, a DIY valve replacement may suffice. For persistent leaks or clear tank corrosion, a professional assessment is essential to determine replacement options.
Tip: Budget and safety considerations strongly favor professional guidance when corrosion is visible.
Diagnosis: Visible water pooling at the base of the hot water heater or dampness around the bottom
Possible Causes
- highLoose or faulty drain valve
- mediumCorrosion or rust at the tank bottom due to aging
- lowLeaks from inlet/outlet fittings or T&P valve lines near bottom
Fixes
- easyTighten the drain valve or replace the washer; reseal if the valve threads are damaged
- mediumReplace leaking inlet/outlet fittings or tighten loose connections
- hardIf tank corrosion is evident, plan for replacement and professional assessment
Got Questions?
What does a bottom leak on a hot water heater usually mean?
A bottom leak often points to a faulty drain valve or corroded tank. It can also come from loose fittings on the inlet/outlet lines or the discharge pipe. Quick inspection and safety steps help you decide whether a DIY fix is feasible or a pro is needed.
A bottom leak usually means a bad drain valve or tank corrosion. Check the fittings and drain valve, then decide if you can fix it safely or you need a professional.
Can I fix a bottom leak myself?
Some leaks from the drain valve or nearby fittings can be fixed with basic tools. If corrosion or tank damage is present, or if you’re unsure, call a licensed plumber. Always shut off power and water before starting.
You can fix simple valve leaks yourself, but if the tank shows corrosion, call a pro after turning everything off.
How long can I run a water heater with a bottom leak?
Running a heater with an active bottom leak risks water damage and higher energy waste. It’s best to shut it off and assess the source, then repair or replace as needed.
Don't run it; a bottom leak can cause damage and waste energy. Shut it off and inspect.
What maintenance helps prevent bottom leaks?
Regularly flush the tank to remove sediment, inspect and replace aging drain valves, ensure proper venting for the discharge line, and check fittings for tightness. Preventive care reduces corrosion risk and leakage.
Flush the tank regularly and check fittings; prevention reduces leaks.
Is a bottom leak always a sign of imminent tank failure?
Not always. A bottom leak can stem from a valve or fitting issue, which is repairable, but persistent moisture or rust on the tank bottom often signals replacement is the safer choice.
Not always. It could be a valve issue or corrosion; if corrosion is present, replacement is often best.
Watch Video
The Essentials
- Identify the leak source before attempting fixes.
- Prioritize safety: power, gas, and water shutoffs first.
- Valve or connection issues are often fixable without full tank replacement.
- If corrosion is present, plan for replacement rather than risky repairs.