Steps to Install Water Heater: A Complete Home Guide
Step-by-step guide to installing a water heater safely, covering permits, essential tools, venting basics, testing, and maintenance—brought to you by Heater Cost.

This guide walks homeowners through the essential steps to install a water heater, from selecting the right unit to securing permits and venting or wiring correctly. You’ll learn the order of operations, safety checks, and what to expect during a typical installation. By following these steps, you can plan, prepare, and avoid common installation pitfalls.
Prerequisites and safety considerations
Before you touch a water heater, confirm you understand local codes and safety requirements. Gas and electric installations pose different risks—gas lines require careful venting and leak testing, while electric units demand proper circuit protection and grounding. Always shut off the appropriate utilities and verify de-energization with a tester. Keep a fire extinguisher on hand and ensure clear access around the installation area. If you smell gas or notice evident leaks, stop and call a licensed professional. This section sets the stage for a safe, compliant installation and helps you avoid common safety pitfalls.
Key safety checks: verify shutoffs, test for gas leaks using a soap solution, and ensure carbon monoxide detectors are functional in the area. Budget time for permits if required by your municipality, and photograph the existing setup before you begin as a reference for your installer or future service calls.
Choosing the right water heater and preparing for installation
Selecting the correct unit is critical for long-term reliability and energy efficiency. Tanked models come in standard sizes (e.g., 40–50 gallons) and are generally easier to retrofit in existing spaces. Tankless units save space and can offer continuous hot water but may require larger gas lines or electrical upgrades. Consider your household peak usage, climate, and space constraints when sizing. Check energy efficiency ratings and venting requirements, and confirm local codes for installation clearances and exhaust routing. Laying out a practical plan now helps you avoid costly retrofits later.
Tools, materials, and permits you’ll need
Gather essential tools and materials before starting to avoid mid-project trips. A well-prepared list reduces downtime and improves safety. You’ll likely need wrenches, screwdrivers, Teflon tape, pipe dope, a voltage tester, appropriate shut-off valves, and venting components for gas models. Keep a battery-powered drill, level, and plumbers’ tape on site. Depending on your locale, permit approval may be required; check with your city or county building department and secure any necessary inspections in advance.
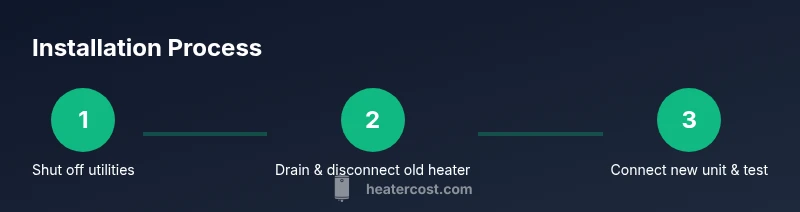
The installation sequence: overview and safety checks
A methodical sequence minimizes errors and leaks. Start by shutting off utilities and draining the old unit, then detach refrigerant or gas lines and disconnect electrical connections as applicable. Position the new heater, secure it according to code clearances, and attach the cold-water supply and hot-water return lines with proper fittings and thread sealant. Install venting for gas models and ensure proper electrical connections and grounding for electric units. Finally, fill the tank, purge any air, and perform leak and safety tests before restoration of operation.
Common mistakes to avoid and how to test after installation
Avoid reversing hot and cold lines and neglecting venting or gas leaks. Always check for leaks at every connection with soap solution or an approved leak detector, and verify the venting system is free of obstructions. After first firing, run hot water to purge air and confirm the thermostat settings meet household needs. Document the installation date and keep manuals handy for maintenance schedules and warranty requirements. A careful post-install test saves time and reduces call-backs.
Tools & Materials
- Adjustable wrench set(For securing fittings and disconnecting lines.)
- Pipe wrenches (12(To grip and turn large pipe fittings.)
- Teflon tape (PTFE) or pipe joint compound(Wrap on threaded connections to prevent leaks.)
- Gas-rated flexible connector (for gas models)(Use only if wiring and codes allow; upgrade if needed.)
- Voltage tester or multimeter(Confirm power is off before touching electrical components.)
- Shut-off valves for cold-water supply(Install if not present; essential for future service.)
- Venting materials (for gas models)(Ensure materials match your venting requirements.)
- Drain pan and collector bucket(Contain water spills during drain and flushing.)
Steps
Estimated time: 60-120 minutes
- 1
Shut off power and fuel supply
Locate and switch off the electrical breaker feeding the water heater and turn off the gas valve or fuel supply. Verify power is off with a tester and confirm there is no gas odor before proceeding.
Tip: Double-check the breaker with a non-contact tester, then test water heater circuits to confirm de-energization. - 2
Drain the tank
Attach a hose to the drain valve and open the valve to drain the tank. Allow the tank to empty completely and catch any sediment at the bottom.
Tip: Place the drain hose into a suitable area to avoid water damage and have a bucket ready for drainage if needed. - 3
Disconnect old connections
Carefully loosen the cold and hot water connections and disconnect any venting or electrical lines as applicable. Label wires or pipes if needed for clarity during reassembly.
Tip: Keep track of fittings and ensure you do not damage the surrounding pipes during removal. - 4
Remove the old heater
Unfasten mounting bolts, slide the old unit out, and prepare the installation space for the new heater. Check clearances and ensure the area remains dry and accessible.
Tip: Have a helper assist you with heavy lifting and alignment of the new unit. - 5
Position the new heater
Place the new water heater into position, ensuring level mounting and alignment with existing plumbing and venting paths. Mark the mounting points for secure anchoring.
Tip: Use a level to confirm the unit sits flat; misalignment can cause strain on connections. - 6
Connect water lines
Attach the cold-water supply line and the hot-water outlet using approved fittings and sealant. Tighten connections evenly to prevent leaks without over-tightening.
Tip: Apply Teflon tape in the direction of thread travel and test each joint after assembly. - 7
Install venting or electrical connections
For gas heaters, install the venting system according to code and connect the gas line while checking for leaks. For electric heaters, connect the electrical service and mount the thermostat safely.
Tip: Gas venting must be sealed and tested for leaks; electrical connections should be safeguarded from moisture. - 8
Fill, purge, and test
Open the cold-water valve to fill the tank while watching for leaks. Purge air by letting water run until steady hot water emerges. Restore power or gas and run the hot water until the system stabilizes.
Tip: Keep a close eye on connections during initial fill and check for slow leaks during the first hour of operation. - 9
Final checks and setup
Verify thermostat settings, confirm proper operation, and confirm venting or exhaust pathways are clear. Document the installation date and adjust settings as needed.
Tip: Record serials and model numbers for warranty and future maintenance.
Got Questions?
Do I need a permit to install a water heater?
Permit requirements vary by location. Check with your local building department and homeowners association. Having a permit helps ensure code compliance and safety.
Permit requirements vary by location; check with your local building department to confirm. Having a permit helps ensure safety and code compliance.
Can I install a water heater myself?
A skilled DIYer can install a water heater, but there are risks with gas, electricity, and venting. If you’re unsure, hire a licensed professional.
A skilled DIYer can install a water heater, but if you’re unsure about gas, electricity, or venting, hire a licensed professional.
What size water heater do I need?
Size depends on household size and peak hot-water demand. Use a sizing guide or consult a professional to select gallons and recovery rate.
Size depends on how many people use hot water and peak demand. Use a sizing guide or talk to a pro to pick the right gallons.
How long does installation typically take?
Most installs take between 2 and 6 hours depending on plumbing and venting complexity and whether upgrades are required.
Most installs take a few hours, usually between two and six, depending on your setup.
What safety tests should I perform after installation?
Check for leaks with soap solution, inspect venting for obstructions, and confirm the heater operates correctly with hot water tests.
Test for leaks, inspect the vent, and verify the heater heats water correctly with a hot-water test.
What maintenance is required after installation?
Flush the tank annually, inspect the thermostat, and test the pressure relief valve. Keep a maintenance log for warranty.
Flush yearly, check the thermostat, and test the pressure relief valve. Keep notes for warranty purposes.
Can I upgrade from a tank to a tankless system later?
Yes, but it involves different venting, gas line or electrical requirements, and space needs. Plan for a professional assessment.
Upgrading to a tankless system is possible but requires professional evaluation of venting, gas or electric needs, and space.
The Essentials
- Plan permits and codes before starting.
- Size and type of heater affect installation complexity.
- Follow a clear step sequence to minimize leaks.
- Test thoroughly for leaks and ventilation after install.
- Document settings and maintenance schedule.