Water Tank Heater Installation Guide: Costs, Steps, and Safety
Learn how to install a water tank heater safely, estimate typical costs, select the right unit, and follow a step-by-step guide with permits and safety tips.

You will learn the essential steps to plan, size, and install a water tank heater, including selecting the right tank, understanding electrical and plumbing hookups, and obtaining required permits. The guide also covers safety precautions, testing, and startup. Use this as a practical checklist to minimize energy waste and avoid common installation mistakes.
Why a Proper Water Tank Heater Installation Matters
Installing a water tank heater correctly is more than a one-off task. A well-planned setup affects energy efficiency, hot-water reliability, and system safety for years to come. Poor sizing, incorrect connections, or skipped permits can lead to higher operating costs, more frequent repairs, and potential safety hazards. According to Heater Cost analysis, 2026, homeowners who invest time in proper planning typically see better long-term reliability and smoother maintenance. When you approach installation as a coordinated project—sizing the unit for your home, preparing the space, and confirming code compliance—you set a solid foundation for comfort and energy efficiency. The goal is not just hot water today, but a resilient system that still performs well five to ten years down the line. In this section we translate that mindset into concrete decisions you can act on, even if you’re handling the job with a mix of DIY tasks and professional help.
Key ideas to keep in mind:
- Proper sizing matters: too small a tank leads to running out of hot water during peak usage, while an oversized tank wastes energy.
- Location and venting influence safety and accessibility: a well-vented, gravity-friendly location improves drafts, moisture control, and service access.
- Code compliance reduces risk: permits, licensed connections, and compliant materials minimize leaks and hazards.
Sizing and Choosing the Right Tank and Type
Sizing a water tank heater hinges on household hot-water demand, recovery rate, and your energy goals. Start by assessing use patterns: how many people in the home, typical shower duration, laundry habits, and how often the dishwasher runs. Rather than fixating on a single gallons-per-hour figure, look at the first-hour rating (FHR) and recovery rate provided by manufacturers. The right tank balances enough hot water for daily routines with sensible energy consumption. For most homes, a 40–60 gallon range covers typical family usage, but results vary with climate, water temperature, and simultaneous demands. In choosing the type, consider gas versus electric: gas tanks heat faster and may offer lower operating costs in some markets, while electric tanks have simpler venting needs and widely available electrical service. When exact numbers matter, rely on manufacturer specifications and your utility’s guidance. Based on Heater Cost research, efficiency and correct sizing are the two biggest levers for long-term costs.
Practical steps include calculating peak demand, evaluating recovery rate, and confirming compatibility with your current electrical panel and gas line. If you’re replacing an older unit, matching the new tank’s capacity to your home’s hot-water habits minimizes waste. Remember that insulation quality is critical: a well-insulated tank reduces standby heat loss and keeps water hot longer between uses.
Permits, Codes, and Safety Considerations
Before you begin any physical work, check your local building codes and permit requirements. Many jurisdictions require a permit for water-heater installation, and a licensed professional for gas connections or venting work. Failing to obtain proper permits can lead to fines, insurance complications, or issues during future renovations. Safety first means ensuring the space has adequate clearance, proper ventilation for gas models, and reliable shutoff access. The Temperature and Pressure (T&P) relief valve must be installed and tested following the manufacturer’s instructions to prevent dangerous pressure buildup. Electrical connections should comply with the National Electrical Code (NEC) or your local equivalent, and a dedicated circuit with appropriate overcurrent protection is typically required for electric tanks. Always verify venting requirements for gas models; improper venting can lead to carbon monoxide risk and indoor air contamination. In this section, we emphasize documentation, compliance, and the safety checks that accompany every installation.
Tip: Contact your local building department to confirm permit costs, required inspections, and approved materials lists before you buy equipment.
Tools, Materials, and Preparation
A successful installation starts with the right tools and materials. Gather items you’ll need and lay them out before you begin. Essential tools include wrenches of various sizes, a pipe cutter, thread sealant or Teflon tape, a pipe wrench, a voltage tester, a bucket, and a level. Materials should cover water supply lines, fittings for hot and cold inlets, pipe insulation, expansion tanks if required by your system, a new T&P relief valve, and appropriate mounting hardware. If you’re installing a gas model, you’ll also need venting components, sealing compounds approved for gas, and gas-rated connectors. For electric models, confirm panel capacity and wire gauge compatibility. Prepping the space means securing a stable, dry location with clear access to the electrical panel and plumbing shutoffs, installing a drip pan if needed, and ensuring the floor is level. Safety equipment like gloves and eye protection should be within reach. In short, the right tools and clean space reduce installation time and help prevent mistakes.
Note: Double-check that you have all installation accessories included with the new tank to avoid last-minute trips to the hardware store.
Common Installation Scenarios and Best Practices
Every home presents a unique set of constraints, but some universal best practices apply. For electric tanks, ensure the circuit breaker and wiring meet the tank’s amperage rating, and avoid shared neutrals that can create overloads. For gas tanks, verify gas line size, ensure proper gas pressure, and maintain clean combustion air access. In both cases, secure the tank in a supported frame, angle the plumbing to minimize stress on joints, and insulate hot water lines to curb heat loss. When replacing an old unit, consider upgrading to a more efficient model to gain energy savings and improved performance. If you’re upgrading from an older style, look at thermal expansion considerations and whether an expansion tank is advisable. Finally, after installation, fill the tank completely, bleed air from the lines, and test the T&P valve to confirm proper operation. With thoughtful placement and attention to code-specific requirements, you’ll improve reliability and reduce hazard risk over time.
Tools & Materials
- Adjustable wrench(Crucial for loosening/tightening fittings)
- Pipe wrench(Use on rigid piping connections)
- Teflon tape (PTFE tape)(Seal threaded pipe joints)
- Pipe cutter(Clean, straight cuts on copper pipes)
- Voltage tester(Verify power is off before work)
- Non-contact voltage tester(Quick safety check)
- Drip pan(Contain leaks during work)
- Bucket and rags(Catch water and keep area clean)
- Pipe fittings and adapters(Match inlet/outlet sizes to your setup)
- Expansion tank (if required)(Used for some installations to prevent pressure buildup)
- Vent kit for gas models(Required if local code demands specific venting)
- Sealant or contractor-grade putty(Water- and gas-rated when applicable)
- Safety gloves and eye protection(Personal protection)
Steps
Estimated time: 2-6 hours
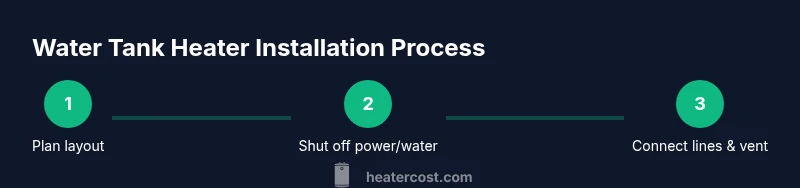
- 1
Verify compatibility and plan layout
Assess current space, confirm electrical panel capacity, gas line availability (if applicable), and determine best mounting location. Create a simple diagram showing hot/cold lines, valves, and the vent path for ongoing maintenance.
Tip: Document existing connections with photos before removing any components. - 2
Shut off power and water supply
Turn off the main power at the breaker panel and close the cold-water supply valve to prevent water flow during installation. Remove any existing heater and drain it completely to minimize spills.
Tip: Lockout/tagout the circuit if others may access the panel. - 3
Drain and prepare the space
Place a drip pan under the tank area, detach existing connections, and drain the system using the drain valve. Clean the area and ensure there is ample space for maneuvering and future service.
Tip: Have towels ready for residual water and check for any sediment buildup in the drain. - 4
Install water lines and fittings
Attach cold inlet and hot outlet pipes with approved adapters. Use Teflon tape on threads and verify unions are tight but not overtightened to prevent leaks. Insulate hot water lines to reduce heat loss.
Tip: Fit an expansion or check valve if your local code requires it. - 5
Run electrical or gas connections
For electric tanks, route wiring from the panel with appropriately rated gauge and secure with strain relief clamps. For gas tanks, install the gas connector and ensure proper venting, sealing, and gas pressure according to code.
Tip: Use a licensed professional for gas connections when unsure. - 6
Fill, test, and verify safety relief
Fill the tank slowly to purge air, then test the T&P relief valve per the manufacturer’s instructions. Check all connections for leaks with soapy water and monitor for several minutes.
Tip: Monitor the system for the first 24 hours to catch slow leaks early.
Got Questions?
Do I need a permit to install a water tank heater?
In many jurisdictions a permit is required for installation, especially when gas lines or venting are involved. Always check local codes and obtain any necessary inspections.
Most places require a permit for installation; check local codes and schedule inspections as needed.
Can I install a water tank heater myself?
You can perform non-Complex installations if you have plumbing and basic electrical skills. Gas or venting work should typically be done by a licensed professional. When in doubt, hire a pro to avoid safety risks.
You can do simple installs if you’re comfortable with plumbing and electricity, but gas work should be handled by a licensed pro.
What maintenance is recommended after installation?
Schedule an annual check, drain and flush the tank to remove sediment, and test the T&P relief valve. Inspect fittings for leaks and replace the anode rod if applicable.
Annual drain and flush, test the relief valve, and check for leaks are key maintenance steps.
What safety concerns should I watch for during installation?
Be mindful of gas leaks, electrical shocks, and scalding hazards. Ensure ventilation for gas models, proper wiring or gas supply, and correct valve operation before startup.
Watch for gas leaks, ensure proper ventilation, and avoid electrical shocks during setup.
How do I choose between gas and electric tank heaters?
Gas tanks often heat faster and may have different operating costs; electric tanks have simpler venting and broader electrical compatibility. Your decision should consider fuel costs, venting availability, and installation simplicity.
Gas heats fast but venting matters; electric is simpler to install but may depend on electrical capacity.
What costs should I expect for installation?
Costs vary widely by tank size, model, and labor. Expect a range based on unit type (gas or electric) and any code-required upgrades, such as wiring or venting improvements.
Costs depend on tank size and labor, with differences between gas and electric installations.
Watch Video
The Essentials
- Size the tank to match household hot-water demand
- Follow permits and code requirements to avoid hazards
- Securely connect water lines and verify leaks before startup
- Choose energy-efficient models to reduce long-term costs