How to Get Rid of a Rental Water Heater: A Tenant Guide
Learn how to get rid of a rental water heater with a landlord-friendly plan. This guide covers rights, permits, disposal, and safe removal steps for tenants and property managers.

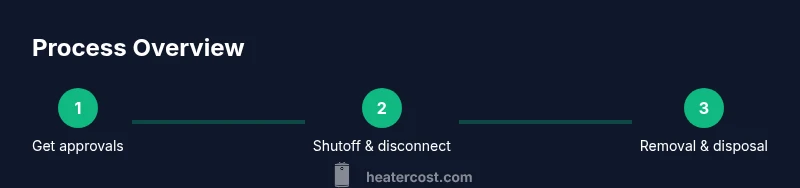
To remove a rental water heater, contact the rental company and your landlord, confirm responsibilities, and schedule removal or replacement. Follow our full step-by-step guide to handle safety, permits, and proper disposal correctly.
Understanding Your Rights and Responsibilities
Removing a rental water heater hinges on your lease and local housing laws. When you’re exploring how to get rid of rental water heater, start by reading the appliance removal clause and confirming whether the building owner or property manager must authorize decommissioning. In most cases, landlords own the unit and oversee removal or replacement, but tenants typically share responsibilities for access, cleanup, and documentation. Keep copies of all communications with your landlord and the rental company so you have a clear trail if questions arise during move-out. Understanding these rights from the outset reduces the risk of unexpected charges and speeds up the process. If you’re unsure, seek clarification in writing and request a written plan that outlines each party’s duties.
Clarifying Who Is Responsible for Removal
In rental scenarios, responsibility for removal often depends on who owns the unit and what your lease says about appliance removal at the end of tenancy. Some leases require the landlord to arrange and pay for removal, while others place the duty on tenants to coordinate access and scheduling. The key is to get this clarified in writing before work begins. If there’s any ambiguity, request a written amendment or a formal notice detailing who pays for which steps, including disposal,return of the old equipment, and any required permits. Clear allocation helps prevent disputes and makes the transition smoother for both parties.
Steps to Prepare for Removal
Preparation is the backbone of a smooth removal. Start by taking inventory of the water heater model, its location, and how it’s interfaced with gas or electricity. Photograph the unit, shutoff valves, and surrounding piping before any action. Notify your landlord and the rental company in advance, schedule access for technicians, and confirm whether a licensed professional must perform the removal. Create a simple, shared checklist that covers utility shutoffs, disconnects, and the return or disposal of the unit. This preparation reduces delays and ensures everyone is aligned on next steps, timelines, and responsibilities.
Safety First: Handling Gas, Electric, and Plumbing
Safety is non-negotiable when removing a rental water heater. If the unit is gas-powered, verify your gas supply is safely shut off at the main valve and do not attempt any work on gas lines without a licensed professional. For electric heaters, switch off the circuit at the main panel and verify no power is running to the unit. Always wear protective eyewear and gloves, and avoid disturbing venting or combustion air pathways. If you encounter rusted pipes, gas odors, or water leaks, stop immediately and contact the rental company or landlord to call in qualified technicians. Remember: improper handling can cause fire, gas leaks, or flooding.
Permits and Notifications: Do You Need One?
Permits for removing a rental water heater vary by location and utility type. In some jurisdictions, a permit is required to disconnect gas or vent connections, while others allow removal under the property owner’s supervision. Before you begin, check with your local building department or the utility provider to confirm whether a permit is needed and who can obtain it. If a permit is required, coordinate with the landlord and the rental company to ensure the permit application is submitted and approved before work starts. Documentation showing permits helps protect you from potential liability and ensures compliance with code requirements.
Coordinating with the Rental Company and Landlord
A successful removal hinges on effective coordination among you, the landlord, and the rental company. Confirm the removal window, who will be present to supervise access, and where the old unit will be disposed of or returned. Obtain a written work order detailing the scope, including shutoffs, disconnections, and the removal crew’s contact information. Maintain ongoing communication, share any photos or measurements, and request receipts for all services performed. This collaboration keeps everyone informed and reduces the chance of billing disputes after the job completes.
Disposal Options: Dump, Recycle, or Reuse
Disposal options depend on the unit’s condition, the local waste program, and the rental agreement. If the unit is still functional or salvageable, discuss whether it can be donated or repurposed. If disposal is required, coordinate with the landlord or rental company to arrange compliant removal through an approved recycler or landfill. Always avoid dumping household appliances in regular trash streams; improper disposal can pose environmental and legal risks. Keep disposal receipts, as these documents may be requested during move-out or for tax or record-keeping purposes.
Replacing vs. Decommissioning: What Comes Next
After removal, you’ll choose between decommissioning the system (leaving the space empty) or replacing it with a new, energy-efficient unit. If the landlord is replacing, confirm the model, installation location, and any warranties or service agreements. If you’re planning to upgrade, consider energy-efficient options like a tankless or high-efficiency tank unit, and discuss permit and hookup requirements with the landlord. Document the final state of the space with photos and keep all receipts for future reference.
Cost Ranges and Budgeting
When budgeting for removal, expect variability based on unit type, location, accessibility, and whether licensed professionals are required. Costs can be influenced by the complexity of disconnecting electrical or gas lines, venting reconfiguration, pipe work, and disposal fees. Because pricing is highly location-dependent, obtain multiple written estimates from licensed contractors and the rental company. Avoid relying on online metal-pricing charts alone; instead, request a line-item quote that clearly shows labor, parts, and disposal charges to prevent surprise bills later.
Quick Reminders and Best Practices
Keep communications in writing, verify appointments, and confirm the disposal method in advance. Take “before” photos of the installed heater and “after” photos of the removal area for documentation. If you’re unsure about any step, pause and consult the landlord or rental company. Always follow safety procedures and do not attempt work beyond your training. By staying organized and communicative, you’ll minimize delays and ensure a clean handover of the space.
Documentation and Getting Receipts
Documentation matters. Save all notices, work orders, permits, and disposal receipts, and store them with your move-out records. Take timestamped photos showing the final condition and the removed unit. If the landlord demands an inspection, provide the documentation promptly and politely. Documentation protects you from future disputes and helps support any energy-efficient upgrades you pursue later.
Final Checklist Before Sign-off
Review the written plan with the landlord and rental company, confirm the removal date, ensure utilities are safely isolated, and verify proper disposal or the return of the unit. Collect all relevant receipts, permits, and warranties, and capture final photos of the cleared space. Confirm that all cleanup tasks—such as sealing openings and restoring any affected walls—are completed. Finally, obtain a move-out clearance or completion confirmation in writing.
Tools & Materials
- Adjustable wrench(Choose size for the heater’s inlet/outlet fittings)
- Pipe wrench(Useful for stubborn threaded connections)
- Screwdrivers (Phillips and flat-head)(For mounting brackets and covers)
- Safety glasses(Protect eyes from debris and spills)
- Work gloves(Grip and protect hands during removal)
- Multimeter/voltage tester(Optional to verify power shutoff)
- Gas leak detector or soapy solution(Check for leaks after disconnecting gas line)
- Rags and bucket(Catch minor drips and clean area)
- Sealant or piping tape(Cap/plug open lines after removal)
Steps
Estimated time: 3-6 hours
- 1
Notify stakeholders
Contact your landlord and the rental company to announce the plan, confirm responsibilities, and agree on a removal window. Get written confirmation and document any decisions or conditions in an email or formal notice.
Tip: Keep all communications in one thread or folder for easy reference. - 2
Shut off utilities
For gas heaters, close the gas supply at the shutoff valve and inform the utility provider if you smell gas. For electric heaters, switch off the dedicated breaker and test that the unit has no power before touching it.
Tip: Use a non-contact voltage tester if you’re uncertain about power State. - 3
Disconnect power and plumbing
Carefully disconnect electrical connections and water lines with the unit supported. Cap or seal open lines after disconnection and ensure there’s no water pressure in the lines.
Tip: Do not force fittings; apply steady, even pressure to avoid damage. - 4
Prepare the removal area
Clear a path for removal, protect floors, and have a helper ready if the unit is heavy. Take photos before removal and label any exposed pipes or cables for later reassembly.
Tip: Use a towel or sheet to catch residual moisture during disconnects. - 5
Remove the unit
Lift or unmount the heater from its brackets, keeping it level to avoid spills or leaks. Have a plan for safe transport to the disposal or storage area.
Tip: If the unit is awkward to lift, disassemble brackets first and remove in pieces. - 6
Cap and seal lines
Cap any exposed gas or water lines and seal openings to prevent debris entry. Re-check venting paths and protect surrounding insulation from damage.
Tip: Double-check that no gas is leaking before closing up. - 7
Arrange removal and disposal
Coordinate with the landlord or rental company to arrange a disposal or return. Obtain a receipt or transfer document and ensure the unit is moved to the correct location.
Tip: Get a receipt that lists the disposal method and location. - 8
Document and finalize
Update the move-out checklist with removal details, store all paperwork, and confirm sign-off from the landlord. Share final photos of the cleared space as proof of completion.
Tip: Keep digital copies of all documents in a dedicated folder.
Got Questions?
Who is typically responsible for paying removal costs?
Responsibility varies by lease terms and local law. Often the landlord covers removal when ending a tenancy, but always confirm in writing. If you’re unsure, request a formal breakdown of who pays for each step.
Responsibility depends on your lease. Check the agreement and get it in writing.
Do I need a permit to remove a rental water heater?
Permits depend on your location and the heater type. Check with your local building department or utility company to determine permit requirements and who can obtain them.
Permits depend on your area; verify with local authorities before you start.
Can I remove a water heater myself?
Only if you have appropriate training and safety measures. Gas line work or venting should be handled by licensed professionals. For non-hazardous steps, follow the landlord’s approved process.
If you’re not trained for gas or electrical work, hire a pro.
What should I do with the unit after removal?
Return the unit to the landlord or rental company if required, or arrange disposal with a licensed recycler. Obtain a receipt and document the handoff.
Return it as directed or arrange proper disposal and get a receipt.
What documentation is essential?
Keep notices, work orders, permits, disposal receipts, and before/after photos. This documentation supports your move-out record and any future inquiries.
Save all notices, receipts, and photos from removal.
What safety steps are non-negotiable?
Shut off utilities, avoid working on live lines, wear PPE, and consult a pro for any gas line work. If you smell gas, evacuate and contact authorities.
Always shut off utilities and call a pro for gas lines.
Watch Video
The Essentials
- Clarify responsibilities in writing before removal.
- Prioritize safety: shutoffs, PPE, and professional help for gas work.
- Document everything to protect yourself from future charges.
- Coordinate disposal with landlord/rental company for compliance.
- Keep receipts and photos as part of the move-out record.