How to Remove a Water Heater: Safe Disposal Guide
Learn how to safely remove and dispose of a water heater with our step-by-step guide. Understand safety precautions, permits, disposal options, and costs to plan a compliant removal.

Prepare to safely disconnect, remove, and dispose of a water heater with a practical plan. This quick guide outlines essential safety steps, required tools, drainage and disconnection practices, and disposal options, including recycling and licensed pickup. You’ll learn about electrical and gas considerations, permits where needed, and how to stay compliant with local codes.
What removing a water heater involves
Removing a water heater is not a casual DIY task. It requires planning, safety precautions, and awareness of your home's utility connections. According to Heater Cost, a careful approach reduces the risk of leaks, burns, and electrocution while ensuring you meet local disposal rules. The phrase how to get rid of water heater is often searched by homeowners looking for a legitimate, safe path to replacement. The process includes identifying the type (electric or gas), preparing the space, disconnecting utilities, draining remaining water, and arranging transport to a recycling or disposal facility. Before you begin, inventory the parts you’ll remove, such as the venting on gas units if applicable, and decide whether you’ll haul yourself or hire a licensed service. Understanding the steps in advance helps you avoid costly mistakes and protects your home’s plumbing and electrical system.
Planning and safety considerations
Planning is the core of a safe removal. Evaluate the unit’s location, ceiling clearance, and floor condition. Safety is paramount; shut off at the main power panel for electric heaters, or the gas supply for gas heaters. Wear protective gloves, goggles, and sturdy boots. If your heater is in a tight space or above a finished surface, use a buddy and proper lifting equipment, if needed. Local codes may require permits or certified professionals; check with your city or county. The Heater Cost team recommends not improvising about gas lines or venting and to confirm who is responsible for decommissioning all related components.
Permits, codes, and environmental considerations
Disposal and removal can trigger local permit requirements, especially in multi-unit buildings or spaces with shared utilities. Always verify with your city’s building department before starting. Environmental considerations include proper drainage, preventing sediment or contaminants from entering street drains, and routing waste to permitted recycling or disposal facilities. Heater Cost analysis shows that choosing licensed recyclers or disposal services can reduce liability and ensure the tank and components are handled correctly. Avoid dumping or illegal disposal; improper handling may incur fines and safety risks.
Tools, materials, and preparation
Having the right tools and materials ready reduces time and risk. Gather safety gear, drainage equipment, and moving aids ahead of the removal day. Keep a cleanup kit on site to manage any spills. You’ll also want containers or absorbents to catch residual water and a plan for how the old tank will be transported. This preparation helps you work cleanly and minimizes disruption to your home’s plumbing and floors, while making it easier for a licensed pro if you decide to hire one.
Disposal options and cost considerations
There are several disposal routes for old water heaters. Recycling programs and metal recyclers often accept tanks, especially if you remove any gas lines or electrical components safely. Local curbside programs may offer bulky item pickup for a fee, or you can hire a licensed hauler who specializes in appliance removal. Costs vary by region, weight, and whether the tank contains hazardous materials. The Heater Cost team notes that choosing a reputable service can prevent hidden charges and ensure compliant recycling or disposal.
Replacements and future-proofing
If you’re replacing, consider a tanked or tankless model, depending on your home’s energy profile and hot water demand. Evaluate energy efficiency, installation requirements, and long-term operating costs. Proper disposal frees up space for a new unit and can simplify permitting if you upgrade. Budget for new installation by considering equipment costs, venting (gas), electrical work, and potential venting adjustments for safer operation in the future.
Hiring help vs DIY: what to consider
DIY removal is possible for some skilled homeowners, but removal and disposal often benefit from professional expertise due to electrical, gas, and venting hazards. Evaluate your comfort with handling heavy equipment, working near gas lines, and complying with local codes. If you hire a licensed technician or appliance removal service, verify credentials and obtain a written estimate outlining removal, transport, and disposal. The decision should balance safety, liability, cost, and convenience.
Tools & Materials
- Safety equipment (gloves, goggles, sturdy boots)(ANSI-rated PPE; slip-resistant footwear)
- Voltage tester and multimeter(Used to verify electrical de-energization)
- Adjustable wrench and pipe wrench(For loosening fittings and hose connections)
- Screwdriver set (Phillips and flat-head)(General fastener work and panels)
- Pliers and hose clamp pliers(Grip and control hoses and clamps)
- Bucket, rags, and absorbent material(Contain leaks and cleanup spills)
- Garden hose(For draining tank to a safe drainage spot)
- Teflon tape and sealant(Seal pipe connections during reassembly or cap)
- Dolly or moving straps(Assist lifting if space is tight)
- Gas shut-off tool or wrench (for gas units)(Shut off gas line safely before disassembly)
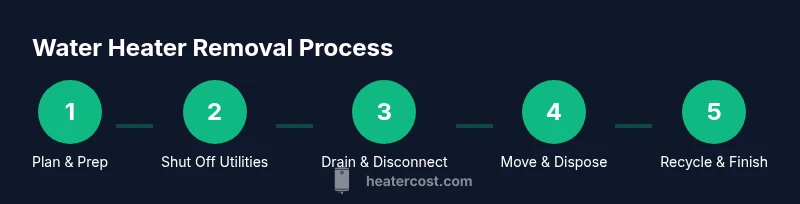
Steps
Estimated time: 2-5 hours depending on space, utilities, and whether you hire help
- 1
Shut off utilities and prepare the area
Power down electric heaters at the main breaker and shut off the gas valve for gas units. Clear a path and lay down protective coverings to catch spills. This initial step reduces risk and sets a safe stage for the removal.
Tip: If you smell gas or detect a strong gas odor, exit, evacuate, and call your gas utility immediately. - 2
Close the cold water supply and drain the tank
Locate the cold water shutoff valve on top of the heater and turn it clockwise to close. Attach a garden hose to the tank’s drain valve and run it to a safe drainage location. Open a hot water faucet nearby to vent air and speed drainage.
Tip: Open the drain valve slowly to avoid splashing; never force a stubborn valve. - 3
Disconnect electrical or gas lines
For electric heaters, switch off the circuit breaker and verify power is off with a voltage tester. For gas heaters, shut off the gas supply valve and carefully disconnect the gas line after depressurizing. Do not remove fittings while pressurized.
Tip: Work with a partner when handling heavy gas lines to prevent strain on piping. - 4
Detach venting and safety components (gas units)
If your unit is gas-powered, detach the vent or flue connection and step back from any remaining heat source. Remove the T&P valve, drain line, and any protective vent components as needed in a controlled sequence.
Tip: Label and photos the vent connections to help with reinstallation if you replace the unit. - 5
Disconnect water and move the unit
Unhook the hot and cold water lines from the heater, cap the lines, and drain completely. With help, carefully lift and move the tank to a truck or staging area for disposal or recycling.
Tip: Use proper lifting technique: bend knees, keep back straight, and rotate hips to avoid injury. - 6
Prepare the removal site and cover openings
Seal any open supply lines with caps or plugs and lay down protective mats to prevent floor damage. Confirm the area is clear of obstacles before transporting the unit.
Tip: Keep a spare cap set on hand for quick sealing of any exposed pipes. - 7
Transport to disposal or recycling
Transport the heater to a licensed appliance recycler or bulky item pickup service. Obtain a receipt or certificate of recycling and keep it for your records.
Tip: Call ahead to confirm pickup windows and required documentation. - 8
Document the process and clean up
Photograph the removal, keep disposal receipts, and perform a final check for leaks or drips. Restore any removed or capped lines only if you’re replacing the unit immediately.
Tip: Note any environmental considerations or local disposal rules for future reference.
Got Questions?
Can I remove a water heater myself, or must I hire a pro?
Removing a water heater can be done by a confident, dry-run helper, but it involves risks with gas lines, electrical connections, and potential leaks. If you’re unsure, hire a licensed technician to avoid safety hazards and ensure proper disposal.
You can DIY if you’re comfortable with gas and electricity, but it’s safer to hire a professional for complex setups.
Do I need a permit to remove a water heater?
Permit requirements vary by locality. In many places, removal itself doesn’t require a permit, but any replacement or plumbing work often does. Check with your city or county building department.
Check with local authorities; permits vary by area and project scope.
What happens to the tank after removal?
Most tanks are recycled as metal, while some components may require special disposal if they contain insulation or refrigerants. Use a licensed recycler or bulky-item pickup service to ensure proper handling.
Recycle the tank through a licensed facility or bulky-item service.
Are there safety concerns specific to gas water heaters?
Gas heaters involve shutoff valves, venting, and potential gas leaks. Always depressurize lines and confirm there’s no smell of gas before starting, and never work on gas lines without proper training.
Gas heaters require caution; when in doubt, call a pro.
Can I replace my water heater at the same time as removal?
Yes. If you’re installing a new unit, coordinate removal and installation to minimize downtime. Many services offer bundled removal and installation packages with a single quote.
Combining removal and replacement saves time and money.
What costs should I expect for removal and disposal?
Costs vary by region, unit type, and disposal method. Expect potential charges for haul-away, disposal, and any required permits. Request a written estimate before work begins.
Costs depend on location and whether you hire a pro.
What if my heater is in a cramped space?
In tight spaces, you may need special equipment and multiple people to safely maneuver the unit. Consider professional help to avoid damage to walls or fixtures.
Cramped spaces often benefit from a pro’s equipment and planning.
Watch Video
The Essentials
- Plan and verify utilities before touching the heater
- Choose an approved disposal route to avoid penalties
- Document removal for future replacements
- Consider professional help for safety and compliance