How to Remove a Water Heater: A Practical Step-by-Step Guide
Learn how to remove a water heater safely, with a complete step-by-step process for homeowners, including safety checks, draining, disconnecting utilities, lifting, and proper disposal.

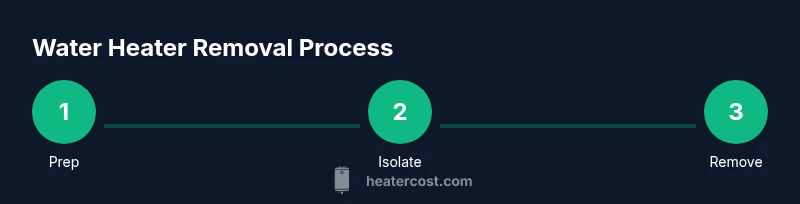
How to remove a water heater safely and correctly. This guide covers prep, shutting off utilities, draining, disconnecting lines, removing mounting, lifting, and disposal. According to Heater Cost, expect to encounter rusted fittings and a heavy tank; plan for a second set of hands and proper disposal streams. If you’re unsure, hire a licensed pro to avoid leaks or gas hazards.
Prep and Safety Basics
Removing a water heater is a task that can protect your home and your wallet when done correctly. The goal of this section is to establish a safe plan for how to remove a water heater and to identify situations when you should call a pro. According to Heater Cost, most home systems are designed so that a controlled teardown minimizes water damage, gas leaks, and electrical hazards. Start by surveying the space, noting access to the heater, nearby receptacles, and the path to the nearest outside exit for moving a heavy unit. Check the age and type of heater, as this affects how you shut off utilities and how you will dispose of the tank. Plan for at least one additional helper and lay out drop cloths or old towels to catch any spills. Clear the area of children and pets. Confirm you have a working flashlight and a way to communicate with a helper. A calm, methodical approach reduces stress and mistakes during removal.
Tools, Materials, and Safety Gear
Before you begin, gather tools and safety gear to ensure a smooth removal. This section aligns with best practices from Heater Cost and general safety standards. You will need items to disconnect water lines, drain the tank, and safely move the unit out of the workspace. Keep protective gloves, eye protection, and sturdy footwear on hand. Having everything ready reduces last-minute scrambling and lowers the risk of spills or injuries. Cross-check your list with the tools materials block to ensure nothing is forgotten.
Utilities Shutdown and Isolation
Shutting off utilities is the first and most critical safety step. Electric heaters require cutting power at the breaker or disconnect switch, while gas-fired units require closing the gas supply valve. If you smell gas or detect a hissing sound, evacuate and call emergency services. Isolating the heater from water and gas prevents leaks when you begin drainage and disconnection. In many homes, the main water shut-off valve should be closed before touching any plumbing connections to avoid backflow.
Draining the Tank and Relieving Pressure
Drainage is the heart of a safe removal. Attach a sturdy garden hose to the tank drain valve, route the hose to a safe location, and open the valve slowly. Open the T&P relief valve only if necessary and instructed by manufacturer guidelines, as this can release hot water and steam. Allow the tank to drain completely, which can take several minutes to hours depending on the size of the heater and your drainage setup. Have a bucket on hand for any residual drips and ensure the area is well-ventilated to dissipate heat and moisture.
Disconnecting and Detaching the Heater
With the tank drained, disconnect the cold and hot water lines, and, if applicable, the gas line. Electric models require unplugging the power cord or removing the fuse at the disconnect box, followed by verifying no voltage with a tester. Gas models require ensuring the gas line is fully shut off and then carefully detaching the gas piping using proper fittings. Remove the seismic brackets or mounting bolts that secure the heater to its base or wall studs. Keep track of all fittings and note their orientation for a potential replacement.
Removing the Unit and Preparing for Disposal
Plan the final move with an assistant. Carefully loosen the heater from its mounting, slide the unit toward the exit, and transport it to a disposal or recycling facility. Heavy tanks are cumbersome; use a dolly and body mechanics to minimize back strain. If you are replacing the heater, determine whether the old venting and T&P valve can be salvaged or must be replaced. Check local codes for disposal requirements, and arrange pickup or drop-off in advance. After removal, inspect the space for any leaks or water damage and address it promptly.
Special Scenarios and Common Issues
Older homes may have different configurations that affect removal, such as hard to reach shutoffs, corroded fittings, or integrated venting. Electric heaters can pose a shock hazard if wiring is disturbed, while gas heaters demand careful handling of the gas line and vent system. If you encounter persistent rust, a stuck valve, or a gas smell, stop and seek professional assistance. The Heater Cost analysis shows that most homeowners benefit from professional help for gas models or complex configurations to avoid hazards and ensure code compliance.
Authority Sources and Safety Standards
When removing a water heater, consult credible sources for safety guidelines. You can review general safety information and disposal guidance from established agencies and organizations. For technical references, see state and local building codes and guidelines. The following references offer foundational safety and disposal insights: Energy.gov, OSHA.gov, and EPA.gov. Always verify any local permit requirements before removal or replacement, and follow best practices for hazardous material handling.
Tools & Materials
- Heavy-duty dolly or cart(to move the tank safely; two-person lift recommended)
- Pipe wrenches (12-14 inch and adjustable)(for loosening inlet/outlet fittings and gas line where applicable)
- Non-contact voltage tester(to verify power is off for electric models)
- Multimeter(for confirming circuit de-energization in complex setups)
- Garden hose(to drain the tank into a floor drain or outside area)
- Bucket or large container(to collect water during draining)
- Flashlight or headlamp(ensures visibility in tight spaces)
- Gas shut-off tool or adjustable wrench(to shut off gas supply if the heater is gas-fired)
- Teflon tape or pipe thread sealant(for resealing threads if reinstalling a new unit)
- Rags, towels, and absorbent material(to catch drips and protect floor)
- Protective gloves and safety glasses(to protect hands and eyes during disconnections)
- Plywood or protective mats(to create a stable base on uneven floors)
Steps
Estimated time: Total time: 2-6 hours
- 1
Prepare the workspace and safety checks
Survey the area, confirm access and paths, and gather all tools. Notify others in the home and ensure pets are out of the workspace. Identify if the heater is gas or electric as this determines the shutdown sequence.
Tip: Have a helper ready and clear a path to move the unit through the doorway. - 2
Shut off power and gas supply
For electric models, switch off the circuit at the breaker or disconnect switch and verify no voltage with a tester. For gas models, close the gas supply valve and relight only after removal is complete if applicable.
Tip: Use a non-contact voltage tester to confirm power is off before touching any wiring. - 3
Shut off water and drain the tank
Close the cold water supply valve and attach a garden hose to the drain valve. Direct the hose to a safe location and slowly open the drain valve to begin draining. Open a hot water tap on a nearby sink to relieve pressure and speed drainage.
Tip: Drain water away from electrical outlets and avoid standing water near electrical panels. - 4
Disconnect water lines and safety devices
Loosen the cold and hot water connections with the appropriate wrenches. If your heater has a T&P relief valve, disconnect the discharge pipe according to manufacturer instructions and cap or redirect as required by code.
Tip: Place rags around fittings to catch drips and avoid scalding water. - 5
Relieve pressure and detach venting
For gas units, ensure the gas line is fully isolated. If there is venting or a flue, detach only as instructed by the manufacturer and leave the venting in place if you are not replacing the unit immediately.
Tip: Do not force fittings; if a thread is corroded, stop and seek a professional. - 6
Unbolt and lift the heater from its base
Remove mounting brackets or bolts securing the tank to its base or wall studs. With help, carefully tilt and slide the unit away from walls and obstacles.
Tip: Use a dolly and proper lifting technique to prevent back strain. - 7
Move out and prepare for disposal
Carefully transport the heater to your disposal or recycling facility. Verify local requirements for tank recycling and arrange pickup if needed. Inspect the space for leaks and clean up any spills.
Tip: Take a photo of the final setup for your records and future replacement reference.
Got Questions?
Is it safe to remove a water heater by myself?
Removing a water heater can be safe if you follow proper safety steps and local codes. This includes shutting off power or gas, draining the tank, disconnecting lines correctly, and using the right tools. If you are unsure at any point, stop and call a licensed professional.
Yes, it can be safe if you follow safety steps and local codes; if you’re unsure, call a professional.
Do I need a permit to remove a water heater?
Permit requirements vary by location. Some jurisdictions require a permit for removal and replacement due to disposal and venting considerations. Check with your local building department before starting.
Permit rules vary by location; check with local authorities before starting.
What should I do if I smell gas during removal?
If you smell gas, exit the area immediately and call your gas utility or emergency services. Do not operate electrical switches or light switches, which could ignite a gas leak.
Exit the area and call the gas utility if you smell gas; do not use any switches.
Can I reuse venting or T&P valve for a replacement?
It depends on the replacement unit and local codes. Many replacements require new venting components and a new thermal expansion device. Always follow the installation manual and local code requirements.
Replacement often needs new venting and expansion devices; follow the manual and local codes.
How should I dispose of an old water heater?
Most old water heaters are recyclable. Contact a local recycling center or waste disposal service to arrange pickup or drop-off. Some manufacturers or retailers offer take-back programs for old units.
Recycle where possible; check with local centers or manufacturer take-back options.
What if my water heater is electric and has no gas line?
Electric heaters follow the same shutdown procedure but do not involve gas lines. Ensure the breaker is off and use a voltage tester before handling wiring. Remove the tank with the same caution as gas models.
Electric heaters are simpler—just kill power and disconnect wiring safely.
Watch Video
The Essentials
- Plan thoroughly and prioritize safety.
- Shut off utilities before touching any connections.
- Drain completely and protect against spills.
- Move the unit with proper equipment and help.
- Dispose or recycle per local guidelines and upgrade with a safer replacement.