Do It Yourself Pool Heater: Safe, DIY Installation & Maintenance
Learn how to safely install a do it yourself pool heater with planning, permits, sizing, and maintenance tips. This guide covers choosing a heater type, wiring or gas connections, venting, and when to hire a pro.

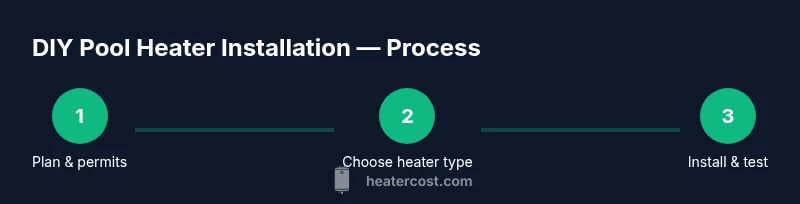
You can install a DIY pool heater with proper planning, safety checks, and the right equipment. This guide covers choosing a heater type, sizing, permits, electrical or gas connections, venting, and routine maintenance. Always confirm local codes and consider professional help for complex installs. We’ll outline safety requirements, common mistakes, and cost considerations so you can evaluate DIY feasibility.
What a DIY pool heater can do for you
According to Heater Cost, a well-planned do it yourself pool heater project can extend your swimming season and increase comfort, provided you respect safety, sizing, and local codes. A DIY approach is most feasible when you have a straightforward upgrade or replacement, clear access to utilities, and the relevant installation manual from the heater manufacturer. When done correctly, a DIY pool heater can improve comfort, reduce energy costs over time, and give you a sense of accomplishment. However, the risks of electrical or gas work are real, and improper installation can lead to leaks, fire hazards, or carbon monoxide exposure. The Heater Cost team emphasizes that this is not a “set it and forget it” task; you must monitor operation, schedule regular maintenance, and stay up to date with local codes and safety standards. If you’re unsure at any point, pause and consult a professional.
Safety first: electrical, gas, and venting basics
Safety is the cornerstone of any DIY pool heater project. Before you touch any wires or gas lines, verify that the circuit is de-energized and the gas supply is shut off. Wear proper PPE, use non-conductive tools where appropriate, and keep a clear work zone away from pool chemical storage. Venting is non-negotiable for gas heaters; improper venting can cause dangerous exhaust buildup. For electrical work, ensure outdoor-rated enclosures, weatherproof connections, and appropriate grounding. If you’re not confident about gas lines, venting paths, or electrical codes, it’s wise to consult a licensed professional. Regularly inspect fittings for corrosion and leaks, especially after seasonal exposure.
Permits and codes: what you need to know
Permits and local codes vary by jurisdiction, and they can affect whether you’re allowed to complete a pool heater upgrade yourself. The first step is to contact your local building or code enforcement office to understand permit requirements for electrical or gas work, as well as any pool-specific rules. Even when a permit isn’t required, certain installations must meet energy and safety standards. According to Heater Cost analysis, documenting compliance with code requirements reduces the likelihood of inspection failures and future compatibility issues. Keep copies of manuals, receipts for components, and any inspection approvals for your records.
Heater types: electric, gas, or heat pump—what to know for DIY
Choosing the right heater type is the foundation of a successful DIY project. Electric resistance heaters are often easier to wire into existing circuits, and heat pumps can deliver high efficiency in moderate climates, though they may require more space and insulation. Gas heaters typically offer faster heat delivery but involve gas lines, venting, and combustion safety considerations. Each type has installation nuances, upfront costs, and ongoing operating expenses. Assess your climate, pool size, and desired performance before selecting a unit. Manufacturer manuals and installation guides are your best source for compatibility and required clearances.
Sizing and site considerations: planning for performance
Sizing a pool heater involves matching the heater’s output to your pool’s heating load, climate, and desired temperature rise. A common approach is to estimate energy needs based on pool volume, desired water temperature, and typical temperature swings in your area; however, exact numbers should come from the heater’s sizing chart and a professional evaluation if you’re unsure. Site considerations include mounting location, exposure to the elements, ventilation (for gas), and proper drainage. Ensure there’s adequate clearance around the heater for service access and routine maintenance. A well-placed unit reduces heat loss and maximizes efficiency.
Installation realities: mounting, plumbing, and clearances
Installation involves secure mounting, correct plumbing connections, and reliable electrical or gas terminations. Use manufacturer-provided mounting brackets and ensure a sturdy surface. Plumbing connections should use appropriate pipes, fittings, and sealant approved for outdoor use; avoid cross-threading and overtightening. Electrical wiring must meet code requirements, including weatherproof conduit and proper grounding. Gas installations require leak testing, correct venting, and adherence to local gas codes. If any step seems unclear, pause and seek guidance from a qualified technician.
Maintenance and long-term care after a DIY install
Once your pool heater is up and running, establish a maintenance routine. Periodically inspect connections for leaks, check venting paths for blockages, and test thermostat calibration. Flush water lines as recommended by the manufacturer to prevent mineral buildup, and winterize the system if you live in a freezing climate. Regularly replace gaskets and seals as they wear, and keep a maintenance log with dates, temperatures, and any issues. A proactive approach reduces downtime and prolongs heater life.
When to hire a pro: recognizing limits and ensuring safety
There are scenarios where professional help is wise or required. If your project involves electrical work beyond a simple outlet or switch, gas line modifications, or any alteration to venting or fuel supply, a licensed contractor is the safer choice. Even experienced DIYers should consider a pro for critical steps, permits, or complex integration with pool automation systems. The Heater Cost team recommends evaluating your comfort level, equipment compatibility, and local regulations before proceeding.
Tools & Materials
- Safety gear (gloves, goggles, non-slip boots)(ANSI-rated PPE; chemical-resistant gloves; eye protection)
- Non-contact voltage tester(Always verify power is off before handling electrical components)
- Multimeter / voltage tester(Use for electrical checks and continuity testing)
- PVC/CPVC pipe cutter and saw(For precise cuts in outdoor-rated piping)
- PVC/CPVC primer and cement(Choose solvents compatible with your piping material)
- CPVC/PEX piping, fittings, and adapters(Match sizes to your heater connections and pool plumbing)
- Shut-off valves and unions(Isolation points for safe maintenance and replacement)
- Outdoor-rated electrical enclosure and conduit(Weatherproofing is essential for safe outdoor use)
- Gas-rated piping materials (if using gas heater)(Certified components and proper venting are required)
- Manufacturer installation manual(Follow manufacturer guidelines precisely)
Steps
Estimated time: 4-8 hours
- 1
Assess scope and local rules
Document pool size, climate, and your existing utilities. Check whether local codes require permits for electrical or gas work and review the heater’s installation manual for compatibility. This upfront planning prevents costly mistakes later.
Tip: Take photos of your current setup to reference during the install. - 2
Choose heater type and size
Select electric, gas, or heat pump based on climate, pool size, and desired heating speed. Verify the unit’s efficiency rating and ensure the space can accommodate the unit with proper clearances and ventilation.
Tip: Start with the manufacturer's sizing chart, then cross-check with your local climate data. - 3
Shut off utilities and establish safety zone
Power down the circuit at the breaker and secure the area to prevent accidental activation. For gas units, shut off the gas supply and verify there is no combustion gassing in the area. Confirm all air intakes and exhausts are clear.
Tip: Use a padlock on the breaker to prevent accidental re-energization. - 4
Prepare mounting location and plumbing
Choose a sturdy, weather-protected location with adequate clearance. Plan pipe routes that minimize bends and avoid sharp turns. Install shut-off valves and unions near the heater for easy servicing.
Tip: Dry-fit pipes first to avoid last-minute adjustments. - 5
Make electrical or gas connections
For electric heaters, run appropriately rated wiring in weatherproof conduit and secure with strain-relief clamps. For gas heaters, follow a licensed installer’s steps for gas line connections and venting. All connections must be tested for leaks or continuity.
Tip: If you’re unsure about wiring or gas lines, hire a licensed professional. - 6
Pressure test, leak check, and priming
With the system closed, perform a pressure test and inspect all joints for leaks. Prime the pump and ensure air is purged from lines before final startup. Confirm that the venting path is unobstructed for gas units.
Tip: Keep a leak-detection solution handy to quickly identify issues. - 7
Fill, start, and monitor
Fill the system and gradually bring it up to operating conditions. Monitor temperature, flow, and safe operation for the first several hours. Check for unusual noises or leaks and adjust settings as needed.
Tip: Document initial readings to compare with future performance. - 8
Maintenance planning
Create a maintenance calendar, including periodic valve checks, gasket inspections, and seasonal flushes. Keep a log of service and any component replacements to extend the life of your heater.
Tip: Set calendar reminders for annual inspections.
Got Questions?
Is it legal to install a pool heater myself?
Permits and code requirements vary by location. Check with your building department and energy code for guidance. Even if not required, following code improves safety and future compatibility.
Permits and codes vary by location. Check with your local building department to be sure.
Do I need a permit to install a pool heater?
In many areas, electrical or gas work requires permits. Not obtaining permits can lead to fines and safety issues. Always verify requirements before starting.
Most places require permits for electrical or gas work.
Which heater type is easiest for a DIY install?
Electric resistance heaters and some heat-pump setups are generally easier for DIY, while gas units require careful venting and gas line work. Choose based on your climate and access to skilled labor if needed.
Electric or heat pump units are usually easier for DIY.
How long does a DIY pool heater project take?
A straightforward upgrade can be completed in a day; more complex installations may take multiple days, especially if permits or inspections are involved.
A simple upgrade might be a day; complex installs take longer.
What maintenance is needed after a DIY install?
Regular checks of plumbing leaks, electrical connections, and thermostat calibration help prevent downtime. Winterize as appropriate for your climate and follow the manufacturer’s maintenance schedule.
Keep up with leaks, connections, and routine maintenance.
When should I hire a pro?
If you’re unsure about electrical, gas work, venting, or code compliance, hire a licensed professional to complete or review the installation. This minimizes risk and ensures safety.
If you're unsure about code or safety, hire a pro.
Watch Video
The Essentials
- Plan thoroughly before starting any install.
- Choose a heater type suited to climate and pool size.
- Check permits and local codes to stay compliant.
- Maintain the system regularly to maximize life and efficiency.