When Your Water Heater Isn’t Heating: Quick Troubleshooting Guide
Urgent troubleshooting guide from Heater Cost to diagnose and fix a water heater not heating, with a clear diagnostic flow, step-by-step actions, safety tips, and maintenance advice.

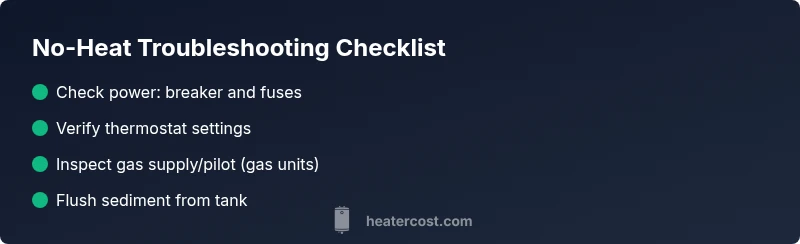
If your water heater isn’t heating, start with the basics: reset the breaker, check thermostat settings, and ensure gas supply or pilot light is on. Most no-heat issues respond to these simple fixes. According to Heater Cost, addressing these basics first prevents costly repairs and buys you time before a professional assessment.
Understanding the problem: what no-heat means for your home
When a water heater stops delivering hot water, daily routines suffer and energy usage can spike as you run longer cycles. The phrase when water heater not heating captures a range of scenarios—from a cold shower to a tank that never reaches temperature. This section explains what hot water should feel like, common symptoms signaling a failure, and why quick, careful troubleshooting matters. The Heater Cost team notes that most households can identify the issue early with basic checks, helping avoid unnecessary replacements. By understanding electric versus gas models, you’ll target the right solution without guessing. This isn’t just about comfort; it’s about safety, efficiency, and long-term reliability of your heating system.
Quick safety and power checks you can do right away
Safety first. Before you touch any heating element, ensure your personal safety and gear up with gloves if you’re handling hot parts. Then, work through a sequence of simple checks:
- Turn off power at the main breaker for electric units and verify there’s no live current at the terminal.
- Look for a tripped breaker or blown fuse and reset/replace as needed.
- Inspect the thermostat setting (often 120°F/49°C as a baseline) and adjust if it seems off.
- For gas models, confirm the gas valve is open and the pilot light is lit (if applicable).
These steps resolve many no-heat calls and are the easiest, lowest-cost actions. Heater Cost Analysis, 2026 shows that these basics address a large share of failures. If cold water persists, move to deeper checks and consider professional help.
How the heating system works: electric vs. gas (refresh)
A quick refresher helps you diagnose correctly. Electric water heaters use one or two elements in a tank that heat water when powered by electricity. Gas models rely on a burner beneath the tank, controlled by a thermostat and a gas valve. In either case, the thermostat instructs the heating source to reach the set temperature. A failure can lie with the thermostat, the heating source, or with supply lines. Knowing which system you have narrows the possible causes and reduces iterations. This understanding also helps you explain the problem clearly when you call a technician. The goal is to identify whether heat is failing at the source, the sensor, or the distribution path (pipes and taps).
Common causes of no heat and how to prioritize them
Priority sequencing matters when when water heater not heating. Start with the simplest, most common issues:
- Tripped breaker or blown fuse on the electrical panel (high likelihood)
- Incorrect thermostat setting or a faulty thermostat (high likelihood)
- Gas supply issues or a pilot light that’s out (medium likelihood for gas units)
- Heating element failure (electric units only; medium likelihood)
- Sediment buildup in the tank (low to moderate likelihood)
- Faulty high-limit switch or safety device tripped (low likelihood)
Understanding these causes helps you decide which fixes to attempt and when to call a professional. Based on Heater Cost analysis, 2026, most homeowners recover heat with basic fixes. If your unit is old or a gas model lacks a safe pilot, professional service becomes advisable.
Diagnostic flow: from symptom to solution (structured path)
A clear diagnostic flow saves time and reduces unnecessary parts replacement. Start with the symptom: no heat from the faucet or a dramatically cooler output. From there, move through likely causes in order: power, thermostat, gas supply (if applicable), heating element, and sediments. For each suspicion, verify the fix and test the system after applying it. If you’re unsure at any point, stop and call a professional—safety is paramount and mistakes can be costly. Heater Cost recommends documenting your checks to share with a technician for faster resolution.
Step-by-step diagnostic and fixes you can perform (practical guide)
This section complements the diagnostic flow with concrete actions you can take.
- Check power and reset the breaker. If the breaker tripped, reset it, wait a few minutes, and run hot water to test.
- Tip: Take a photo of your panel labeling for future reference.
- Confirm thermostat setting and test. Ensure it’s set to a safe baseline (~120°F/49°C) and adjust if needed.
- Tip: If you suspect a faulty thermostat, avoid replacing it without confirming power is off.
- Inspect gas supply and pilot (gas units only). Verify the gas valve is open and the pilot light is steady or reignite if instructed by the manufacturer.
- Tip: If you smell gas, evacuate and call your gas provider immediately.
- For electric tanks, test the heating elements. If you have access to an ohm-meter, check continuity and replace a failed element.
- Tip: Only perform electrical testing if you’re confident; otherwise skip to professional service.
- Flush and drain the tank to remove sediment buildup. This can improve heating efficiency and flow.
- Tip: Follow manufacturer instructions and avoid scalding injuries.
- Inspect for leaks and damaged components. A slow leak or corroded tank can cause heat loss and heat failure.
- Tip: If you detect leaking, shut off the water and call a technician.
Total time: 45–90 minutes depending on model and access. If you’re not comfortable with any step, stop and call a professional for safety.
Maintenance and prevention to avoid future no-heat issues
Prevention keeps your water heater reliable and efficient. Schedule regular maintenance to address common culprits before they become failures.
- Perform annual flushing to remove sediment and scale that inhibit heat transfer.
- Inspect anode rods and replace as needed to prevent tank corrosion.
- Check the expansion tank and pressure relief valve to ensure safe operation.
- Keep vents, chimneys, and exhaust pathways clear for gas models to maintain proper combustion.
- Replace aging components, including thermostats and heating elements, on a sensible cycle based on manufacturer guidance.
With proactive care, you reduce the odds of encountering a sudden loss of heat. Heater Cost recommends tracking maintenance tasks and setting reminders to stay on top of essential checks.
Steps
Estimated time: 45-90 minutes
- 1
Check electrical power
Turn off the power at the breaker, then turn it back on. Listen for a hum or feel the thermostat to see if it’s responsive. If the breaker trips again, there is likely a short or overload.
Tip: If you’re unsure about wiring, skip to a professional to avoid shock or fire risk. - 2
Verify thermostat settings
Confirm the thermostat is set to a safe baseline (around 120°F/49°C). If the thermostat is old or non-responsive, consider replacement or professional testing.
Tip: Record the current setting before adjusting so you can revert if needed. - 3
Check gas supply/pilot (gas units)
For gas models, ensure the gas valve is fully open and the pilot light is burning steadily. If the pilot won’t stay lit, you may need to relight or service the valve.
Tip: If you smell gas, do not attempt to relight; evacuate and contact your provider. - 4
Inspect heating element (electric only)
If you have access to an ohmmeter, test heating element continuity. Replace a faulty element following manufacturer guidelines.
Tip: Only test electrical components with power disconnected. - 5
Flush the tank
Drain a portion of the tank to remove sediment that can impede heating. Refill and test with hot water to evaluate improvement.
Tip: Follow safety steps to avoid scalding and water loss. - 6
Check safety devices and leaks
Inspect the pressure relief valve and look for signs of leaks or corrosion. Address any leaks promptly and replace worn parts.
Tip: A leak is a signal to stop using the unit and call a professional.
Diagnosis: No hot water or significantly cooler water despite thermostat setting
Possible Causes
- highPower issue (tripped breaker or blown fuse)
- highThermostat setting or thermostat failure
- mediumGas supply issue or pilot light out (gas unit)
- mediumHeating element failure (electric unit)
- lowSediment buildup in the tank
Fixes
- easyReset the circuit breaker and retest hot water
- mediumReplace or recalibrate the thermostat
- mediumRelight pilot or verify gas supply (gas units)
- hardReplace heating element(s) in electric units
- easyFlush the tank to remove sediment buildup
Got Questions?
What is the first thing I should check if my water heater isn’t heating?
Begin with safety and power: reset any tripped breakers, verify thermostat settings, and confirm gas supply or pilot status if you have a gas heater. These checks resolve many no-heat issues without expensive parts.
Start by checking the breaker and thermostat, and ensure the gas valve or pilot is functioning if you have a gas heater.
Can sediment buildup stop heating entirely?
Yes, heavy sediment can insulate the water from the heater elements, reducing efficiency or stopping heat transfer altogether. Flushing the tank regularly helps prevent this.
Sediment can block heat transfer; a tank flush can restore heating performance.
Is it safe to replace heating elements myself?
Replacing heating elements can be dangerous if you’re not comfortable with electrical work. Follow manufacturer guidelines and consider a professional if you’re unsure.
Element replacement is doable for some, but don’t risk shocks or fires if you’re unsure.
Should I diagnose gas-related problems myself?
Gas problems involve combustion safety. If you suspect gas issues, contact your gas utility or a licensed technician immediately.
Gas issues require professional handling for safety and compliance.
When is professional help unavoidable?
If power checks don’t resolve the issue, if you smell gas, or if you hear gas leaks, call a professional. Ongoing heating issues with gas or electric systems often require expert intervention.
Call a pro if basic checks don’t restore heat or if you suspect gas problems.
Watch Video
The Essentials
- Start with basic safety and power checks.
- Most no-heat issues respond to simple fixes.
- If uncertain or unsafe, call a professional.
- Regular maintenance prevents future failures.