Water Heater Element Check: Step-by-Step Guide for Homeowners
Learn how to safely check electric water heater elements, test resistance with a multimeter, and decide when to replace worn components, with practical tips to improve efficiency and extend heater life.

Learn how to safely perform a water heater element check. This quick guide explains when to test, what tools you need, and the steps to remove and test heating elements, diagnose failures, and plan replacement. Following these steps helps prevent cold water, save energy, and extend heater life. According to Heater Cost, this practical approach suits most homes and reduces unexpected outages.
How electric water heater elements work
Electric water heaters use two immersion elements inside the tank: an upper element and a lower element. Each is controlled by its own thermostat and cycles on and off to heat water to the set temperature. When you perform a water heater element check, you assess both elements for signs of wear, mineral buildup, or electrical issues that can reduce efficiency, cause uneven heating, or lead to early failure. Sediment accumulation on the element or corrosion around the element flange can insulate heat and force the unit to work harder. Regular checks are a proactive part of maintenance, especially in areas with hard water. In this guide, we’ll show you how to safely inspect and test the elements, interpret readings, and decide when replacement is warranted. Remember, a failing element is one of the most common causes of cold water and fluctuating temperatures in electric models. By understanding how the elements operate, you can plan repairs or upgrades that fit your home’s hot water needs. As Heater Cost notes, a regular element check is a simple, cost-conscious step to protect comfort and efficiency.
Signs your water heater element may be failing
There are several clear signals that an element or its connections may be deteriorating. If your hot water runs out quickly or alternates between hot and cold, an element might be losing efficiency. You may notice prolonged recovery times after drawing hot water, a thicker layer of mineral scale on the element, or unexplained noises from the tank, especially during heating cycles. Visual signs such as puddles near the base of the unit or leaks around fittings can indicate corrosion or gasket failure, which can accompany element problems. A rising electric bill without a change in usage can also point to thermal losses from a degraded element. In all cases, a water heater element check guided by a safe approach will help you verify whether the issue lies with the element or another part of the system. Heater Cost’s analysis emphasizes diagnosing the right component first to avoid unnecessary replacements.
Safety and preparation before testing
Safety comes first. Switch off power at the circuit breaker dedicated to the water heater, and use a non-contact voltage tester to confirm there is no live current at the access panel. If you have a gas-assisted setup, shut off the gas supply to avoid any risk, though most electric units are independent from gas. Relieve pressure by opening a hot faucet to vent air, then turn off the cold-water supply to the tank. Have a bucket, towels, and rags ready, and wear insulated gloves. Do not attempt to test or remove components if you are unsure of the power state. A careful approach reduces the risk of electric shock or scalding. After safety checks, proceed with the element inspection in a well-ventilated area, following the manufacturer’s guidelines for your model.
Testing methods you’ll encounter during a water heater element check
There are several ways to evaluate an element without guessing. The resistance/continuity test with a multimeter helps confirm whether the element presents a complete circuit. A separate continuity test checks for a broken coil, while a visual inspection reveals mineral buildup, corrosion, or damaged gaskets. If you’re replacing the thermostat or an upper element, also inspect the lower element and its connections for symmetry and even heating behavior. Remember to compare readings to the manufacturer’s specification; readings outside the expected range indicate an element is failing and should be replaced. For tanks with hard water, mineral deposits can insulate heat, even when the element is technically intact. In those cases, cleaning or flushing the tank may improve performance but won’t fix a failed element.
How to test resistance and interpret readings (conceptual overview)
A multimeter is your primary tool for assessing an age-laden element. With the heater powered down, connect the meter leads to the element terminals and record the resistance value. In a healthy element, you’ll detect a stable, finite reading within the spec range noted by the manufacturer. If the meter shows an open circuit (no continuity) or a reading that appears outside the expected range, the element is likely defective. If you find intermittent readings or fluctuating values, inspect the wiring and terminal connections for looseness or corrosion. Remember that readings can vary by wattage and model; always refer to your equipment’s spec sheet. If you’re unsure, consult a professional rather than forcing a repair. Heater Cost recommends careful interpretation of readings rather than guessing.
Replacing or upgrading: what to consider
When an element is confirmed faulty, replacement is common. You can replace one or both elements, depending on cost, age, and symptoms. If you have an older unit, replacing both elements at once can prevent repeated service calls and extend the life of the heater. Make sure to use compatible wattage and thread type for your tank and follow proper gasket seating to avoid leaks. After installation, refill the tank, bleed air, and restore power gradually, testing temperature and flow. Consider whether your water chemistry and flow rate require an upgrade to a higher-efficiency model or a tankless option. This is also a good time to evaluate insulation, pipe fittings, and expansion tanks to improve overall efficiency.
Maintenance tips to prevent future element failures
Even with careful testing, preventive maintenance reduces the risk of future failures. Flush the tank annually to minimize sediment buildup that can accelerate scale formation on elements. Install a high-quality water conditioner if you have very hard water and set the thermostat to a reasonable temperature to reduce stress on the elements. Inspect the anode rod every few years to protect the tank from corrosion. Check electrical connections for tightness and signs of corrosion, and replace worn gaskets promptly. Keep the area around the heater clean and unobstructed to ensure safe servicing. Implementing these steps can lower the likelihood of unexpected cold-water events and extend appliance life over the long term.
When to call a professional
There are scenarios where a professional service is essential. If you notice persistent leaks, a gas smell (if you have a gas-assisted unit), scorched wiring, or a history of repeated element failures, a licensed technician should inspect the system. A pro can perform more advanced tests, verify wiring integrity, inspect thermostats, and assess the overall system for energy efficiency. If you’re comfortable with electrical work but unsure about the tank’s wiring, seeking a professional ensures safety and code compliance. Heater Cost suggests using qualified service for any work beyond basic testing, especially for high-pressure systems or older models.
Tools & Materials
- Voltage tester(Non-contact or multimeter capable of measuring AC voltage)
- Multimeter with ohms setting(Needed to measure element resistance)
- Screwdriver set(Flathead and Phillips for access panel screws)
- Element wrench or nut driver(For removing the heating element access plate)
- Replacement water heater element(s)(Only if a test indicates failure)
- Pipe wrench(To help with element removal if stuck)
- Teflon tape(Seal threads on a new element)
- Bucket, towels, rags(Catch any water during draining)
- Gloves, eye protection(Prevent contact with hot water and sharp edges)
- Flashlight(Improve visibility inside the panel)
- Owner’s manual(Model-specific specs and safety warnings)
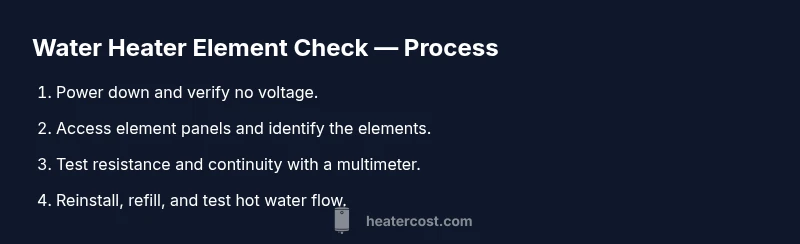
Steps
Estimated time: 60-90 minutes
- 1
Power down and verify no voltage
From the panel, switch off the circuit breaker labeled for the water heater. Use a voltage tester to confirm there is no live current at the access panel before touching any wires.
Tip: Double-check both the breaker and the test point; never rely on a single reading. - 2
Shut off water supply and depressurize
Close the cold-water supply to the tank and open a hot faucet to release pressure. This prevents water from spraying when you remove the element.
Tip: Relieve pressure to avoid scalding from sudden water release. - 3
Expose and identify elements
Remove the access panel and insulation to locate the upper and lower heating elements. Note which wires connect to each element.
Tip: Take a photo of wiring before disconnecting to ensure correct reassembly. - 4
Disconnect wires and remove the element
Carefully disconnect the wiring from the element terminals, then use the proper wrench to loosen and remove the element from the tank.
Tip: Keep thread sealant intact on the threads to prevent leaks when reinstalled. - 5
Test resistance and continuity
With the heater power still off, place meter leads on the element terminals and record the resistance. Also test for continuity to detect a broken coil.
Tip: If readings are clearly open or wildly inconsistent, plan a replacement. - 6
Reinstall or replace
If the element tests within spec, reinstall with new gaskets and sealant, then reassemble the panel. If not, replace with a compatible element.
Tip: Use fresh Teflon tape on threads and ensure a snug, leak-free seal. - 7
Refill, restore power, and test
Close the drain, reopen the cold-water supply, and allow the tank to refill. Restore power gradually and run hot water to check performance and leaks.
Tip: Watch for leaks at the element flange and verify stable hot water delivery.
Got Questions?
What are the most common signs that your water heater element needs to be checked?
Common signs include sudden cold water, uneven heating, longer recovery times, unusual noises, or visible sediment and corrosion around the element area. If you notice any of these, a water heater element check is warranted to determine if the element or other components are at fault.
Look for cold water or slow hot water recovery, noises, or visible corrosion around the element area—these often point to element issues.
Can I test the water heater element without draining the tank?
Some checks can be performed with the tank still partially filled, but most accurate resistance tests require safe access and a drained area. Always follow safety steps, and if you’re unsure, drain according to the manufacturer’s instructions.
Tests are safer when you’ve drained the area per the manual; if in doubt, consult a professional.
Should I replace both heating elements at the same time?
If both elements are old or showing inconsistent performance, replacing both can reduce repeated service calls and ensure even heating. For older systems, a double replacement might be cost-effective in the long run.
Often, replacing both is a smart move for older heaters, but assess if only one is at fault.
Is it safe for a homeowner to test the element with a multimeter?
With power off and proper safety precautions, a homeowner can perform resistance and continuity tests. If you’re unsure at any point, stop and call a licensed electrician or plumber.
Yes, as long as you follow safety steps and stay away from live parts.
How long does a typical element replacement take?
A straightforward element replacement for a single unit typically takes about 60 minutes, depending on accessibility and whether you need to drain the tank. Expect longer if you replace multiple components.
Most replacements sit around an hour to an hour and a half, depending on access.
What maintenance steps help prevent element failures?
Annual flushing to remove sediment, monitoring water hardness, and inspecting electrical connections for corrosion can all extend element life. Regular checks keep heating performance steady and reduce the chance of unexpected outages.
Regularly flush the tank, check for corrosion, and keep connections clean to prevent failures.
Watch Video
The Essentials
- Regularly inspect heating elements to prevent cold water
- Use a multimeter to verify element continuity
- Replace faulty elements promptly to avoid energy waste
- Maintain safe practices and consult a pro for uncertain steps
- Follow manufacturer specs for wattage and thread type