Steps to Drain Electric Water Heater: A Practical Guide
Learn how to safely drain an electric water heater to remove sediment, improve efficiency, and extend tank life. This step-by-step guide from Heater Cost covers safety, tools, and maintenance.

By following these steps to drain electric water heater, you’ll remove sediment, protect the tank, and restore efficiency. You’ll need a garden hose, a bucket, and basic hand tools, plus a safe power shutoff. This quick guide gives you the key actions and safety notes you’ll perform before beginning the full procedure.
Safety first: risks and preparation
Draining an electric water heater involves working near live electricity and very hot water. Safety is non-negotiable, so always assume the circuit is live until you verify it is off. Begin by turning off power at the breaker and confirming there is no voltage at the heater with a tester. Do not bypass safety devices or jump wires to speed the process. If you’re unsure, pause and consult a licensed professional. Inadequate precautions can lead to electric shock, severe burns, or water damage. According to Heater Cost, improper draining has led to shocks and flooded floors; a clear, written plan reduces risk and helps you stay organized. With proper safety practices, you can perform this maintenance without compromising your home or family, while protecting the long-term health of your heater.
What you’ll need before you start
Before you touch a valve or hose, gather everything in one place. You’ll typically need a garden hose long enough to reach a floor drain or an outdoor area, a bucket or shallow pan for drips, and basic hand tools for any fittings. Keep towels or an old rug on the floor, a flashlight for dim corners, and gloves for grip and warmth. Consider a non-contact voltage tester to confirm the power is off, and never skip the power-down step. A chisel or adjustable wrench can help loosen stubborn drain fittings if needed. Having all supplies at hand minimizes the chance of leaving a drain valve open or spilling water near electrical components. Preparation is the healthiest first move for a safe, successful flush.
Understanding sediment and why draining helps
Water that enters your home can carry minerals that settle at the bottom of the tank. Over time, this sediment forms a layer that acts as an insulating blanket, reducing heat transfer and forcing the heater to work harder. Draining and flushing the tank removes this sediment, helping restore efficiency and potentially extend the heater’s life. Heater Cost analysis shows that regular sediment removal is a practical maintenance step that homeowners can perform themselves, reducing wear and improving hot-water consistency. Remember, sediment can accumulate again, especially in hard-water areas, so make drainage a part of your routine. A flush can also reduce banging noises and improve recovery time when you draw hot water.
Detailed safety considerations
Always follow safe work practices when draining an electric water heater. Lock out and tag out the circuit if possible, and avoid working on wet floors with wet hands. Use dry, non-slip footwear and keep children and pets away from the workspace. Ensure the drainage hose is securely attached and directed to a safe location—never toward electrical outlets or living spaces. If you notice corrosion, leaks, or a damaged drain valve, stop and call a professional. After draining, dry the area to prevent slips. If you smell unusual fumes or notice signs of overheating on the heater, discontinue and contact a licensed technician. Adhering to these safeguards aligns with general electrical and plumbing safety guidelines and helps you avoid common mistakes.
Troubleshooting common issues during draining
Drainage is not always smooth, but most issues have simple fixes. If the drain valve leaks, tighten the connection or replace the washer. If the hose leaks, check the hose clamp and ensure the end is fully seated on the valve. If the flow is slow, frequently open a nearby hot-water faucet to vent air and help the tank drain. If no water flows, verify the cold-water supply is fully open and the valve to the heater is not blocked. For stubborn valve problems, consider shutting down and scheduling a professional inspection. These tips can save time and help you complete the flush safely.
Aftercare: refilling, testing, and maintenance tips
When the tank is drained, close the drain valve, remove the hose, and begin refilling by slowly opening the cold-water supply. Open a hot-water faucet nearby to vent air until a steady stream of water flows. Once the tank is full, restore power at the breaker and run hot water from a faucet to confirm proper operation. Inspect all fittings for leaks and ensure the drain valve is snug. Use this opportunity to plan future maintenance based on your water hardness and the heater’s manual. Regular maintenance helps maintain efficiency and prolongs the life of your electric water heater.
Tools & Materials
- Garden hose(Long enough to reach a floor drain or outdoor area; secure connection to drain valve)
- Bucket or shallow pan(Catches drips and protects the floor)
- Adjustable wrench(Loosen stubborn drain fittings if needed)
- Towels or absorbent mat(Protects floor surfaces from spills)
- Non-contact voltage tester(Optional but recommended to confirm power is off)
- Flashlight(Illuminates dim corners and dark cabinet spaces)
- Gloves(Improve grip and protect hands from heat)
- Screwdriver or pliers(Useful for loosen fittings or clamps)
Steps
Estimated time: 60-90 minutes
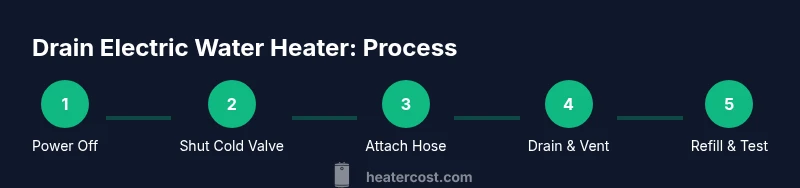
- 1
Power off and verify
Switch off the circuit breaker that feeds the water heater. Use the non-contact tester to confirm there is no voltage at the unit. This prevents electric shock while you work.
Tip: Double-check with a tester even if the breaker is off. A hidden line can carry current. - 2
Shut off the cold-water supply
Close the cold-water supply valve that feeds the tank. This stops refilling the tank while you drain, reducing splashing and overflow.
Tip: Close valve slowly to minimize water hammer and pressure surges. - 3
Attach hose and prepare drainage area
Secure a garden hose to the drain valve on the tank and route it to a floor drain or outside. Place towels under the area to catch drips and prevent water damage.
Tip: Ensure the hose end is lower than the valve to facilitate gravity drainage. - 4
Open drain valve and vent air
Open the drain valve to start draining. To help air escape, open a hot water faucet at a nearby sink or tub. Let air billow out until a steady stream of water flows.
Tip: Do not run the drain valve fully open at once; open gradually to avoid sudden splashes. - 5
Drain and flush sediment
Allow the tank to drain completely, then flush the chamber by briefly opening and closing the water supply as needed. This helps loosen and remove sediment clinging to the bottom.
Tip: If the flow slows, pause and vent faster; sediment often traps air and slows the drain. - 6
Refill, vent, and restore power
Close the drain valve, remove the hose, and slowly reopen the cold-water supply to fill. Open a hot-water faucet to vent air until steady water runs, then restore power at the breaker and test hot water.
Tip: Monitor for leaks at all connections; tighten as needed before restoring full use.
Got Questions?
Do I need to turn off the power before draining the water heater?
Yes. Power must be off to avoid electrical shock. Verify with a tester if necessary.
Yes, always turn off the power and verify it’s off before draining.
Can I drain the heater if it’s very cold outside or if the room is wet?
Drain only when conditions are safe; keep the area dry and avoid working in icy or wet spaces.
Drain only when it’s safe and dry; avoid wet work areas.
What if the drainage is slow or the valve leaks?
Open a nearby hot-water faucet to vent air and inspect fittings for leaks. If leaks persist, close the valve and call a professional.
Vent air with a hot-water faucet and check fittings; consult a pro if leaks continue.
Is draining necessary every year?
Sediment buildup is common; a flush is a recommended maintenance step, though frequency depends on water hardness and usage.
Sediment buildup happens often, so flush as part of ongoing maintenance based on your water quality.
Can I drain into a bucket or outside?
Yes, drain into a floor drain, bucket, or outdoor area, ensuring it doesn’t cause water damage or violate local codes.
Draining into a floor drain or outside is fine as long as it’s safe and compliant with local rules.
Watch Video
The Essentials
- Turn off power before touching any heater components.
- Shut the cold-water supply to stop refilling during drainage.
- Vent air to avoid pressure build-up and spillage.
- Refill slowly and check for leaks before restoring power.
- Schedule regular maintenance based on water quality.