Repair Gas Hot Water Heater: A Homeowner's Step-by-Step Guide
Learn how to diagnose and repair common gas hot water heater problems safely. This Heater Cost guide covers safety, tools, step-by-step troubleshooting, maintenance, and knowing when to hire a pro.

Repair gas hot water heater safely and effectively by diagnosing common failures, performing essential checks, and knowing when to call a professional. This guide covers safety prerequisites, tool lists, step-by-step troubleshooting, and maintenance tips. You’ll learn to verify gas supply, test the pilot/igniter, inspect venting, and restore hot water while minimizing risk.
Understanding the Risks and Why Repairs Matter
Gas-powered hot water heaters are reliable workhorses for homes, but they require careful handling. DIY repairs can save money, but mistakes can create gas leaks, carbon monoxide exposure, or venting problems. According to Heater Cost, most routine fixes focus on ignition systems, valve seals, and burner performance. This section explains why a small leak or a stubborn pilot can disrupt hot water supply and how timely, safe repairs protect your home. We’ll outline common causes, how to diagnose them, and safe first steps you can take as a homeowner. The goal is to help you decide whether a DIY fix is appropriate or if you should call a licensed technician. Remember that gas appliances involve combustion byproducts; ensure proper ventilation and functioning CO detectors are in place in any repair plan. The Heater Cost team found that staying within code requirements reduces risk and improves long-term reliability.
Safety First: Gas Lines, CO Detectors, and Venting
Working with gas lines means dealing with potential ignition sources and leaks. Always locate the main shutoff valve and know how to switch off the gas supply before you touch any components. Install or verify a functioning carbon monoxide detector near the heater and in living spaces. Ensure the area is well-ventilated and free of clutter that could trap gas. The ventilation path for the exhaust must be clear; blocks in the flue can cause dangerous CO buildup. Keep children and pets away during any inspection. For DIY repairs, use gas-rated tools and thread sealants, and never bypass safety devices. The Heater Cost team emphasizes that venting integrity and shutoff accessibility are the two most critical safety factors in any gas-water-heater repair.
Common Problems That Signal Repair Is Needed
Hot water scarcity, inconsistent temperatures, or fluctuating water supply are common indicators that something is wrong with the gas water heater. You might hear banging or gurgling sounds from the tank caused by mineral buildup or a failing sediment trap. Pilot lights that go out or fail to ignite signal issues with the thermocouple, gas valve, or the pilot assembly. A persistent gas odor near the unit must be treated as an emergency: evacuate and call the gas company or emergency services. Small puddles around the base indicate leaks in the tank, drain valve, or connections. Recognizing these symptoms early can save energy, reduce waste, and prevent bigger repairs later. Repair vs. replacement depends on unit age and problem severity; see the costs and maintenance guidance later in this guide.
When DIY Repair Makes Sense (and When It Doesn’t)
Some fixes are straightforward for a handy homeowner, but others require licensed professionals. Simple tasks like tightening loose connections (gas or water lines) or replacing worn washers can sometimes be done safely with the main shutoff off. If the issue involves the gas control valve, thermocouple, or main burner assembly, consult a pro immediately; incorrect adjustments can cause gas leaks or poor combustion. Always check local codes; in many jurisdictions, gas-line work requires permits and inspections. If your unit is older than 10–15 years and shows repeated failures, a professional evaluation may reveal whether repair or replacement offers better value. The Heater Cost analysis suggests that maintenance and timely part replacements extend life, optimize energy use, and may influence whether repair remains viable.
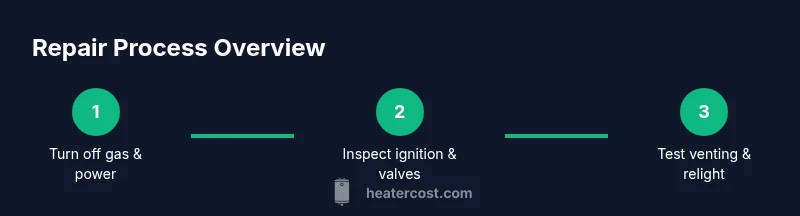
Step-By-Step Troubleshooting Overview (High-Level)
This section outlines a logical sequence to diagnose problems without getting bogged down in hardware details. Start with safety: shut off gas and power, confirm ventilation, and verify that CO detectors function. Then inspect the pilot or electronic ignition for ignition problems, check the thermocouple and gas control valve for wear, and examine the drain valve and pressure-relief components for leaks. Finally, test the system by turning gas and power back on, relighting the pilot if applicable, and ensuring a steady supply of hot water. If any step results in a strong gas odor or flame instability, stop and contact a licensed professional immediately. The goal is to narrow down the issue while preserving safety.
Costs, Warranties, and When to Replace
Repair costs vary with part availability, labor rates, and gas-line accessibility. Typical tasks include igniter replacement, thermocouple repair, or valve seating, but actual prices depend on local markets. If the unit is nearing the 15-year mark or shows frequent failures, replacement may be more cost-effective. Warranties often cover specific parts or labor but exclude normal wear. The Heater Cost analysis notes that choosing energy-efficient, correctly sized units can reduce operating costs over time; discuss with a pro whether a new unit offers better value than ongoing repairs.
Maintenance Tips to Prevent Future Failures
Maintenance pays off with fewer emergencies. Flush the tank annually to remove mineral buildup, especially in hard-water areas. Inspect and tighten gas and water connections, test the pressure-relief valve, and verify venting integrity at least once a year. Replace anodes or sacrificial parts per the manufacturer’s schedule. Consider a water-softening system if mineral buildup persists. A combined approach of professional inspections and DIY upkeep yields the best results for reliability, efficiency, and hot water availability.
Safety Standards, Permits, and Code Compliance
Gas appliances are heavily regulated for safety. Before performing repairs involving gas lines or venting, check local codes and obtain any required permits. In many areas, only licensed gas technicians may work on gas lines or combustible connections. Maintain thorough documentation of repairs and receipts for future inspections or warranty claims. CO detectors should be positioned per local guidelines and replaced on schedule. Following manufacturer instructions and current codes protects your family and reduces equipment damage risk.
Hiring a Pro: What to Expect and How to Choose
If you’re unsure about a repair or the task touches gas lines, hire a licensed professional. Verify credentials, licenses, and insurance; request a detailed written estimate with scope and parts. A technician should test for gas leaks, verify venting, and provide after-service instructions for re-lighting. Clarify warranty coverage for parts and labor, and ask about safe, code-compliant replacement options if repair costs approach replacement costs. The Heater Cost team recommends prioritizing safety, then efficiency, and finally long-term reliability when deciding between repair and replacement.
AUTHORITY SOURCES and Further Reading
For governance and safety guidelines, refer to government and major publications that cover gas appliances, venting, and water-heater safety. Energy Department resources provide basics on selecting and maintaining water heaters, while professional associations explain code compliance and permits. Consumer Reviews and trade publications offer independent guidance that complements home-improvement basics. Relevant sources include:
- https://www.energy.gov/energysaver/water-heaters
- https://www.energy.gov/eere/buildings/articles/maintaining-your-hot-water-heater
- https://www.consumerreports.org/cro/heating-water-heaters.htm
Tools & Materials
- Adjustable wrench(Select sizes 6-12 inches; fit gas and water fittings)
- Screwdrivers (flathead + Phillips)(For removing panels and screws)
- Gas leak detector(Test joints after repairs and near connections)
- Multimeter (optional)(Only if diagnosing electrical controls on the unit)
- Bucket(Catch condensate or small leaks during testing)
- Flashlight(Inspect dark corners and vent path)
- Gas-rated PTFE tape(Use on threaded gas connections)
- Pipe wrench(Loosen/tighten large fittings)
- Replacement parts kit (pilot assembly, thermocouple)(Only if you’ve identified worn parts)
Steps
Estimated time: 60-120 minutes
- 1
Prepare safely
Begin by turning off the gas at the main shutoff valve and switching off the electrical power to the unit at the breaker. This prevents accidental ignition and electrical shock while you inspect. Confirm there are no flames or strong gas odors before proceeding.
Tip: If you smell gas, evacuate the area and call your gas provider or emergency services immediately. - 2
Verify area safety
Ventilate the space and remove flammable items. Ensure you have a clear path to exit if you need to move quickly. Keep a flashlight handy and wear safety glasses.
Tip: Do not perform repairs in a damp area or while standing on wet surfaces. - 3
Inspect obvious components
Check the burner access panel, thermocouple, and pilot/ignition assembly for signs of wear, corrosion, or debris. Look for loose or damaged connections and for any mineral buildup around the drain valve.
Tip: Take photos before disassembly to document connections. - 4
Test gas connections and leaks
Using a gas detector or soapy water, inspect joints for leaks. If you detect bubbles or a persistent odor near fittings, do not proceed; contact a pro.
Tip: Always re-check after any tightening; a small leak can reappear as fittings settle. - 5
Relight or verify ignition
If the pilot was out, re-light according to the manufacturer’s instructions. If you have an electronic ignition, listen for a reliable ignition sequence and confirm flame stability.
Tip: If the flame wavers or fails to stay lit, don’t force it—there may be a thermocouple issue or gas-control problem. - 6
Check venting path
Inspect the flue and vent for blockages, corrosion, or debris. A restricted vent can cause CO buildup and poor combustion.
Tip: Never operate the unit with blocked vents; CO safety is non-negotiable. - 7
Restore power and test
Turn the gas and power back on and run a short hot-water test. Observe for stable water temperature, unusual sounds, or leaks.
Tip: Monitor the first few cycles to ensure consistent performance. - 8
Document and clean up
Reassemble any panels, secure loose wires, and store tools. Note what you tested, what you found, and any parts you replaced for future reference.
Tip: Record the date of any fixes for warranties and future maintenance.
Got Questions?
Is it safe to repair a gas hot water heater myself?
DIY repairs can be safe for non-gas-line tasks if you follow proper shutoffs, ventilation, and testing. For any work on gas lines or the burner assembly, hire a licensed professional.
DIY can be safe for simple checks, but avoid gas-line work unless licensed.
What are the most common DIY fixes for a gas hot water heater?
Common DIY tasks include tightening loose water connections, cleaning minor sediment, and replacing easily accessible parts like the drain valve or thermocouple, provided you turn off the gas and power first.
Common DIY tasks include tightening connections and replacing simple parts with the power and gas off.
How do I know when to hire a professional?
If you detect a gas leak, persistent odor, flame instability, or a non-relightable pilot, consult a licensed technician. Gas-line work and venting modifications require permits in many locales.
Call a pro if you smell gas or can’t relight the pilot safely.
What maintenance should I perform annually?
Schedule an annual safety check, flush the tank to remove mineral buildup, inspect the vent, check the pressure-relief valve, and verify the gas connections are tight.
Do a yearly safety check, flush, and inspect vent and valves.
What should I do if I smell gas near the heater?
If you smell gas, leave the area immediately, avoid switches or flames, and call your gas company or emergency services from a safe location.
Leave the area and call for help if you smell gas.
Watch Video
The Essentials
- Prioritize safety: shut off gas and power before work.
- DIY fixes are possible for simple, non-gas-line tasks with proper tools.
- Use gas-rated fittings and verify venting to prevent CO exposure.
- Know when to call a pro for gas-line or burner-system work.
- Maintain yearly checks and flush to extend heater life.