How to Fix an Electric Hot Water Heater: A Homeowner’s Guide
Learn how to safely fix an electric hot water heater with step-by-step troubleshooting, maintenance tips, safety guidelines, and when to call a pro. Practical guidance for homeowners, renters, and property managers.

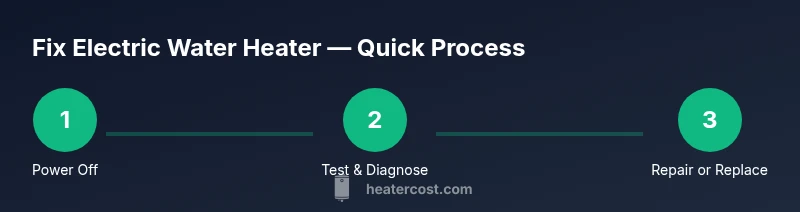
To fix electric hot water heater issues you can address simple electrical faults, thermostat settings, and mineral buildup. This quick guide covers essential safety checks, diagnosing common symptoms, and when to replace components or call a pro. You’ll learn how to test breakers, inspect heating elements, and perform a professional-grade flush if needed.
Why fix electric hot water heater issues yourself and safety first
According to Heater Cost, many homeowners save time and avoid unnecessary service calls by performing basic diagnostics before assuming a full replacement is required. The goal is to identify simple culprits—like a tripped breaker, a faulty thermostat, or mineral buildup—that are reachable with common tools. This approach helps you preserve energy efficiency and extend the life of your unit, especially when it’s an older electric water heater with a known history of mineral scale. Always pair problem-solving with safety, since electricity and hot water pose real hazards. If at any point you feel unsure or encounter live components, step back and consult a licensed professional. During diagnosis, document what you test and observe so you have a clear record if you need to seek professional help later. This mindset aligns with Heater Cost’s emphasis on practical, cost-conscious maintenance for residential heating systems.
Common electrical symptoms and quick checks
No hot water, fluctuating water temperature, or repeated tripping of the home's circuit breaker are typical signs that you should start with basic checks. Listen for unusual humming or buzzing from the tank, which can indicate a failing element or sediment interference. Inspect the thermostat settings; a misadjusted thermostat can make water feel lukewarm or scalding. If you notice a visible burn mark, smell burnt plastic, or see melted components near wiring, treat this as an emergency and shut off power immediately. Quick checks also include confirming the breaker is in the ON position and reset it if it trips, then verify there’s power at the outlet using a non-contact tester. These steps establish a safe baseline before deeper testing.
Diagnosing heating elements and thermostats
Electric water heaters typically rely on two heating elements (upper and lower) and a thermostat assembly. A faulty element or a malfunctioning thermostat will prevent water from reaching the desired temperature. Common symptoms of a bad element include no-hot-water at all or very cool water after an extended run time. With a multimeter, you can test element continuity according to the manufacturer’s guidelines; a broken element shows open circuit. Thermostat tests are about confirming the thermostat is sending power to the corresponding element when temperature calls occur. If readings are outside the expected range or the element tests fail, replacement parts are usually required. Keep in mind that some models use a dual-thermostat arrangement; testing both is essential for accurate diagnosis.
Safety first: when to shut off power and call a pro
Electrical work around water requires strict safety precautions. Always shut off power at the circuit breaker before touching any wiring or components. If you detect exposed conductors, damaged insulation, or a burning smell, stop and contact a licensed electrician. Never work on live wiring, and avoid using metallic tools near wet components. If your unit uses a power disconnect switch near the heater, turn it off as an additional safety step. For those who are not comfortable with electrical testing, the safest path is to call a pro early in the process to avoid equipment damage or personal injury.
Step-by-step diagnosis of no-hot-water symptoms
This section walks through a methodical approach: 1) verify power is off, 2) inspect wiring access panels for signs of damage, 3) test thermostat settings and function, 4) test both heating elements for continuity, 5) perform a controlled flush if sediment is suspected, and 6) reassemble and restore power to observe behavior. Document each test outcome. If you discover a damaged element, burned wiring, or persistent tripping after resetting, replace the faulty component or seek professional service. Taking photos during disassembly helps with ordering parts and ensuring the correct orientation during reassembly.
Regular maintenance to prevent future failures
Preventive tasks save trouble down the line: schedule a light annual flush to remove mineral buildup, inspect anode protection where applicable, and verify insulation on exposed pipes. Check the pressure relief valve to ensure it opens and closes freely, and test it per the manufacturer’s instruction. Clean dust from the area around the heater to improve airflow and reduce overheating risk. Replace any worn gaskets and tighten connections to minimize leaks. Consistent maintenance helps stabilize performance and extends the life of your electric water heater, which is a key goal for cost-conscious homeowners.
When to replace vs repair and cost considerations
Older electric water heaters often become energy-inefficient even if repaired, especially if mineral buildup is severe or the tank has endured multiple leaks. A repair-focused approach may be cost-effective for a unit with solid shell integrity and a recent component replacement history. However, if you’re routinely paying for repairs or the unit struggles to meet daily hot-water demand, replacement becomes sensible. When comparing options, consider energy efficiency, upfront costs, and expected lifespan rather than immediate repairs alone. Heater Cost’s perspective emphasizes evaluating total cost of ownership and the potential savings from improved efficiency in a modern electric model.
Troubleshooting smells, noises, and leaks related to electric water heaters
Unusual smells such as a burning odor, persistent popping, or banging noises can indicate mineral scale buildup or a failing heating element; leaks around the tank often signal corrosion or loose fittings. In many cases, a sediment flush or tightening valve connections can address minor leaks, but persistent drips may require a tank replacement. If you notice a damp area or water pooling near the base, shut off power and water supply immediately and inspect the drain valve and fittings. Early detection prevents water damage and preserves the system’s efficiency.
Tools & Materials
- Non-contact voltage tester(Verify power is fully off before touching components)
- Multimeter(Check heating element continuity per manufacturer instructions)
- Screwdriver set (Phillips and flathead)(Access panels and element screws)
- Wrench or pliers(Disconnect plumbing fittings if needed)
- Bucket or drain pan(Catch water during drain/flush process)
- Garden hose(Attach to drain valve for controlled flush)
- Safety gear (gloves and goggles)(Protect hands and eyes when handling hot components)
- Replacement heating element(s) and/or thermostat kit(Only if diagnostic tests indicate failure)
- Teflon tape(Seal pipe threads if you replace drain valve or fittings)
Steps
Estimated time: 45-90 minutes
- 1
Turn off power to the heater
Go to the main breaker panel and switch off the breaker labeled for the water heater. Confirm zero voltage at accessible components with a non-contact tester. This is the foundation of safe diagnostics.
Tip: Double-check power at the panel before touching any wires; assume live until confirmed off. - 2
Shut off water supply and drain if needed
Close the cold-water supply valve to reduce pressure and water flow. If you plan to flush or inspect the tank interior, place a bucket or drain pan beneath the drain valve and have a hose ready.
Tip: A controlled drain helps prevent splashing and makes component access cleaner. - 3
Access and inspect the heating elements and thermostat
Remove access panels and insulation to reach the upper and lower elements and thermostats. Check wiring for corrosion, loose connections, and signs of overheating. Follow the manufacturer’s wiring diagram when testing continuity with a multimeter.
Tip: Take photos before disconnecting wires to ensure correct reassembly. - 4
Test heating element continuity
Disconnect the element terminals and test each element for continuity. A reading of 'no continuity' indicates a failed element that should be replaced. If both elements test fine, move to thermostat testing.
Tip: If you’re unsure about the test setup, pause and consult the manual or a pro. - 5
Test thermostat operation
Set the thermostat to a mid-range temperature and observe whether power is sent to the corresponding element. If the thermostat fails to energize the element, replacement is likely needed.
Tip: Avoid setting temperatures very high during testing to reduce scald risk. - 6
Flush the tank if mineral buildup is suspected
If sediment appears cloudy or gritty, perform a gentle flush using the drain valve and hose. This helps restore flow and improves heating efficiency. Refill slowly to avoid air pockets.
Tip: Do not forcefully drain; allow water to run clean before re-seating panels. - 7
Reassemble, restore power, and test
Reconnect all components, re-energize the circuit, and run hot water to verify performance. If the water remains cold or you notice tripping, reassess connections or replace faulty parts.
Tip: Keep the area dry and monitor for any leaks during the initial test run.
Got Questions?
Is it safe to DIY fix an electric hot water heater?
DIY troubleshooting is appropriate for basic electrical checks and simple component tests if you follow safety steps. If you encounter exposed wiring, burning smells, or water leaks from the tank, stop and call a licensed professional.
DIY can be safe for basic checks if power is off and you follow safety steps; otherwise call a pro.
What are common signs I need to replace heating elements?
No hot water after testing elements, inconsistent water temperature, or visible damage to wiring are typical signs you should replace heating elements.
No hot water after testing, or visible element damage usually means you need a replacement.
Do I need to drain the tank before testing elements?
Draining is not always required for element testing, but it can help if mineral buildup is blocking access. Follow manufacturer guidance and drain carefully if you see heavy sediment.
Draining isn’t always required, but it helps if sediment is blocking access.
Can a tripped breaker cause no hot water?
Yes. A tripped breaker stops power to the heater, resulting in no hot water. Reset the breaker after ensuring there are no underlying wiring issues.
A breaker trip stops power; reset after confirming no wiring issues.
When should I hire a licensed electrician or plumber?
If you encounter damaged wiring, recurring tripping after testing, or leaks around the tank, hire a professional for safety and to ensure code compliance.
Call a pro if wiring looks damaged, trips persist, or there are leaks.
What maintenance helps extend the life of an electric water heater?
Annual sediment flush, thermostat checks, and valve inspections help extend life and maintain efficiency.
Do yearly flushes and thermostat checks to keep it running efficiently.
Watch Video
The Essentials
- Identify simple culprits first: tripped breakers, misadjusted thermostat, sediment buildup.
- Always shut off power and water before inspecting electric components.
- Test heating elements and thermostats with proper tools to confirm failure.
- Regular maintenance can prevent most no-hot-water issues.