Remington Heater Problem Troubleshooting: Step-by-Step Guide
Learn how to diagnose and fix a common remington heater problem, from no heat to cycling issues. Safe steps, maintenance tips, and when to call a pro in 2026.

The most common remington heater problem is a unit that won’t heat, often caused by a tripped breaker, a clogged air intake, or a dirty filter. Start by verifying power at the outlet and checking fuses or a blown thermal fuse. Then inspect vents and the filter for dust, reset the thermostat, and retest. If it still won’t heat, seek professional service.
Understanding the Remington Heater Problem
The Remington heater is designed to deliver reliable warmth, but like any appliance, it develops problems that can leave you cold and stressed. A remington heater problem often manifests as no heat, noisy operation, frequent cycling, or a sudden drop in efficiency. Understanding the typical symptoms helps you triage quickly and safely. Start with the simplest checks and move toward more in-depth diagnostics. This guide walks you through common failure modes from 2026’s perspective, with actionable steps homeowners can take before calling a technician. Regular maintenance and mindful usage dramatically reduce the chances of recurring remington heater problems, especially in households that rely on space heating during cool seasons.
Safety First: Before You Begin
Electrical heaters, including many Remington models, can present shock or fire hazards if mishandled. Always unplug the unit before inspecting internal components, and never work on live wiring. If you smell gas or hear hissing noises, stop immediately and evacuate if you suspect a gas appliance or a hazardous leak. Use basic PPE like insulated gloves if you need to handle exposed parts, and keep kids and pets away. Finally, ensure the surrounding area is clear of clutter that could obstruct airflow. These safety precautions reduce risk while diagnosing a remington heater problem and protect your home.
Quick Home Checks You Can Try
Before diving into complex diagnostics, perform these at-home checks. • Confirm the heater is plugged in and the outlet is delivering power. • Check the circuit breaker and any fuses; reset or replace as needed. • Inspect the air intake and exhaust grilles for dust, lint, or obstructions, and clean carefully. • Examine the filter; a clogged filter restricts airflow and triggers overheating. • Verify the thermostat is set correctly and not stuck on a minimum or off position. • Listen for unusual sounds that might indicate a blade, fan, or motor issue. If these checks don’t restore heat, proceed to a more structured diagnostic flow.
Diagnostic Flow Overview
A structured diagnostic flow helps identify the remington heater problem without guesswork. Start with the most accessible issues and progress to electrical or control components. Symptoms like no heat, blower running without heat, or strange odors map to likely causes. Document each test result, as this makes it easier for a technician to reproduce the problem if you need professional help. Always prioritize safety and avoid opening sealed compartments if uncertain.
Common Root Causes Explained
Many remington heater problems stem from simple root causes: a tripped breaker, dirty air intake, blocked vents, or a dirty filter causing overheating. Thermostat calibration errors, sensor faults, or a failing limit switch can also lead to heat loss or intermittent operation. In some cases, electrical wiring or control board faults are responsible. Understanding how these parts interact helps you decide which fixes to attempt and which to delegate to a professional.
Step-by-Step Fixes for the Most Common Causes
This section provides concrete fixes for the most likely remington heater problem scenarios. Begin with the least invasive actions, such as power checks and filter cleaning, then move to thermostat testing and vent clearance. Each fix includes a brief rationale, a safety reminder, and a clear success indicator. If a fix does not resolve the issue, move to the next step in the sequence.
Maintenance to Prevent Future Problems
Prevention is better than cure for any heating system. Establish a seasonal maintenance routine that includes filter replacement, duct cleaning, and vent inspection. Keep the area around the heater free of dust and clutter, and replace any worn seals or gaskets. Regular inspections catch problems before they escalate into a remington heater problem, reducing repair costs and downtime.
When to Call a Professional: Red Flags and What to Expect
Not every remington heater problem is safe to fix solo. If you detect gas smells, suspect electrical hazards, hear buzzing noises near the wiring, or see exposed wiring, stop and call a pro. A licensed technician can diagnose control board faults, flame sensor issues, or gas line concerns with the right tools and safety protocols. Knowing when to seek help saves time and protects your home.
Troubleshooting Worksheet: Quick Reference
Use this compact worksheet to record symptoms, tests, and fixes for quick reference during the troubleshooting process. Fill in the symptom, the observed cause, and the action you took, then note the result. This keeps you organized and ready to escalate if necessary, especially during busy winter months when remington heater problems surge.
Steps
Estimated time: 60-90 minutes
- 1
Check power and reset safety components
Ensure the unit is unplugged, then inspect the outlet and power cord for damage. Reset the circuit breaker if tripped and replace any blown fuses. Plug the heater back in and confirm power after a brief pause. This step often resolves the remington heater problem when power supply is the culprit.
Tip: If the outlet tests as dead, use a known-good outlet to confirm the heater isn't at fault. - 2
Test thermostat and settings
Set the thermostat to a comfortable temperature and verify the display responds. If the display is faint or unresponsive, the control board or thermostat may be faulty. Calibrate if possible, or replace the thermostat if it doesn’t hold setting.
Tip: Avoid forcing the thermostat; a stuck dial can indicate internal sensor issues. - 3
Clean filters and air pathways
Remove the filter and clean it with mild soap and water if washable, or replace it if worn. Vacuum the intake grilles and straighten any bent louvers to restore airflow. After cleaning, run the unit to see if heat returns.
Tip: Clean every 1–3 months during heavy use to prevent remington heater problem symptoms. - 4
Inspect vents, ducts, and clearances
Make sure vents aren’t blocked by furniture or curtains. Check outdoor vents if applicable for debris. Ensure at least 3 feet of clearance around the heater to prevent overheating and improve air exchange.
Tip: Close nearby doors if the space is too large for the heater to heat efficiently. - 5
Check for overheating indicators
Many units have an internal overheat protection switch. If triggered, allow the unit to cool for 15–30 minutes before retrying. If overheating recurs, there may be a blocked intake or sensor fault needing a professional look.
Tip: Do not bypass safety switches—the system is designed to prevent fires. - 6
Assess electrical connections
Gently reseat any accessible wires or connectors inside the service panel if you’re comfortable. Look for loose or discolored wiring that may indicate a fault. If you notice burning smells or melted insulation, stop and contact a pro immediately.
Tip: Only handle electrical components if you have proper training and tools.
Diagnosis: Remington heater won’t heat or cycles off unexpectedly
Possible Causes
- highPower or electrical issue (tripped breaker, blown fuse, loose connection)
- mediumDirty filter or blocked air intake causing overheating
- lowThermostat or control board fault
Fixes
- easyReset the breaker or replace blown fuses; verify power at the outlet with a tester
- easyClean or replace the air filter and clear vents; ensure adequate clearance around the unit
- mediumTest the thermostat and control panel; replace faulty components; consult a pro if needed
Got Questions?
Why won’t my Remington heater turn on to produce heat?
Most often the cause is a power issue (tripped breaker or fuse) or a thermostat fault. Start with basic power checks, then inspect the thermostat before moving to deeper components.
If it won’t turn on, first check power, then the thermostat and fuse condition before calling a tech.
Is it safe to keep using the heater if I notice a burning smell?
No. A burning smell can indicate overheating, burning insulation, or wiring problems. Stop using the unit, unplug it, and have it inspected by a licensed technician immediately.
If you smell burning, switch it off and contact a pro right away.
How often should I replace the air filter on a Remington heater?
Check the filter monthly and replace every 1–3 months depending on usage and dust levels. A dirty filter commonly contributes to remington heater problem symptoms.
Change the filter every 1–3 months to keep heat consistent and airflow clean.
Can I reset the thermostat myself if heat is inconsistent?
Yes. Power off, wait 30 seconds, power back on, and re-set the thermostat to the desired temperature. If the issue recurs, the thermostat or control board may require replacement.
Try a simple reset by cycling power, then re-setting the thermostat before calling support.
What are the signs a control board is failing?
Frequent random heat changes, unresponsive settings, or error codes indicate control board trouble. A technician can diagnose and replace the board if needed.
Unresponsive settings or erratic heat usually points to the control board.
When should I replace my Remington heater instead of repairs?
If the unit is old, inefficient, or requires multiple major repairs, replacement is often more cost-effective. A professional can help compare long-term costs.
If repairs pile up or efficiency drops, consider replacement after a pro assessment.
Watch Video
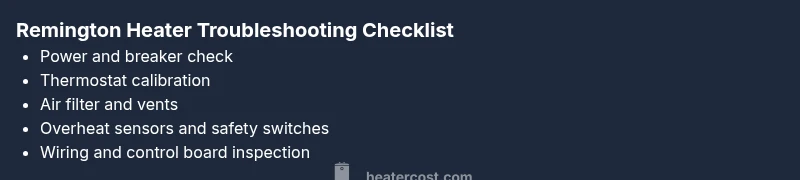
The Essentials
- Diagnose with power checks first
- Clean air pathways to restore heat
- Test thermostat before replacing parts
- Know when to call a pro for safety
- Maintain regular filter and vent upkeep