Pressure Relief Valve Replacement for Water Heaters: A Practical Guide
Learn how to safely replace a pressure relief valve on a residential water heater with a clear, step-by-step approach, essential tools, safety checks, and testing tips to prevent leaks and damage.

This step-by-step guide shows homeowners how to replace a faulty pressure relief valve (T&P valve) on a standard residential water heater. You’ll learn when replacement is needed, the essential safety checks, required tools, and how to properly install and test the new valve. Follow local codes and consult a pro if you encounter corrosion or uncertainty.
What the T&P Valve Does and Why Replacement Matters
The temperature and pressure relief valve (T&P valve) is a critical safety device on every residential water heater. It opens automatically if the tank pressure or water temperature climbs too high, allowing hot water to escape safely rather than risking a tank rupture. Over time, seals can wear, threads can corrode, and the valve may leak or discharge unexpectedly. If you notice a constant drip, a slow seep, or the valve discharging hot water, plan a replacement rather than ignoring the issue. Regular testing of the valve ensures it remains responsive and protects your home. According to Heater Cost, understanding when to replace and how to perform the replacement safely is essential for homeowners, renters, and property managers who manage heating systems. This guide uses plain-language steps, safety checks, and testing tips to help you complete the task with confidence.
Signs that a T&P Valve Needs Replacement
Common indicators include visible leakage, a valve that spurts water during normal operation, frequent discharges after a heating cycle, or a valve that has accumulated mineral buildup or corrosion. If the valve fails the test lever lift (a small amount of water should exit when raised slightly), replacement is usually the correct course. Do not ignore persistent leaks, as they signal a compromised seal or a compromised seat. In many homes, a leaking T&P valve is a warning that the system’s safety relief function is impaired, which can pose serious risks if the tank overheats or overpressurizes. Heater Cost analysis notes that replacement is often the most responsible option when the valve shows wear or repeated leakage.
Safety First: Precautions Before You Begin
Before touching any component on a water heater, shut off power (electric) or gas, and close the cold-water supply to the tank. Put on eye protection and work in a well-ventilated area. Do not attempt replacement if the area around the heater is corroded, if you smell gas, or if the unit is excessively hot. Relieve pressure by opening a hot-water tap or the valve itself, but never with your hand directly at the discharge. These precautions reduce the risk of scalding or sudden pressure release. Following Heater Cost guidance, a careful, methodical approach minimizes the chance of damaging connections or omitting crucial steps.
Tools and Materials You'll Need
- adjustable wrench and channel-lock pliers
- new T&P valve (temperature and pressure relief valve)
- thread sealant or Teflon tape (note: do not apply to the T&P valve threads; see tips)
- bucket and towels for spills
- rag and flashlight for visibility
- pipe wrench or strap wrench for stubborn fittings
- optional: manufacturer-specific installation kit
The Replacement Process: What to Expect (Overview)
Replacing a T&P valve involves isolating the heater, removing the old valve, cleaning the outlet threads, installing the new valve correctly, and then refilling the tank to test operation. It’s a straightforward, single-purpose job, but attention to detail matters: you must ensure the discharge line is clear and properly directed, and you must verify there are no leaks after re-pressurizing the system. This section provides the high-level workflow and safety considerations, while the STEP-BY-STEP block below delivers the concrete actions you’ll perform.
Aftercare: Testing, Leaks, and Maintenance
Once the new valve is in place and the tank is refilled, perform the valve test by lifting the test lever to ensure a small amount of water is released through the discharge lines. If there’s no discharge or if leakage appears around the valve body, shut down power and water supply and re-check fittings. It’s wise to observe the valve for a few hours after replacement to catch slow leaks or drift in pressure. Regular, gentle testing helps ensure long-term reliability and can catch issues before they escalate into more costly repairs. Heater Cost emphasizes documenting the replacement date to aid future maintenance scheduling.
Cost Considerations and Code Compliance
Valve replacement costs typically include the price of the new valve and minimal labor if you perform the work yourself. Costs vary by region and by the model of valve, but the key value is safety and reliability. Always follow local building codes and regulations; some jurisdictions require permits or professional installation for modifications affecting the water heater system. If you’re unsure about code requirements, contact your local building department or a licensed professional for guidance.
Tools & Materials
- Adjustable wrench(Essential for loosening and tightening valve fittings)
- Channel-lock pliers(Grab the valve and fittings securely)
- New T&P valve(Rated for your heater’s capacity; match size to existing fitting (commonly ¾ inch NPT))
- Rag and bucket(For catching drips and cleaning the valve area)
- Teflon tape or thread sealant(Do not use on T&P valve threads; check manufacturer guidance)
- Flashlight(Improve visibility in the valve area)
- Gloves(Protect hands from sharp edges and hot surfaces)
- Manufacturer installation kit(Contains any specialty adapters if needed)
Steps
Estimated time: 60-90 minutes
- 1
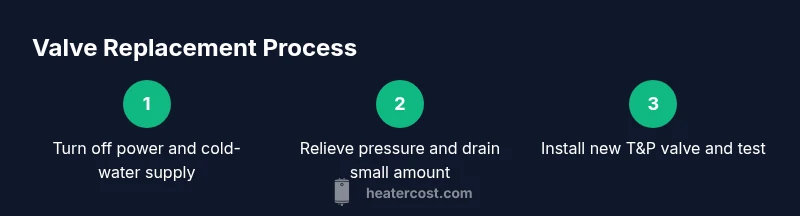
Turn off power and cold-water supply
Power off the heater (electric: at the breaker; gas: at the control valve). Close the cold-water supply to prevent more water from entering the tank during the replacement.
Tip: Verify power is off by attempting to turn on the heater after your work and ensuring nothing starts up unexpectedly. - 2
Relieve pressure and access the valve
Open a hot-water tap to relieve pressure inside the tank. Then place a bucket under the discharge area to catch any water that escapes when you begin.
Tip: Relieving pressure reduces the chance of scalding and minimizes water spray when you loosen fittings. - 3
Remove the old valve
Using suitable wrenches, loosen the old valve from the tank and carefully lift it away. Do not twist or yank excessively to avoid damaging the tank threads.
Tip: Keep the discharge outlet aligned with its drain path to prevent kinks or misalignment. - 4
Inspect and prepare the threads
Clean the tank opening and threads with a rag. If there are mineral deposits or corrosion, remove them gently to ensure a clean seal for the new valve.
Tip: Only remove buildup; avoid scraping the tank material.” - 5
Install the new valve
Hand-tighten the new valve, then snug with a wrench. Do not use sealant or tape on the valve threads unless the manufacturer specifies otherwise.
Tip: Over-tightening can damage fittings; snug is enough to seal without stressing the valve body. - 6
Reconnect discharge and water lines
Reconnect any discharge piping ensuring it runs downward and away from people. Reopen the cold-water supply slowly to begin filling the tank.
Tip: Ensure the discharge path remains clear and unblocked. - 7
Refill, bleed air, and test the valve
Let the tank refill completely, then bleed air by running a faucet until steady water flows. Lift the test lever on the valve to confirm water is discharged and then release.
Tip: If no discharge occurs, recheck valve seating and connections. - 8
Restore power, monitor for leaks
Restore power or gas to the heater and monitor the valve area for leaks over the next several hours. If you notice leaks or abnormal discharge, shut off power and consult a professional.
Tip: Document the replacement date for your records and future maintenance.
Got Questions?
Do I need a permit to replace a water heater pressure relief valve?
Code requirements vary by location. In many areas, replacing a T&P valve is considered a minor repair, but some jurisdictions require a permit or inspection. Check with your local building department or a licensed plumber to confirm.
Check local codes first; permits may be required in some places for valve replacement.
Is replacing a T&P valve a DIY task or should I hire a plumber?
A confident homeowner can replace a T&P valve with the right tools and careful safety steps. If you’re unsure about gas lines, electrical shutoffs, or valve seating, hire a professional.
You can do it yourself if you’re comfortable, otherwise hire a pro.
What are common signs of a failing T&P valve?
Frequent leaks, continuous dripping, valve discharge during normal operation, or a failed test lever indicate a replacement is needed.
Look for leaks or abnormal discharge as the main signs.
How long does valve replacement typically take?
A straightforward replacement usually takes about an hour or two, depending on access and system specifics.
Most people finish within an hour or two.
How much does valve replacement cost?
Costs vary by region and valve model. Expect a small part cost plus potential labor; consult local pros for a precise estimate.
Costs vary; call a local plumber for a quote.
Watch Video
The Essentials
- Understand the T&P valve role and when replacement is needed
- Follow safety steps before touching the heater
- Use proper tools and avoid sealant on valve threads
- Test the valve after replacement to confirm safe operation
- Monitor the area for leaks after restoration