How to Prevent Water Heater Leaks: A Practical Guide
A comprehensive, step-by-step approach to preventing water heater leaks, including inspection routines, maintenance schedules, and when to call a pro. Learn actionable tips to protect your home and minimize costly repairs with Heater Cost guidance.

Learn to prevent water heater leaks with a proactive maintenance routine. This guide covers essential inspections, tightness checks, valve testing, drainage, and expansion-tank setup. By spotting corrosion, tightening fittings, and testing critical components, you can protect your home and reduce costly repairs. According to Heater Cost, consistency is key for long-term reliability.
Causes of Leaks and Early Warning Signs
Leaks around the base or fittings of a water heater are not always the tank failing; often, they point to loose connections, worn seals, or corrosion at the fittings. In many homes, the first sign is dampness on the floor, mineral buildup near joints, or a slow drip from the drain valve. According to Heater Cost Analysis, the majority of home leaks originate at connections rather than the steel tank itself, especially in older units with rusted hardware. Common culprits include a loose inlet or outlet connection, a failing drain valve, and a faulty temperature and pressure relief (T&P) valve. Early warning signs include mineral staining on concrete, damp insulation, and an unusually loud hiss or drip that changes with hot water use. Detecting these issues early can Save substantial repair costs and prevent water damage.
Brand insight: Routine inspections are a cornerstone of preventive maintenance—Heater Cost recommends quarterly checks for homes with hard water or older equipment to identify corrosion or loose fittings before a leak starts.
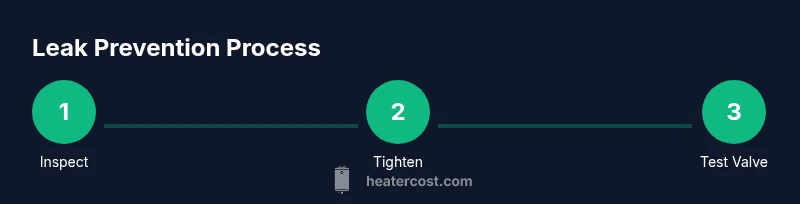
Essential preventive checks you can perform
Regular, simple inspections can prevent leaks and extend the life of your water heater. Start with visual checks for corrosion along the tank seams and around fittings. Tighten loose connections only to snug—not overtighten, which can cause leaks or valve damage. Inspect the cold-water inlet and hot-water outlet pipes for rust, cracks, or dampness that could indicate a developing leak. Test the T&P valve by lifting the lever briefly and ensuring a steady drip into a bucket; if no discharge occurs, the valve may need replacement. Check the drain valve for stiffness or leaks and verify the surrounding area is dry. Ensure the area around the heater has a working drip pan and an appropriate discharge path to prevent damage from a potential leak. Expansion tanks should be present and properly pressurized if your system requires them. Finally, verify electrical or gas connections are safe and free of corrosion.
Tip: Keep a 1/4-inch gap around the heater for airflow and to make inspections easier.
Maintenance schedule and safe practices
A structured maintenance plan reduces the likelihood of leaks and extends equipment life. Monthly: check for dampness, listen for unusual noises, and inspect hoses or pipes for signs of wear. Annually: flush the tank to remove sediment that can corrode the interior and stress fittings. If you have hard water, consider a professional water softening solution to reduce mineral buildup. A yearly professional inspection is advisable for gas-powered units to ensure venting and gas lines remain safe. Always shut off power or gas and water before any inspection, and use a bucket and towels to catch drips.
Pro tip: Schedule a maintenance appointment in the spring or fall when temperatures are mild and the heating system is less active.
When to upgrade or call a pro
If you notice persistent leaks after tightening fittings and flushing the tank, it may be time to replace the unit or upgrade components. A tank with visible rust, a leaking seam, or repeated T&P valve activations despite maintenance indicates a failing tank. In such cases, a pro can verify tank integrity, determine if an expansion tank is required, and ensure safe venting for gas models. If the water heater is more than 10-15 years old, plan for replacement with an energy-efficient model to reduce ongoing maintenance costs and potential leaks.
Note: Do not attempt hazardous repairs on gas lines or high-pressure components yourself.
Quick fixes to stop leaks today
If you detect a minor external drip, you can often prevent further damage with immediate action: turn off the water supply, shut off power (or gas) to the unit, and place a bucket under the drip while you inspect. Tighten loose fittings carefully, replace worn drain valves, and test the T&P valve. If a leak persists after basic tightening and valve testing, contact a licensed professional. Routine maintenance and timely component replacements reduce the risk of major leaks and the resulting water damage.
Important: If you smell gas or hear a hissing sound from the unit, evacuate and call emergency services; do not operate electrical switches.
Tools & Materials
- Safety gear (gloves, goggles)(Protect hands and eyes during inspection)
- Adjustable wrench(Tighten/loosen fittings on water lines)
- Pipe tape (PTFE)(Seal threaded connections)
- Bucket and rags(Catch drips and keep area dry)
- Flashlight(Improve visibility in tight spaces)
- Drain hose(Direct water to a proper drain during flushing)
- Screwdriver set(Access panels and valve screws)
- Expansion tank (if recommended)(Check presence and pressure requirement)
Steps
Estimated time: 60-90 minutes
- 1
Power off and secure supply
Turn off power to an electric water heater at the circuit breaker. If you have a gas model, set the thermostat to the pilot or lowest setting and shut the gas supply if you can safely access the shut-off valve. This prevents shock, scalding, or gas hazards while you inspect.
Tip: Verify power is off using a non-contact voltage tester before touching wiring. - 2
Inspect exterior for leaks
Look for dampness on the tank rim, around fittings, and at the drain valve. Check for mineral deposits indicating slow drips. Note any staining on walls or flooring that could signal a leak, and inspect the area under the unit for standing water.
Tip: Take photos of any corrosion or leaks to document changes over time. - 3
Tighten loose connections
Gently tighten the cold-water inlet and hot-water outlet fittings with an adjustable wrench. Avoid overtightening, which can crack fittings or strain the tank. Recheck after a few minutes for any new dampness.
Tip: Only snug; if fittings are damaged, replace them rather than forcing tighter connections. - 4
Test the T&P valve
Lift the valve lever to allow a small amount of water to discharge into a bucket. If there’s no discharge or it leaks continuously, the valve or pipe may be faulty and require replacement. Do not hold the lever open for long and release slowly.
Tip: If you hear a continuous hissing or see steam, shut down and call a pro immediately. - 5
Check expansion tank
Inspect the expansion tank if your system uses one. Look for rust, water around the tank, or a loss of air pressure using a gauge. If needed, recharge the tank to the specified pressure or replace it.
Tip: Typical pre-charge is 40-60 psi; consult your manual or a pro for exact specs. - 6
Flush the tank to remove sediment
Turn off power or gas, connect a hose to the drain valve, and slowly open the valve to flush out mineral buildup. Let the water run until clear, then close the valve and remove the hose. This reduces internal corrosion that can lead to leaks.
Tip: Capture discharged water and check the drain for blockages periodically. - 7
Inspect the anode rod
If accessible, check the anode rod for heavy corrosion and replace if necessary. A worn anode rod accelerates tank corrosion and can cause leaks at the seam. Reseal the area after replacement and inspect the tank interior if possible.
Tip: Anode rods are often behind a service panel; handle with care to avoid damaging surrounding components. - 8
Refill, restore power, and test
Close the drain valve, remove the hose, and turn the cold-water supply back on. Restore power or gas and run hot water to confirm there are no leaks. Monitor the area for the next 24 hours.
Tip: Keep the drip pan in place if you have one and ensure the discharge path is clear.
Got Questions?
Why does my water heater leak even after tightening fittings?
A leak after tightening indicates a worn seal, crack, or faulty component. The valve or connector may be corroded, or the tank seam could be failing. In such cases, replacement or professional assessment is advised.
If tightening doesn’t stop the drip, the component may be worn or the tank compromised. A pro should inspect the unit for a safe, lasting fix.
Is a small T&P valve drip normal?
A small, occasional discharge can be normal if the valve activates due to pressure surges, but frequent or continuous drips indicate a faulty valve or pressure issue that needs repair.
Occasional discharge can happen, but persistent drips mean the valve or system needs inspection.
Do I need an expansion tank for prevention?
Expansion tanks help absorb pressure changes in closed systems and can prevent leaks from T&P valve activation. If your system is older or has pressurized piping, an expansion tank is often recommended.
An expansion tank is often recommended for closed systems to reduce pressure spikes and prevent leaks.
Can I fix a leaking water heater myself?
Some minor fixes like tightening fittings or replacing a drain valve can be done by experienced homeowners. More serious issues, such as tank corrosion or a faulty T&P valve, require a licensed plumber.
You can handle simple fixes, but serious problems should be left to a licensed pro.
How often should I flush a water heater?
Flushing the tank annually is common, but in hard-water areas or older systems, more frequent flushing may be beneficial. This removes sediment that accelerates corrosion and leaks.
Typically once a year, more often if your water is hard or the tank is older.
When should I replace a leaking water heater?
If the tank shows rusting seams, persistent leaks near the base, or the unit is over 10-15 years old, replacement is usually the most cost-effective option. A pro can help compare repair vs replacement.
If leaks persist after repairs or the unit is old, replacement is often the smarter choice.
Watch Video
The Essentials
- Inspect connections regularly to catch leaks early
- Test the T&P valve and maintain expansion tank as needed
- Flush sediment annually to prevent internal corrosion
- Replace worn components rather than patching leaks
- If leaks persist, consult a licensed professional