How to Know If Your Water Heater Is On
A complete, beginner-friendly guide to determine if your water heater is on, including electric and gas models, safe testing, and when to call a pro.

You’ll learn fast checks for hot water, visual cues, and safe testing methods to confirm your water heater is functioning. This quick guide walks you through simple tactile checks, listening for burner or pump sounds, and verifying thermostat settings. You’ll know within minutes if your unit is on or off, whether it’s heating, and what to do next if you don’t get hot water. Keep safety in mind and note any unusual smells or noises. This quick answer helps homeowners decide whether to adjust settings, reset, or call a pro.
How a Water Heater Works: Electric vs Gas
Water heaters convert energy into heat to warm household water, using two common approaches: electric elements and gas burners. Electric models rely on one or two submerged heating elements controlled by thermostats; gas units burn propane or natural gas and vent exhaust through a flue. Understanding these basics helps you interpret signs of activity and diagnose status without guessing. Most tanks include safety features such as temperature and pressure relief valves, a thermostat, and, on gas models, a standing pilot or electronic ignition. When you know which method your unit uses, you can tailor your checks—electric units often show heating element activity inside a panel, while gas models reveal burner ignition and venting cues. With this foundation, you’ll read signals more accurately and avoid unnecessary service calls. This section sets the stage for practical, safe verification of whether the heater is on or off.
Why It's Important to Confirm the Unit Is On
Confirming that your water heater is actively heating is essential for comfort and safety. Misreading status can lead to cold showers, wasted energy, or even unsafe situations if a gas appliance is not venting properly. By learning a few reliable checks—thermostat readings, power status, and faucet temperature—you gain confidence in diagnosing heating behavior. Regular verification also helps you notice creeping problems early, such as a failing thermostat or sediment buildup that reduces efficiency. In short, a proactive approach saves water, energy, and potential repair costs, while giving you a clearer picture of your home's heating system. This is especially important for rental properties or multi-family dwellings where consistent hot water supply is a baseline expectation.
Quick Visual Cues That Heating Is Happening
Look for immediate indicators that your heater is active. If you have an electric unit, you may hear faint buzzing or hums or feel a warm surface near the access panel when power is energized. Gas models often show a steady flame in the burner area or a lit pilot light in older units. On both types, a rise in faucet water temperature after 60–90 seconds of running hot water is a positive sign. Also check for indicator lights on modern digital thermostats—these can confirm that the control board is energized and calling for heat. If you notice that hot water remains cold despite these cues, you may be looking at a thermostat issue, a faulty heating element, or a gas supply/venting problem that requires deeper inspection.
Electric Water Heaters: Safety-First Power Checks
Safety comes first with electric water heaters. Before poking around, switch off the circuit breaker that serves the heater and, if accessible, switch off the disconnect at the device. Use a non-contact voltage tester to confirm there is no live power at the junction box before opening any panels. With the power off, remove the access panel(s) and inspect the thermostat(s) for proper setpoints (a common residential target is around 120–140°F, though check your manual). Never bypass safety devices or force components; if you feel unsure, stop and consult a qualified technician. After adjustments, replace panels, turn power back on, and test water at a faucet to confirm heating.
Gas Water Heaters: Verifying the Burner and Vent
Gas-powered units rely on a burner and venting system. If the pilot is present, ensure it remains lit; if your unit has an electronic ignition, listen for a click when heat is requested. Check that the gas valve is fully open and the vent is clear of obstructions. A yellow or flickering flame can indicate incomplete combustion and warrants service; a blue flame typically indicates proper combustion. Always test outdoors for gas smells and do not operate if you suspect a leak. If you’re unsure about safe shutdown procedures, call a plumber or gas utility for assistance.
Testing Hot Water at the Faucet: What to Expect
Run hot water from a nearby faucet for 60–90 seconds. If the water heats up and then stabilizes near your desired temperature, the heater is likely on and functioning. If the water remains cold, run a longer test to see if temperature gradually improves, which could indicate sediment buildup or element/ignition issues. For electric models, be mindful of safety and avoid contact with exposed elements. If you cannot produce hot water after thorough testing, proceed to further diagnosis or contact a pro.
What to Do if There’s No Hot Water
If you’re not getting hot water, first recheck power and gas supply, then inspect the thermostat settings and heating elements (electric) or burner operation (gas). Sediment buildup can insulate the water and slow heating—consider a yearly tank flush. If your tests suggest a faulty thermostat, burning smell, gas odor, or a tripped breaker that won’t reset, stop troubleshooting and call a licensed professional. Persistent lack of hot water can indicate a more serious issue that requires specialized tools and expertise.
Common Causes of No Hot Water
The lack of hot water often boils down to thermostat missettings, blown fuses, or tripped breakers in electric models, and a pilot light outage or burner problems in gas systems. Sediment buildup at the bottom of the tank can also reduce heating efficiency, leading to cooler water. Age and wear are culprits too: older heaters lose efficiency and may require replacement. By understanding these common causes, you can prioritize fixes and avoid unnecessary replacements.
When to Reset or Reignite Safely
Some units have a reset button to clear minor fault codes; use it only after consulting your manual to avoid hazards. For gas heaters, ensure the area is well-ventilated and there are no gas smells before attempting to reignite or service. If you’re uncomfortable with resetting or ignition procedures, contact a pro. This approach helps prevent prolonged outages and keeps your system operating within safe parameters.
Maintenance Tips to Extend Life and Ensure On Status
Schedule annual inspections and flush the tank to remove sediment that impedes heat transfer. Check the anode rod for corrosion and replace as needed to extend tank life. Replace worn components like thermostats, heating elements, and valves with model-compatible parts. Keep the area around the heater clean and free of flammable materials, and ensure proper ventilation for gas models. Regular maintenance improves reliability and keeps the unit on when you need hot water.
Authority Sources
For trusted guidance, consult official sources and major publications. • Energy.gov’s Water Heating guidance provides energy-efficient practices and safety considerations. • The Energy Department’s articles on common water heater problems offer practical troubleshooting steps. • NFPA safety resources cover gas and electrical heating device safety and risk awareness. These sources help homeowners validate their checks and understand when to seek professional assistance.
Quick Reference Debug Checklist
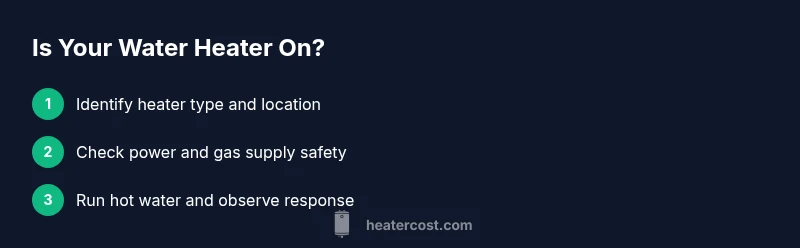
- Identify heater type (electric or gas) and locate the access panels.
- Cut power (and gas supply if safe) before touching internal components.
- Check thermostat settings and heating element/burner status.
- Run hot water and observe temperature and flow rate.
- Listen for heating sounds and look for indicator lights.
- Note any smells, noises, or leaks and take appropriate action.
Tools & Materials
- Non-contact voltage tester(Verify power is off at the junction box before touching any components.)
- Flathead and Phillips screwdrivers(Needed to remove access panels on electric models and adjust thermostats.)
- Heat-resistant gloves(Protect hands when handling hot surfaces or damp components.)
- Flashlight(Improve visibility inside the cabinet and access panel areas.)
- Bucket or towel(Catch drips if you loosen a drain valve or fittings.)
- Digital thermometer(Use for approximate water temperature checks at the faucet.)
- Owner’s manual or model information(To confirm safe procedures and specific thermostat settings.)
Steps
Estimated time: 60-75 minutes
- 1
Identify heater type and location
Locate the water heater in your home and determine whether it is electric or gas. Note the model, access panels, and the presence of any burners or ignition components. Understanding the type guides the inspection path and safety precautions.
Tip: Consult the manual for your model before touching any controls. - 2
Power off safely (and gas if applicable)
Turn off power to an electric unit at the circuit breaker or disconnect switch. If you’re inspecting a gas unit, close the gas valve only if you can do so safely and follow local codes. Do not proceed if you smell gas or feel unsure about gas safety.
Tip: Always confirm power is off with a tester before panel work. - 3
Verify the main power supply
Use a non-contact voltage tester to ensure there is no live voltage at the heater’s junction box. If you detect voltage, stop and re-check the disconnect. Electric checks require the power to be off before you proceed with panel removal.
Tip: If you’re unsure, seek a licensed electrician. - 4
Open access panel and inspect thermostats (electric)
Carefully remove the panel(s) to reveal the thermostats and heating elements. Look for signs of wear, corrosion, or loose connections. Verify the thermostat setting; 120–140°F is a typical household target, but follow the manufacturer’s recommendation.
Tip: Label wires before disconnecting anything; reassemble in the correct order. - 5
Check thermostat settings and adjust if necessary
If the thermostat is set too low, raise it gradually and avoid overshoot. After adjustment, reassemble the panel and restore power. Monitor the heater to see if heating resumes after a cycle.
Tip: Make small changes and test with a faucet to gauge response. - 6
Inspect for indicator lights or displays
Some heaters show diagnostic lights or a digital display when heating is active. Note any fault codes and refer to the manual to interpret them. Modern units may require a reset for a fault condition.
Tip: Document codes for reference when contacting support. - 7
Gas burner and flame check (gas models)
If your unit uses a standing pilot, ensure it remains lit or that ignition is functioning. For electronic ignition, listen for ignition clicks. A healthy flame is blue with minimal yellow tips; a yellow flame can indicate incomplete combustion and safety risk.
Tip: If you detect gas odor, evacuate and call the gas utility immediately. - 8
Turn power back on and run hot water
Restore power and open a hot water faucet. Allow 60–90 seconds for the system to respond. Observe whether hot water begins to flow and the temperature trend toward the set point.
Tip: Use a single faucet to simplify monitoring and avoid hot-water mixing. - 9
Evaluate heat output and cycle duration
If the water heats slowly or doesn’t reach temperature, there may be a failing heating element (electric) or burner/venting issue (gas). Compare with previous performance to determine if a service call is justified.
Tip: Keep a log of temperatures and cycle times for trend analysis. - 10
Check for leaks, corrosion, and venting
Inspect fittings and the tank for moisture or drips. Ensure venting on gas models is free of obstructions and that the flue is clear. Leaks or poor venting can mask heating performance.
Tip: Address leaks promptly to avoid bigger problems and safety hazards. - 11
Document findings and next steps
Record thermostat settings, observed behavior, and any fault codes. Decide whether to adjust, reset, schedule service, or replace the unit. A clear log helps you communicate with a contractor.
Tip: Keep notes handy for future maintenance checks. - 12
Know when to call a professional
If you smell gas, hear persistent hiss, see leaks, or cannot safely perform checks, stop and contact a licensed professional. Do not attempt risky ignition work or disassembly beyond your comfort and training level.
Tip: Prioritize safety; professional service is often cost-effective for complex issues.
Got Questions?
How can I tell if my water heater is on without opening it?
Check the faucet water temperature after running hot water for a minute. Listen for heating sounds and look for indicator lights on the thermostat. If you still can't confirm, consult the manual or a professional.
You can tell by running hot water and listening for heating sounds or checking the thermostat light; if unsure, consult the manual or a professional.
Is it safe to adjust the thermostat on an electric water heater?
Only with the power off and using insulated tools. Make small adjustments and test gradually. If you’re unsure, avoid changes and contact a pro.
Only adjust with power off and be careful. If unsure, call a pro.
What if there’s no hot water even when the heater is on?
Possible causes include a faulty thermostat, bad heating element (electric), or gas burner issues. Sediment buildup can also impede heating. Inspect and test step-by-step or call a technician.
If there’s no hot water, it could be thermostat, element, or burner problems and sediment buildup. Consider professional help if the issue persists.
Should I reset my water heater?
Some models have a reset button; follow the manual and avoid repeated resets. If resets don’t fix the issue, or fault codes reappear, contact a pro.
A reset can help small faults, but if problems continue, call a professional.
When should I call a professional?
Call a professional if you smell gas, hear gas hissing, see leaks, or cannot safely perform basic checks. Persistent lack of hot water or unusual sounds should also prompt expert diagnosis.
If you smell gas or can’t safely test the system, call a professional right away.
How often should I service my water heater?
Annual inspection and a yearly tank flush are recommended for most homes. This helps maintain efficiency and prolongs the unit’s life.
Have your heater inspected yearly and flush the tank to keep it efficient.
Watch Video
The Essentials
- Identify heater type before testing.
- Power off before touching internal components.
- Test hot water at faucet to confirm heating.
- Gas smells mean emergency action—leave area.
- Schedule maintenance to keep on-status reliable.