Fix Heater in House: Step-by-Step Home Guide 2026
Learn a safe, practical approach to diagnose and fix common heater issues at home. This guide covers electrical, thermostat, filtration, and gas-safe concerns with clear steps and maintenance tips for 2026.

Learn how to diagnose and fix common heater issues in your home with a practical, safety-first approach. This guide covers core troubleshooting: power supply, thermostat settings, air filters, ignitors, gas lines, and vent blockages. Follow step-by-step actions to identify problems, perform basic fixes, and know when to call a licensed professional.
Why Fixing a Heater in Your Home Matters
Heating systems are complex, and many common faults are user-serviceable with basic safety practices. A malfunctioning unit can pose risks such as carbon monoxide exposure, electrical faults, or gas leaks, and it often wastes energy, driving up utility bills. Even when problems seem minor, addressing them early prevents minor faults from turning into expensive replacements. According to Heater Cost, homeowners who respond promptly to early warning signs tend to experience fewer emergency visits and better overall heater longevity. This guide focuses on common causes in both electric and gas systems, from flaky thermostats to dirty burners, and explains what you can safely handle vs. when to contact a professional. You’ll learn practical steps to diagnose, document, and communicate the issue, so you can get faster, more accurate service if a professional visit becomes necessary. By building a routine of quick checks, you reduce downtime and keep your living spaces warm with confidence.
Consider the big picture: a well-functioning heater keeps rooms evenly warm and reduces moisture issues that can stress structures. When components like ignitors, burners, or fans struggle, you might notice inconsistent heat, unusual noises, or rising energy bills. Many fixes cost far less than replacing the unit. This section focuses on gas and electric systems alike, and it stresses safety as the top priority, with emphasis on turning off power or gas before inspecting, keeping detectors functional, and following the manufacturer's manual for your specific model. By building a routine of quick checks, you reduce downtime and keep your living spaces warm with confidence.
noteCountIfAny":null}
Quick Troubleshooting Checklist (Safe First Steps)
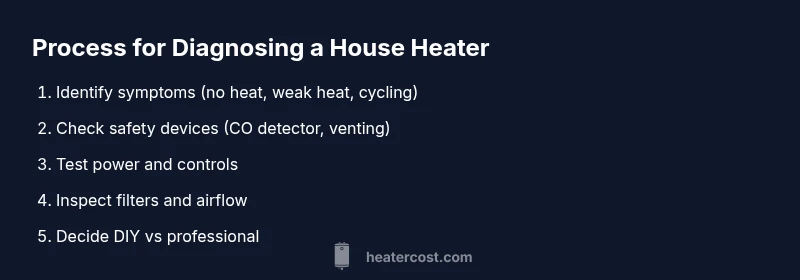
Before you dive into any internal components, perform a high-level check to rule out obvious external causes. Ensure the thermostat is set to heat and at a comfortable temperature, verify the circuit breaker or fuse is intact, and inspect the air filter — a clogged filter is a common reason for reduced heat and cycling. Check for unusual noises or smells, which can signal mechanical wear or combustion issues. If you have a gas furnace, confirm the exhaust vent is not blocked, and verify the exterior air intake is clear. Always switch off power to the system at the breaker before touching any wiring, and never attempt to bypass safety controls. Keep a carbon monoxide detector installed near living spaces and test it monthly. If you still notice weak heat or intermittent operation after these quick checks, proceed to more in-depth diagnostics or call a pro. Document any observed symptoms, dates, and recent changes (like new filters) to share with a technician, which speeds up diagnosis and reduces guesswork. This safe first-check framework helps you avoid unnecessary service calls while improving your odds of a quick fix.
Electrical Diagnoses: Wires, Breakers, and Safety
Electrical problems are common culprits behind heating issues. Start by turning off power at the main disconnect to avoid shocks, then test the outlet or circuit using a multimeter if you are comfortable. Inspect for signs of arcing, frayed insulation, or loose connections at the furnace control board, blower, and switch wiring. A tripped breaker or blown fuse may indicate an overload or a failing component; reset only once and monitor for repeated trips. If the system runs intermittently or if you notice scorch marks or smells, shut it down and call a licensed electrician. Do not attempt to repair high-voltage components beyond your training. For heat pumps and electric furnaces, check that contactors are engaging properly and that the limit switch is not stuck in the open position. Document voltage readings and connector tightness to share with a technician. Routine electrical safety discipline saves lives and prevents further damage, and it keeps the system from failing during cold snaps.
Thermostats and Controls: Getting the Right Signals
Thermostats sometimes go out of sync with the heating system, causing short cycling or no heat at all. Verify the thermostat is powered, correctly wired, and located away from heat sources or drafts that skew readings. Calibrate or replace batteries as needed, and compare the thermostat’s readings with a separate room thermometer to assess accuracy. If you have a smart thermostat, ensure firmware is up to date and that the device is communicating with the furnace or air handler. Check for dirty or loose thermostat wires at the furnace control board and at the stat terminals. A misconfigured emergency heat or fan setting can mimic a non-functioning system. In many cases, recalibration or a simple replacement fixes the issue; if not, the problem may lie with the control board or sensor, which requires professional evaluation.
Airflow and Filtration: Why Dirty Filters Cause Problems
Airflow is the lifeblood of any heating system. A clogged filter or blocked supply ducts reduces efficiency, causes uneven heating, and can overwork the blower motor. Start by replacing the air filter with a correctly sized one for your model, and ensure the return air grille is not obstructed by furniture or debris. Vacuum dust from around the furnace or air handler to minimize dust debris that can hamper heat exchange. If you notice reduced airflow in specific rooms, inspect supply registers and ensure ducts are sealed and not leaking; a leaky duct can waste energy and reduce comfort. Regular maintenance calendars suggest replacing filters every 1-3 months depending on usage and household conditions. For homes with allergies or pets, more frequent changes help maintain indoor air quality and keep the system performing at peak efficiency.
Gas Heaters: Venting, CO Detectors, and Safe Handling
For gas-fired furnaces, safety starts with proper venting and reliable carbon monoxide detection. Ensure the flue or vent is clear of bird nests or debris and that exterior vent caps are free from obstructions. CO detectors should be installed on every level, tested monthly, and replaced per the manufacturer’s timeline. Do not attempt to adjust gas pressures or seals yourself; gas lines and burners require licensed technicians. Lean toward professional service if you smell gas, hear a hiss, or notice dark soot around burners. When testing, only use manufacturer-approved procedures; never bypass safety controls. If a service call is needed, collect operational data like flame color, furnace cycling patterns, and any error codes from the display to help the technician diagnose quickly.
Cleaning and Maintaining Burners and Heat Exchangers
Over time, burner ports can clog with dust or soot, reducing flame height and efficiency. With power off, gently brush the burner ports and flame sensor to remove buildup, using a soft brush and compressed air if available. For heat exchangers, look for cracks or corrosion signs; handle with care and do not attempt to open sealed compartments. A clean heat exchanger improves heat transfer and reduces temperature rise in the ductwork. Always refer to the manufacturer’s maintenance schedule and avoid using abrasive cleaners that could damage protective coatings. If you notice yellow or orange flame rather than crisp blue in gas furnaces, this can indicate improper combustion and warrants immediate professional inspection. Document your maintenance activity, including parts replaced and dates, to support future service visits.
DIY vs Professional Repairs: Making the Right Call
Many routine maintenance tasks and some basic repairs are appropriate for confident homeowners, especially those involving filters, cleanings, and simple sensor checks. However, many issues require professional expertise: gas line work, refrigerant handling, electrical voltage tests, and control-board repair. When in doubt, start with a clear problem description, all visible symptoms, and recent changes (filters, settings). Heater Cost recommends erring on the safe side: if you smell gas, hear unusual noises, or run into error codes you cannot interpret, contact a licensed technician sooner rather than later. If pursuing DIY, ensure you comply with local codes and safety procedures and never bypass built-in safety systems. Keep a written maintenance log and schedule annual checkups with a qualified tech to extend the life of your system.
Budgeting for Fixes and Potential Upgrades
Repair costs vary widely depending on the issue, the system type, and local labor rates. A service call for diagnostic inspection typically covers the labor to identify problems and may include basic safety checks. Replacing worn parts such as ignitors, contactors, sensors, or fans can be relatively affordable compared with full replacements, while major failures may point to the end of a system’s life. When cost comparisons arise, consider upgrading to a more efficient model or adding components like better filtration or improved zone control to improve long-term energy savings. This section also outlines potential incentives or rebates that your area might offer for upgrading to high-efficiency equipment; check with local utility providers and state programs. Regardless of budget, it’s wise to plan for routine maintenance to head off costly breakdowns and extend the life of your heater. The Heater Cost team recommends preparing a maintenance fund and scheduling annual inspections to protect your home’s comfort and value in 2026 and beyond.
Tools & Materials
- Screwdriver set (Phillips and flathead)(Access panels and service covers)
- Multimeter(Test electrical circuits and voltage safely)
- Vacuum with crevice attachment(Remove dust from furnace area and vents)
- Soft brush or microfiber cloth(Clean burner ports and sensors without damage)
- Replacement air filters(Use the correct size and MERV rating for your system)
- Flashlight or work light(Inspect dark corners and hidden components)
- CO detector(Test and replace as needed)
- Safety gloves and eye protection(Personal protection during inspection)
- Gas leak detector spray (optional)(Only for trained individuals; do not perform gas work)
- Duct-sealing tape or mastic (optional)(Seal leaks in accessible ducts)
Steps
Estimated time: Total time: 90-120 minutes
- 1
Power down and secure safety
Turn off power to the furnace at the main breaker or service panel and switch off the gas supply if you suspect a leak. This prevents shocks or accidental ignition while you inspect. Verify that any external disconnects are clearly labeled and cannot be re-energized accidentally during work.
Tip: Always double-check that the system is fully de-energized before touching wiring. - 2
Inspect thermostat and controls
Check that the thermostat is set to heat, that the display is on, and that it has a reliable schedule. Replace batteries if needed and verify readings with a room thermometer to confirm accuracy. For smart thermostats, ensure firmware is current and the device remains connected to the furnace.
Tip: Compare readings to a known-good thermometer to catch calibration drift. - 3
Check and replace air filters
Inspect the air filter for dirt and debris; replace if it looks clogged or dark. A clean filter improves airflow and heat delivery. After replacement, reset any timer settings on smart thermostats to avoid confusion.
Tip: Keep a spare filter on hand and rotate replacements every 1-3 months. - 4
Inspect electrical connections
Look for loose wires, exposed conductors, or signs of arcing at the control board and wiring harnesses. If you see damage or smell burning, stop and call a pro. Only perform light cleaning of contacts with a dry brush if comfortable.
Tip: Record any noticeable changes in voltage or connection tightness for the technician. - 5
Evaluate blower and motor components
Check the blower wheel for dust buildup and ensure belts are intact and properly aligned. Listen for unusual noises that indicate wear or misalignment. Clean accessible components and reseat any loose connections.
Tip: A dirty blower motor can overheat and shorten its life. - 6
Assess gas supply and venting safety
For gas systems, confirm the gas shut-off valve is accessible but not over-tightened. Inspect vents for blockages and ensure outdoor vent caps are clear. If you smell gas or hear hissing, evacuate and contact emergency services.
Tip: Never attempt to adjust gas pressures or seals without licensing. - 7
Clean burners and ignition components
Gently clean burner ports and flame sensors; remove soot or dust that impedes ignition. If your system uses an electronic ignition, verify the sensor is clean and free of corrosion. Reassemble components carefully.
Tip: Avoid abrasive tools that can scratch sensitive surfaces. - 8
Test startup and cycling
Power the system back on and observe startup behavior. Note whether heat comes on promptly, if there’s a delay, or if cycling is irregular. If issues persist, escalate to professional diagnostics with the observed symptoms.
Tip: Record startup time and cycling pattern to speed up diagnosis. - 9
Document results and plan next actions
Write down what you checked, which parts were replaced, and any codes or readings from tests. Use this log when contacting a technician or deciding on repairs versus replacement.
Tip: A clear log reduces diagnosis time and avoids repetitive steps.
Got Questions?
Why won't my heater start even though it’s powered on?
Several issues can cause this, including thermostat misalignment, a tripped breaker, a dirty filter, or ignition problems. Start with simple checks: thermostat settings, the filter, and the breaker. If the system still won’t start, the fault may be electrical or combustion-related and requires professional inspection.
If your heater won’t start, check the thermostat and breaker first, then consult a professional if the problem persists.
What should I check first if the thermostat seems off?
Validate the thermostat’s settings, ensure it’s powered, and compare its reading with a room thermometer. If it’s a smart thermostat, verify firmware and device communication with the furnace. Replacing batteries or recalibrating can fix many readings.
Verify power, recalibrate if needed, and compare with a room thermometer before calling for help.
Is it safe to clean burners or ignitors myself?
You can clean accessible surfaces with the system powered down, but do not disassemble gas burners deeply or adjust fuel controls. If you notice abnormal flames or smells, stop and call a pro. Safety first is essential for gas systems.
Light cleaning of accessible parts is fine, but avoid disassembly of gas components; call a pro if in doubt.
How often should I replace air filters?
In most homes, filters should be checked monthly and replaced every 1–3 months, depending on usage, pets, and allergies. Regular replacement improves airflow, efficiency, and indoor air quality.
Check monthly and replace every 1 to 3 months depending on conditions.
When is it time to call a professional?
Call a professional if you detect gas smells, persistent cycling issues, error codes you can’t interpret, or signs of electrical problems like buzzing, scorch marks, or frequent breaker trips.
If you smell gas or see signs of electrical issues, don’t DIY—call a licensed technician right away.
Can carbon monoxide exposure occur even with a functioning heater?
Yes. If a heater is malfunctioning, CO can accumulate. Install CO detectors on every level and test them regularly; never ignore symptoms such as headaches, dizziness, or nausea that could indicate CO exposure.
CO risk is serious; detectors should be active and tested monthly.
Watch Video
The Essentials
- Keep safety first; shut off power/gas before inspection.
- Start with thermostat, filters, and airflow before complex diagnostics.
- Call a pro for gas work, electrical high-voltage issues, or unknown error codes.
- Document symptoms and maintenance steps for faster service.
- Schedule annual checks to extend heater life and efficiency.