How to Deal with a Heater: A DIY Guide for Homeowners
Learn safe, practical ways to diagnose, maintain, and troubleshoot your heater. This step-by-step guide helps homeowners decide between DIY fixes and professional help, with safety tips and cost considerations.

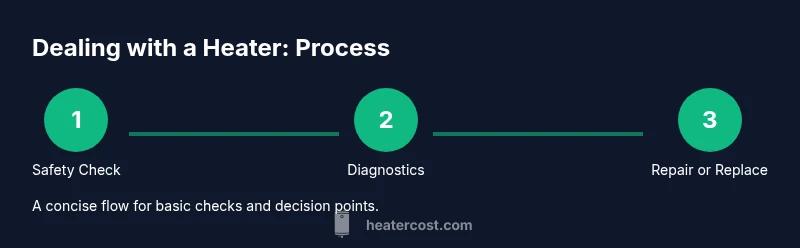
Learn how to deal with a heater safely and effectively. This step-by-step guide covers safety precautions, quick diagnostics, maintenance routines, and decision points for repair versus replacement. According to Heater Cost, you’ll compare DIY fixes with professional help, estimate long-term costs, and know when it's time to call a licensed technician for gas, propane, or electric systems.
How a Heater Works: Quick Primer
Most homes rely on a heating system that converts energy into warm air or radiant heat. Common types include gas furnaces, electric furnaces, boilers, heat pumps, and portable space heaters. Understanding the basics helps you triage issues without unnecessary panic. A typical malfunction often stems from airflow restrictions, thermostat misreads, ignition problems, or dirty components. Before you touch any hardware, confirm your system type and have the owner’s manual on hand. This primer sets expectations for the checks that follow and highlights areas where DIY actions are safest. According to Heater Cost, recognizing the system you own will guide you toward appropriate maintenance intervals and avoid dangerous attempts on components outside your expertise.
Key ideas to remember:
- Identify your system type (gas, electric, or boiler) and distribution method (ducted air, radiant, or hydronic).
- Many issues start with simple airflow problems or a misreading thermostat.
- Always consult the manual and, if in doubt, proceed with caution and seek professional help when needed.
Safety Essentials: Installations, Venting, and Carbon Monoxide
Safety around heaters is non-negotiable. Carbon monoxide is a silent danger with fuel-burning systems, so install and maintain CO detectors on every level, test them monthly, and replace batteries as recommended. Ensure proper venting for gas or oil-fired units and never block exhausts or combustion air intakes. If you smell rotten eggs or gas, leave the home immediately and call the gas company or emergency services from a safe location. For electric models, ensure the power supply is stable and avoid running heaters on overloaded circuits. In the Heater Cost analysis, safety always takes precedence over convenience, and professional inspection is advised for any uncertain situation.
Practical steps:
- Test CO detectors and verify they’re within their expiration window.
- Keep vents clear and unobstructed; clean as needed.
- If you suspect a gas issue, evacuate and call authorities.
- Have a licensed technician inspect gas lines, vents, and safety devices when in doubt.
Common Heater Problems and Prerequisites
Heaters can present a wide range of symptoms. Common issues include weak or no heat, uneven heating, frequent cycling, unusual noises, and odd smells. Before you troubleshoot, gather the owner’s manual, a flashlight, and access to basic tools. Check for obvious signs first: blown fuses or tripped breakers, dirty air filters, closed or miscalibrated thermostats, and blocked air intake or exhaust paths. Addressing these simple problems often yields quick wins and may prevent more extensive repairs. The goal is to identify whether the problem is electrical, mechanical, or related to fuel supply, then determine whether a DIY fix is feasible or if a professional is warranted. The Heater Cost team emphasizes documenting the observations to help a technician diagnose efficiently.
What to inspect:
- Thermostat settings and wiring
- Air filters and blower obstruction
- Gas supply (for gas heaters) and ignition status
- Electrical connections and fuses
- Venting and CO detector status
Troubleshooting No Heat: A Practical Checklist
When your heater refuses to heat, start with a conservative, safety-first approach. Begin by powering down the unit, then reestablish power after a brief wait. Verify thermostat accuracy and settings, confirm the unit is receiving signal, and inspect filters for clogging. If the system uses a pilot light or electronic ignition, check for ignition faults and concealed gas issues. Clean or replace air filters, verify blower operation, and ensure airflow paths remain clear. If you notice persistent ignition problems, unusual smells, or if the gas supply is interrupted, pause DIY work and contact a professional. This section focuses on methodical checks that minimize risk while maximizing the chance of diagnosing a simple fault. In all cases, avoid disabling safety devices and never attempt to bypass a control system.
Checklist:
- Confirm power supply and thermostat alignment
- Inspect and replace dirty air filters
- Check blower and air paths for blockages
- Inspect the gas valve, ignition system, and flame sensor (for gas models)
- Verify venting for obstructions and CO detector status
- If any step reveals a potential safety risk, stop and call a pro
Maintenance Routine: Cleaning, Filtration, and Inspecting Components
Regular maintenance reduces the likelihood of unexpected failures and keeps efficiency high. A simple routine includes monthly filter checks and replacements, quarterly visual inspections of belts or motors, and annual professional inspection. Clean blower housings and fans to remove dust buildup, lubricate moving parts if recommended by the manual, and inspect flame quality or heat exchanger condition for signs of wear. For heat pumps, ensure reversing valves operate smoothly and coils are clean. The Heater Cost guidance emphasizes consistent maintenance as the most cost-effective strategy for longevity and safety.
Maintenance tips:
- Replace filters with the correct size and rating; keep spare filters on hand.
- Vacuum dust from accessible surfaces and the blower compartment.
- Listen for unusual noises that indicate worn bearings or loose components.
- Schedule a professional inspection annually to verify gas connections, venting, and safety controls.
When to Repair vs Replace: Economical and Safety Considerations
Deciding between repair and replacement hinges on safety, efficiency, and long-term costs. If a single repair would be routine and affordable, it may be worth pursuing, especially if the heater is relatively new and energy-efficient. If multiple major components require replacement or the system shows persistent inefficiency after several fixes, replacement could be the wiser choice. Safety concerns—such as cracked heat exchangers or persistent ignition failures—often justify replacement. The Heater Cost team highlights weighing upfront costs against ongoing energy consumption, maintenance demands, and the reliability you need for harsh winters.
Guiding principles:
- Prioritize safety when repairs involve combustion, gas lines, or airflow safety devices.
- Consider the system's age, efficiency, and the likelihood of future breakdowns.
- Compare projected maintenance costs against replacement costs over a reasonable horizon.
- Seek a professional assessment if you’re unsure about a component’s condition or risk.
Quick Cost Guide: DIY vs Pro Costs (Ranges)
Costs vary with system type, accessibility, and local labor rates. DIY maintenance can minimize expenses when it involves routine tasks like filter changes, basic cleaning, and simple thermostat adjustments. Professional service typically covers diagnostic fees, parts, and labor for more complex issues such as ignition problems, heat exchanger evaluation, blower motor replacement, or gas line testing. Rather than fixating on a single price point, consider the overall value: energy efficiency gains, reliability, and safety assurance over time. The Heater Cost analysis emphasizes informed decision-making rather than chasing a single dollar figure.
What to expect:
- DIY tasks generally incur minimal parts costs and your time.
- Pro service covers diagnostics, parts, and guaranteed safety work.
- Major repairs or replacements should be evaluated for long-term value and energy savings.
- Always request an itemized quote before proceeding and compare options.
Long-Term Maintenance Plan: Seasonal Checks and Scheduling
A proactive maintenance calendar keeps heaters performing well and reduces emergency calls. Create a seasonal check routine that aligns with the heating season. In spring and fall, perform filter replacement, visual inspections, and venting checks. Winter months deserve a more thorough professional assessment and moisture management, while summer can be used for preventive care and power-saving adjustments. The Heater Cost approach favors consistency—tiny, regular tasks accumulate into big reliability improvements over several seasons.
Recommended cadence:
- Monthly: inspect and replace filters as needed; wipe surfaces.
- Quarterly: check thermostat calibration and airflow; clean intake/exhaust areas.
- Annually: professional inspection of gas connections, ignition, venting, and safety devices.
- As needed: replace worn components or seals to prevent energy loss and cold snaps.
Tools & Materials
- Digital multimeter(Test electrical circuits and thermostat wiring; ensure appropriate settings)
- Screwdriver set (Phillips and flathead)(For access panels and component checks)
- Vacuum with hose attachment(Clear dust from blower housing and accessible ducts)
- Soft brush or microfiber cloth(Dust removal without scratching surfaces)
- Flashlight(Illumination for dark access points)
- Replacement air filters(Choose the correct size and rating for your unit)
- Gloves and safety goggles(Protect hands and eyes during maintenance)
- Owner’s manual(Reference for model-specific steps and safety warnings)
Steps
Estimated time: 60-90 minutes
- 1
Power down the system
Switch off the heater at the thermostat and the main power breaker or switch. Wait for any hot components to cool before touching. This prevents electrical shock and accidental ignition.
Tip: If you must work near live gas lines, avoid sparks or open flames. - 2
Verify thermostat settings
Check that the thermostat is set to heat, the mode is correct, and the desired temperature is higher than room temperature. Replace batteries if needed and recalibrate if discrepancies are observed.
Tip: Document the current settings before making adjustments to retrace changes later. - 3
Inspect and replace the air filter
Remove the old filter, inspect for excessive dirt, and replace with a new filter of the correct size and rating. A clogged filter can restrict airflow and force the system to work harder.
Tip: Keep a spare filter on hand and note the replacement date on the filter frame. - 4
Check electrical connections and fuses
Using the multimeter, test accessible wiring for continuity and ensure secure connections. Look for any tripped breakers or blown fuses and reset or replace as needed following safety guidelines.
Tip: If wiring looks damaged or corroded, stop and contact a professional. - 5
Assess vents, ducts, and air pathways
Ensure supply and return vents are open and unblocked. Clean visible dust from accessible ductwork and check for obvious leaks or holes in duct segments.
Tip: Never seal off vents permanently; removal of blockages can restore proper airflow. - 6
Evaluate gas supply and ignition (for fuel models)
If you have a gas furnace or boiler, confirm gas valve is open and ignition components operate. Do not attempt to diagnose complex ignition or flame sensor failures without proper tools and training.
Tip: If you smell gas or detect ignition hesitation, leave the area and call your utility provider. - 7
Test safety devices and CO detection
Test CO detectors and pressure/limit switches according to the manual. Ensure carbon monoxide readings stay within safe ranges and that safety interlocks function properly.
Tip: If detectors fail or alarms persist, contact a professional immediately. - 8
Reassemble, power up, and observe
Reconnect panels, restore power, and monitor heat output and cycling. Note any unusual noises, uneven warmth, or prolonged startup times that persist after adjustments.
Tip: If the heater still misbehaves after these checks, schedule a professional diagnostic.
Got Questions?
Do I need a professional to work on my heater?
It depends on the system and the task. Simple maintenance and thermostat checks are often doable for homeowners, but gas lines, ignition issues, and combustion safety require a licensed technician.
For basic checks, you can do it yourself, but gas and combustion problems should be handled by a licensed professional.
What are signs that my heater needs service?
Unusual noises, frequent cycling, weak heat, or rising energy bills indicate it’s time for service. If you notice a gas smell or CO alarms, seek immediate professional help.
Look for strange noises, uneven heat, and any gas or CO indicators that aren’t normal.
Can I replace a filter myself?
Yes. Replacing filters is a straightforward DIY task that improves airflow and efficiency. Use the correct size and replace at recommended intervals.
Yes—it's a quick job that helps your system run better.
How often should I service a typical heater?
Most systems benefit from an annual professional inspection, with regular filter checks and seasonal DIY maintenance.
Annual professional service is common, with regular DIY checks throughout the year.
Is it safe to run a heater with a CO detector warning?
No. An active CO warning requires immediate evacuation and professional inspection to identify the source and restore safe operation.
If CO detectors alarm, leave the home and call emergency services.
Watch Video
The Essentials
- Understand your heater type before starting any checks.
- Safety first: CO detectors, venting, and gas safety are non-negotiable.
- Start with simple, non-invasive checks to rule out common faults.
- Schedule professional help for gas systems or complex electrical issues.