Fixing a Water Heater: A Step-by-Step DIY Guide
Learn to safely diagnose and fix common water heater problems with this step-by-step DIY guide. Includes safety tips, required tools, and guidance on when to call a professional.

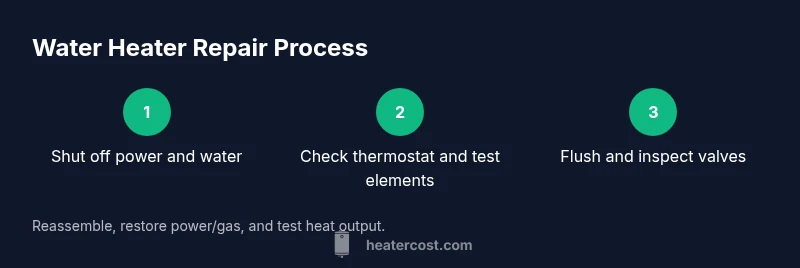
You can diagnose and fix common water heater problems yourself with proper safety steps. This guide walks you through shutting off power and water, identifying the issue, flushing sediment, testing the thermostat and heating elements, and knowing when to call a professional. By following these steps, you’ll restore hot water safely.
Safety first: Assess your unit and plan
Fixing a water heater starts with safety. Before you touch any wires or pipes, turn off the power at the breaker or switch, and close the cold-water supply. If you have a gas heater, set the gas control to OFF and ensure the area is well ventilated. Identify whether you have an electric element or a gas burner, and read labels on the unit. Use a non-contact voltage tester to confirm no live voltage before removing access panels. Leaks, exposed electrical components, or high-pressure steam are red flags. If you smell gas, hear an abnormal burner, or see water spraying, evacuate and call emergency services. According to Heater Cost, most households benefit from a careful, measured approach to troubleshooting rather than rushing into repairs. This package of precautions lays the groundwork for safe fixing of a water heater.
Quick check before you begin: identify electric vs gas and leak risks
Start by locating the designation on the nameplate to confirm whether your unit is electric or gas. Look for labels such as “electric,” “gas,” or specific model information. Check for visible signs of leakage around fittings and valves. If you detect a gas smell, a hissing sound, or feel a persistent vibration, stop and turn off the gas supply. Take photos of the control settings and wiring for reference. This step helps you choose the right troubleshooting path and reduces the risk of missteps while fixing a water heater.
Common issues and diagnostic flow
When hot water is scarce or absent, a few issues account for most problems. Start by verifying the thermostat setting and testing the heating element (electric) or burner (gas). Sediment buildup can trap heat and reduce efficiency, while a faulty temperature/pressure relief (TPR) valve can create pressure risks. If you hear popping noises, that’s often mineral buildup; if you notice rusty water, internal corrosion may be present. Create a simple diagnostic flow: check power or gas supply, inspect fittings for leaks, test the thermostat, flush sediment, and observe heat output after reassembly. This structured approach helps you focus on the right fix rather than guesswork, keeping you safe and on track during the repair.
How to test the safety relief valve and pressure
The temperature and pressure relief valve (TPR) protects the tank from overpressure. To test it, place a bucket under the discharge pipe (be mindful of hot water) and gently lift the test lever. If water releases freely and stops when you release, the valve is functioning. Do not leave the system under test for long or attempt frequent testing. If you observe leaks around the valve or hear continuous discharge, replace the valve. This step is crucial for safety and for preventing potential pool-like leaks when fixing a water heater.
Flushing and sediment removal basics
Sediment buildup reduces heating efficiency and shortens the water heater’s life. Start by turning off the power and closing the cold-water supply. Attach a garden hose to the drain valve and run the other end to a safe drain. Open the drain valve slowly while protecting yourself from hot water with gloves and towels. Let the tank drain until it’s empty, then briefly open the cold-water inlet to stir up remaining sediment and flush again. Refill slowly to prevent pressure surges. This flushing step, when done as part of fixing a water heater, can dramatically improve hot-water delivery.
Inspecting the thermostat, heating elements, and burner
Electric water heaters use heating elements controlled by the thermostat, while gas models rely on a burner and pilot assembly. For electric units, remove the access panel and test element continuity with a multimeter if available. For gas models, inspect the burner for proper ignition and clean any soot or debris from the burner area. If you find a faulty element or burner, replacement may be required. Remember to re-seal access panels securely after inspection to prevent heat loss and ensure safe operation.
Wiring, gas controls, and burner cleaning (gas) / heating element replacement (electric)
Wiring should be visually inspected for signs of wear or loose connections. Tighten any loose terminal screws carefully and apply heat-resistant tape if needed. Gas controls should be checked for proper operation; if you smell gas or hear a hiss, stop and call a professional. Electric units may require replacing a faulty heating element; follow the manufacturer’s guidelines and ensure power is off before any replacement. Refer to diagrams in your manual or the unit’s labeling to avoid wiring errors during fixing of a water heater.
Refill, test operation, and leak check
After completing internal inspections and component checks, slowly reopen the cold-water supply and allow the tank to refill. Restore power for electric units or turn the gas valve back on and relight the pilot if applicable. Check for leaks at every connection, valve, and fitting as the system pressurizes. Run hot water through the faucet to ensure the system reaches the desired temperature. If leaks or insufficient heat persist, reassess the issue or escalate to a professional. This step completes the basic fix and confirms proper operation after fixing a water heater.
When to replace vs repair and next steps
If the unit is aging, frequently needs fixes, or shows signs of ongoing corrosion, replacement may be the most cost-effective option. Compare replacement costs to continued repair expenses, factoring in efficiency and home comfort. The decision isn’t only about current problem resolution; it includes long-term reliability, energy costs, and safety considerations. The Heater Cost team emphasizes that choosing the right path—repair or replace—depends on the overall condition and expected lifespan of the unit.
Tools & Materials
- Non-contact voltage tester(Verify power is off before touching wiring)
- Adjustable wrench(Loosen fittings and tighten connections)
- Screwdrivers (Phillips and flathead)(Access panels and components)
- Pliers(Grip hoses and clamps)
- Garden hose(Attach to drain valve to direct water)
- Bucket(Catch draining water)
- Towels or rags(Protect surfaces and absorb spills)
- Teflon tape(Seal threaded connections)
- Multimeter(Optional for checking element continuity)
- Replacement thermostat/heating element(Only if diagnosis confirms fault)
- Gas leak detector (soapy water solution)(For quick checks on gas lines)
Steps
Estimated time: 60-120 minutes
- 1
Shut off power and water supply
Identify whether you have electric or gas; switch off the circuit breaker for electric heaters or set the gas control to OFF. Close the cold-water supply valve to prevent more water from entering the tank. Protect yourself with gloves and ensure you can safely reach the unit.
Tip: If unsure about wiring, use a non-contact tester before touching any panel. - 2
Identify unit type and safety verification
Check the unit label to confirm electric vs gas and document model information. Photograph connections and panel screws before removing any parts. This helps you follow the correct procedure without guessing.
Tip: Label and photograph before detaching panels for easy reassembly. - 3
Inspect thermostat and access panel
Remove the access panel and inspect the thermostat setting. If accessible, test basic operation with a meter or by comparing results with the manual. Adjust the thermostat to a safe baseline and observe whether hot water behavior changes.
Tip: Set a reasonable temperature and avoid high settings to prevent scalding. - 4
Check external connections for leaks
Visually inspect inlet/outlet, drain valve, and cold-water line for signs of corrosion or leaks. Tighten loose fittings carefully with the correct wrench size, and replace gaskets if needed. Do not overtighten, which can damage threads.
Tip: Keep a catch pan ready to trap any residual water. - 5
Flush sediment from the tank
Attach a garden hose to the drain valve and route it to a safe drain. Open the valve slowly while the cold-water supply is off, allowing water to flow and sediment to exit. Close the drain valve and refill the tank gradually.
Tip: Protect yourself from hot water and avoid excessive force when opening valves. - 6
Inspect heating element or burner
For electric units, check the heating element for continuity with a multimeter if available. For gas units, inspect the burner area for soot and proper ignition. Clean or replace components as required following the manufacturer’s instructions.
Tip: Only perform continuity tests if you’re comfortable with electrical work. - 7
Test the safety relief valve only if safe
Carefully test the TPR valve by lifting the lever to release water briefly. Do not stand in line with the discharge pipe. If water flows freely and stops, the valve is functioning. If not, replace the valve.
Tip: Avoid frequent testing; do not bypass safety devices. - 8
Refill, restore power or gas, and test heat
Reopen the cold-water supply slowly to refill the tank. Restore power for electric heaters, or turn the gas valve back on and relight the pilot if applicable. Run hot water to reach the set temperature and monitor for steady operation.
Tip: Run a few cycles of hot water to confirm stable performance. - 9
Monitor performance and decide on next steps
After the test run, observe any leaks, noises, or temperature inconsistencies. If issues persist, revisit earlier steps or call a professional. Consider long-term options like repair parts vs replacement based on condition and efficiency.
Tip: Document issues and decisions for future reference.
Got Questions?
What are the most common causes of a water heater not producing hot water?
Common causes include a mis-set thermostat, a faulty heating element (electric), a burner issue (gas), or sediment buildup. Start by confirming power or gas status, then inspect the thermostat and heating components.
Common causes are thermostat problems, heating element or burner issues, and sediment buildup. Start with power or gas status, then check the thermostat and heating parts.
Is flushing safe for beginners?
Flushing is doable for many homeowners when done slowly and with proper protection. Follow steps to shut off water, attach a hose, and drain gradually. If you’re unsure, pause and seek guidance from a professional.
Flushing can be done by homeowners who follow safety steps, but if you’re not sure, it’s best to consult a pro.
Can I replace the thermostat or heating element myself?
Yes, for electric units you may replace a faulty thermostat or element if you’re comfortable with electrical work. For gas units, focus on ignition and burner components. Always power off and consult the manual before replacing parts.
You can replace parts if you’re comfortable with electrical work for electric heaters, but gas units require professional help for safety.
What safety precautions should I take before starting?
Wear protective gear, shut off electrical and gas supplies, and ventilate the area. Use a non-contact tester to ensure no live voltage, and never work on a pressurized or hot system without safeguards.
Wear protection, switch off power and gas, and ventilate. Check for voltage with a tester and don’t work on a hot or pressurized system.
When should I replace my water heater rather than repair it?
If the unit shows persistent failures or is near the end of its usable life, replacement is often more cost-effective than continuing repairs. Consider energy efficiency and reliability as part of the decision.
If the heater keeps failing or is old, replacement is often better than repeated repairs.
Should I hire a professional for gas water heaters?
Yes. Gas water heaters involve combustion and venting hazards. A licensed pro can safely diagnose fuel supply, ignition, venting, and combustion efficiency.
For gas heaters, it’s best to hire a licensed professional for safety and proper venting and fuel checks.
What maintenance can extend my water heater life?
Regularly flushing sediment, checking the anode rod, testing the TPR valve, and inspecting connections can extend life and efficiency. Schedule annual checks with a professional if needed.
Flushing, checking the anode, and testing safety valves help extend life; annual checks are a good idea.
Is there a risk of electrocution when fixing a water heater?
Yes. Water and electricity are a dangerous combination. Always shut off power, use insulated tools, and test circuits before touching wiring.
There is a real risk; shut off power and use a tester before touching any wiring.
Watch Video
The Essentials
- Shut off power and water before touching components.
- Flush sediment regularly to restore efficiency.
- Test safety devices and thermostat before concluding a fix.
- Call a professional for gas-related issues or persistent problems.