Tank Water Heater to Tankless: A Complete How-To
This comprehensive guide explains how to replace a tank water heater with a tankless system, covering planning, sizing, costs, permits, and practical installation steps for homeowners and property managers.

This guide helps you plan and execute a conversion from a tank water heater to a tankless system. You’ll learn sizing, essential steps, permitting needs, and common cost ranges. It highlights choosing between gas and electric options, evaluating energy savings, and when to hire a pro for safety and code compliance.
Why Move from Tank to Tankless?
According to Heater Cost, homeowners who move from a traditional tank water heater to a tankless system often enjoy more consistent hot water, space savings, and energy-use benefits. This shift is not just about cutting costs; it's about aligning water heating with actual usage. In this section, we examine who benefits most, when the upgrade makes sense, and what trade-offs to expect. The decision hinges on hot-water demand, climate, and whether you prefer gas or electric heating. A careful assessment helps you decide if the conversion is right for your home. Expect discussions of upfront costs, ongoing maintenance, and long-term value as you compare options across brands and installation scenarios.
How Tankless Systems Work
Tankless water heaters heat water on demand using a compact heat exchanger. When a hot-water tap is opened, a flow sensor triggers the burner or electric element to heat the incoming water. Because there is no large storage tank, standby heat loss is minimized, and space utilization is improved. We’ll cover two main types: gas-fired and electric-powered tankless units. Gas models typically require venting and adequate gas supply, while electric models demand a strong electrical circuit and sometimes a panel upgrade. In both cases, modern tankless systems deliver hot water at the point of use, reducing waste and potentially lowering energy use over time. The Heater Cost team notes that actual savings depend on usage patterns, climate, and system sizing.
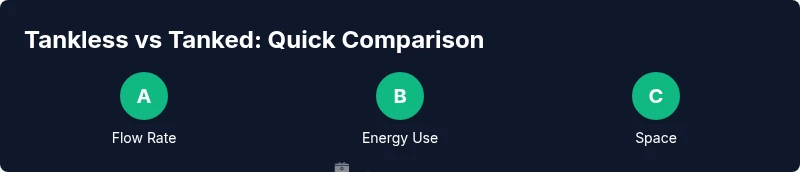
Gas vs Electric Tankless: Which Is Right?
Gas-powered tankless heaters generally provide higher flow rates and faster hot water recovery, making them suitable for larger households or higher simultaneous hot-water needs. They require proper venting and a gas supply capable of meeting peak load. Electric tankless models are easier to install in some homes and can be more affordable upfront, but they demand significant electrical capacity and may struggle in cold climates where incoming water is very cool. When choosing, consider your existing utility infrastructure, energy costs, and long-term maintenance expectations. The Heater Cost analysis suggests that the right choice balances performance with installation feasibility and cost of ownership.
Sizing Your Tankless System
Sizing is about matching the unit’s capacity to your peak hot-water demand. Start with a thorough inventory of fixtures and typical usage (showers, dishwashing, laundry) and estimate the gallons per minute (GPM) you need at your desired water temperature rise. A family of four in a moderate climate might need two to three GPM at a 100–120°F rise, while a high-use home could require more. After calculating, select a unit with a continuous rating that meets or exceeds your peak load. Remember that oversizing improves comfort but increases upfront costs; undersizing leads to cold dips during peak use.
Planning Phase: Permits, Codes, and Safety
Before any physical work begins, verify permit requirements with your local authority. Gas and electrical work typically require inspections and adherence to current codes. Venting for gas models must be properly designed and installed to prevent backdrafts and carbon monoxide risks. If you’re unsure about venting, gas line integrity, or electrical service upgrades, hire a licensed professional. Safe installation not only protects residents but also ensures warranty validity and code compliance.
Cost Ranges and ROI: What to Expect
Costs vary widely based on the chosen technology, existing infrastructure, and labor charges. A typical electric tankless replacement may run higher upfront than a standard tank, while gas models could require additional venting and gas-line work. Installation can range in the mid to upper range of typical plumbing projects, with total costs influenced by permit fees, electrical upgrades, and any retrofit needed for venting. Long-term energy savings and lower standby losses can improve ROI, but payback periods depend on usage, climate, and local energy costs. Heater Cost analysis shows that homeowners should expect an investment that pays back over several years, particularly in high-demand homes.
Installation Considerations and Hiring a Pro
Installing a tankless system involves gas or electrical work, venting, and correct piping connections. If you’re not a licensed professional, hire one and coordinate with a qualified plumber or HVAC technician. The installer will assess gas pressure or electrical capacity, determine venting requirements, and size the unit to match your demand. Clear communication about your hot-water habits and future needs helps ensure the right unit is chosen and installed to code.
Maintenance and Longevity
Tankless systems require periodic maintenance to maintain efficiency. Annual or semi-annual flushing helps prevent mineral buildup, especially in hard-water areas. Replace filters as recommended by the manufacturer and inspect venting and connections for leaks or corrosion. Proper maintenance extends the life of the heat exchanger and reduces the likelihood of unexpected outages. Expect a longer service life than a typical tank if routine maintenance is performed.
Common Pitfalls and Quick Wins
Common issues include selecting a unit that is too small for peak demand, underestimating electrical or gas line upgrades, and neglecting proper venting for gas models. A quick win is to perform a pre-install energy audit and check your home’s cold-water supply temperature. Another pitfall is skipping professional permitting, which can invalidate warranties or lead to fines. Thoughtful planning minimizes delays and budget surprises.
Final Readiness Checklist
Before you commit, confirm your hot-water needs, confirm utility readiness, and obtain any required permits. Ensure space for the unit and appropriate access for installation and maintenance. Have a licensed professional perform a final inspection after installation and set up a maintenance schedule to protect your investment.
Tools & Materials
- Adjustable pipe wrenches (2 sizes)(2 in. and 4 in. sizes preferred)
- Piping materials (PEX, CPVC, or copper)(Match to unit connections)
- Teflon tape and pipe dope(For threaded connections)
- Gas shut-off valve and venting components(Only if installing gas model; include proper vent kit)
- Leak detector solution(To test water and gas connections)
- Gas or electrical readiness tools(Manometer or multimeter as appropriate)
- Vent piping and sealant(Gas models require approved venting)
- Drain pan and condensate/condensation drain(Optional but recommended)
- Water filtration or conditioner (optional)(For mineral control in hard water areas)
Steps
Estimated time: Total time: 2-5 days depending on existing setup and permits
- 1
Assess hot-water needs and system type
Survey your household’s peak hot-water demand and decide between electric or gas tankless options. Use your current plumbing layout and energy costs to guide sizing. This step sets the foundation for the entire project.
Tip: Document typical daily usage to avoid oversizing or undersizing. - 2
Verify readiness of space and utilities
Check that you have sufficient space, ventilation for gas models, and available electrical capacity for electric units. Confirm gas pressure or panel capacity meets the chosen unit’s requirements.
Tip: Run a quick panel and gas line assessment or hire a licensed pro for a pre-install evaluation. - 3
Plan permits and hire a licensed contractor
Identify required permits and inspection steps with your local authority. If in doubt, engage a licensed plumber/HVAC technician to ensure code compliance and warranty validity.
Tip: Ask for a written estimate and a scope of work before beginning. - 4
Prepare installation area and shut off utilities
Turn off power and gas supply, drain the existing tank, and prepare the installation site for new connections. Ensure safe work clearance and proper ventilation for gas models.
Tip: Double-check shutoffs and test for leaks before removal. - 5
Remove old tank and mount the tankless unit
Remove the old tank, mount the new unit securely, and route water lines to the heater. Maintain clearances per the manufacturer’s instructions and local codes.
Tip: Do not force connections; use the correct fitting sizes. - 6
Connect water, gas/electric, and venting
Connect cold and hot water lines, install gas line or electrical wiring per code, and secure venting for gas models. Ensure tight seals and no leaks.
Tip: Use a leak detector solution on all joints after assembly. - 7
Test the system and check performance
Restore utilities, fire up the unit, and test water temperatures, flow, and vent exhaust. Look for leaks and verify proper flame or heating element operation.
Tip: Run multiple fixtures to verify even performance. - 8
Schedule maintenance and future checks
Set reminders for yearly maintenance, including descaling and flushing where needed. Plan periodic inspections for venting and electrical safety.
Tip: Document service visits and keep warranties accessible.
Got Questions?
Is it worth converting from a tank water heater to a tankless system?
For many homes, tankless offers on-demand hot water and potential energy savings, though upfront costs are higher and location-specific factors matter. Savings depend on usage patterns, climate, and system size.
Tankless can save energy, but your climate and how you use hot water determine the payoff.
What is the typical cost range for a tankless conversion?
Costs vary by unit type, installation complexity, and permit requirements. Expect ranges that reflect labor, venting, and necessary upgrades, with electric and gas options having different financial profiles.
Costs vary widely; consult local pros for a precise quote.
Do I need permits to install a tankless heater?
Yes, most jurisdictions require permits for gas or electrical work and proper inspections. Skipping permits can void warranties and create safety risks.
Permits are usually required; check with your local authority.
Can I install a tankless heater myself?
In many areas, professional installation is required due to venting, gas, and electrical codes. DIY installation can be dangerous and may void warranties.
This is typically not a DIY project; hire a licensed pro.
What maintenance does a tankless heater require?
Annual descaling and periodic filter checks help prevent mineral buildup and maintain efficiency. Schedule professional inspections as recommended by the manufacturer.
Keep up with annual flushing and filter checks.
Will tankless save energy in cold climates?
Energy savings are possible but depend on climate, usage, and model efficiency. Electric models may require upgrades in very cold climates or when high draw is common.
Yes, but it varies by climate and use.
How long does installation take?
Typical project timelines range from 1–3 days for a professional installer, longer if permit approvals or retrofits are needed.
Most installs take a couple of days; check permit timelines.
How do I choose between gas and electric tankless?
Gas models deliver higher flow and quicker recovery, but require venting and gas lines. Electric models are simpler to install but demand electrical capacity and may be slower to heat water.
Gas is faster, electric is simpler to install but may be slower.
Watch Video
The Essentials
- Assess demand to size the unit accurately.
- Gas and electric tankless have distinct installation needs.
- Permits and professional installation are often required.
- Plan maintenance for longevity and efficiency.