How to Install a Furnace Filter: A Step-by-Step Guide
Learn to install a furnace filter safely and correctly: sizing, orientation, and step-by-step replacement with practical maintenance tips for homeowners and renters. Easy.

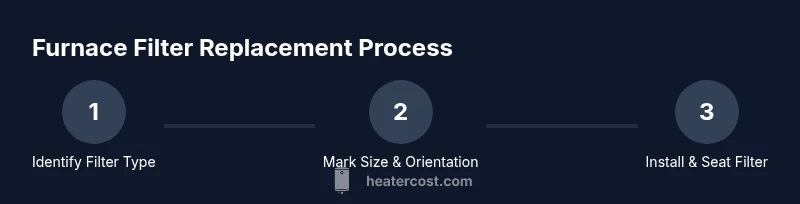
By the end of this guide, you’ll be able to install a furnace filter correctly, safely, and quickly, whether you have a standard HVAC system or a high-efficiency unit. You’ll identify compatible filter types, locate the filter slot, measure and choose the right size, and replace the filter with proper orientation. Practical safety notes and maintenance tips help keep your furnace running efficiently.
Understanding why regular furnace filter maintenance matters
A clean furnace filter is one of the simplest, most impactful components of a heating system. Replacing or cleaning the filter regularly helps maintain proper airflow, which in turn supports efficient heat exchange and reduces strain on the blower motor. For homeowners and renters, this translates into more consistent temperatures and lower energy bills over time. A dirty filter can restrict airflow, causing the furnace to run longer and work harder to push air through clogged pathways. This not only increases fuel or electricity use but also accelerates wear on components such as the blower motor and heat exchanger. In environments with pets, smokers, or dusty conditions, filters can clog more quickly; in those cases, more frequent checks are essential. Additionally, a clean filter improves indoor air quality by trapping dust, pollen, and other particulates before they circulate through ducts. Regular filter maintenance is a small habit with outsized benefits for comfort, health, and the longevity of your heating system.
Filter Types: Which One Should You Use?
Filters come in several styles, each with pros and cons. The most common household options are fiberglass, pleated disposable, and electrostatic. Fiberglass filters are inexpensive and provide basic particle capture, but they are less efficient and may need replacement more often. Pleated filters offer higher surface area and better filtration without a big drop in airflow, making them a popular all-around choice. Electrostatic filters use a static charge to trap particles; some models can be washed and reused, which can reduce ongoing costs but may not suit every furnace. When choosing a filter, consider the motor’s airflow needs and whether your system can handle higher resistance. For many homes, a pleated filter in the lower end of the MERV range (around MERV 8–11) provides a good balance between filtration and airflow. Remember: a higher rating isn’t always better if it restricts airflow and reduces furnace efficiency.
Size, fit, and compatibility: how to avoid a bad match
The filter must fit snugly within the housing with no gaps. Start by locating the current filter or checking the furnace manual for the exact size. Common residential sizes are 16x20x1, 20x25x1, or 20x25x2, but sizes vary by model. Record the exact dimensions and thickness, since even a half-inch difference can affect sealing and airflow. Also confirm the type of filter your furnace requires (fiberglass, pleated, or electrostatic) and whether your system supports higher thickness options like 2-inch or 4-inch filters. If you’re unsure, bring the old filter to a hardware store or consult the manufacturer’s documentation. A properly sized filter should slide in with light resistance and sit flush against all surfaces without bowing. Avoid using old or damaged filters, as they reduce filtration and can impair airflow.
Replacement frequency and signs it’s time
How often you replace a filter depends on usage, pets, allergies, and environment. In most homes, checking once a month and replacing every 1–3 months keeps airflow stable and reduces dust circulation. If you have multiple pets, smoke indoors, or run the furnace in dusty or high-traffic areas, you may need to replace more frequently. Visible dirt, pollen buildup, or a noticeable drop in heating efficiency are clear signs the filter needs attention. Some people schedule a monthly reminder, associating replacement with calendar events or season changes. When you replace, aim for a clean, dry filter that sits evenly in the slot. Moist filters or filters exposed to water should be replaced immediately as they can foster mold growth and degrade airflow.
Reading the label: MERV ratings and filter thickness
The filter label indicates its filtration efficiency, commonly described as MERV or equivalent ratings (MERV, MPR, or FPR). For most homes, MERV 8–11 provides good filtration with minimal airflow impact. If your system is sensitive or you have allergies, you might opt for higher ratings, but ensure your furnace can tolerate the increased resistance. Check the thickness as well; 1-inch filters are common, but many systems accommodate 2-inch or 4-inch filters, which offer greater surface area and longer replacement intervals. Remember to compare the advertised footprint to the available slot and verify the arrows indicating airflow direction on the frame—these arrows must point toward the furnace interior. A mismatch here can reduce filtration efficiency and harm system performance.
Accessing the filter slot in common furnace layouts
Filter slots sit in different locations depending on the model: some are on the return air grille near the furnace, others are in a side panel or a blower compartment. Begin by turning off the furnace or thermostat to avoid drafts and accidental startup. Look for a slide-in cover or a rectangular frame with a removable edge. Use a flashlight if needed to inspect dark areas, and gently open the access panel without forcing it. If you’re replacing an oversized filter, do not cram it into a slot; instead, choose a filter that matches the frame exactly and seats evenly. Keeping the surrounding area clean helps prevent dust from falling into ductwork during replacement.
Replacing the filter: best practices and a quick walkthrough
Prepare your new filter by verifying its size and orientation. Align the arrows on the filter frame with the airflow direction—these arrows should point into the furnace. Slide the filter into the housing until it seats firmly against the back wall. Close any doors or covers securely. Restore power at the thermostat and listen for consistent airflow. If you notice whistling sounds or reduced airflow after replacement, double-check that the filter is fully seated and that the gasket, if present, is intact. Finally, dispose of the old filter properly and consider labeling the new date of replacement for future reference.
Common pitfalls and how to avoid them
Don’t install a filter with the arrows pointing the wrong way; airflow direction matters for filtration efficiency. Avoid forcing a filter into a frame that’s too tight or damaged, as this can deform the frame or cause seal leaks. Never run the furnace with the slot uncovered or a dirty filter—dust can bypass filtration and damage the blower. When in doubt, consult the furnace manual or contact a professional if you encounter an unusual slot location or a nonstandard filter size. Regular checks help you catch issues before they become costly repairs.
Maintenance habits for year-round heating health
Create a simple routine around filter maintenance. Mark a recurring date on your calendar, keep a spare filter on hand, and store replacements in a dry place away from dust. Note the filter size and type in a home maintenance log to simplify future replacements. Pair filter changes with broader HVAC maintenance, such as yearly inspections and duct cleaning if your environment requires it. If you have respiratory concerns, discuss filtration upgrades with a heating professional to optimize air quality while maintaining system performance.
Tools & Materials
- Replacement furnace filter (correct size)(Use the exact size shown on the current filter frame or in the furnace manual; sizes like 16x20x1 are common.)
- Gloves(Protect hands from dust and grime.)
- Flashlight or headlamp(Improve visibility in dim spaces.)
- Vacuum cleaner with hose or microfiber cloth(Clean the filter area before replacement to trap dust.)
- Tape measure or ruler(Verify dimensions if you’re unsure of the size.)
Steps
Estimated time: 15-20 minutes
- 1
Power down and prepare the area
Turn off the furnace at the thermostat and set the system to an idle state. If you have a service switch near the unit, switch it off to prevent accidental startup. Clear the area around the furnace so you can reach the filter slot without knocking loose dust or debris.
Tip: Keep the work area dry and free of clutter to avoid slips and to help you see the slot clearly. - 2
Locate the filter slot
Find the return-air slot or the filter housing. In some models, the slot is behind a panel or inside a blower compartment. If you cannot locate it, consult the manual or look for a rectangular frame with a removable cover.
Tip: If the slot is hard to see, use a flashlight to illuminate the interior and avoid bending or prying panels. - 3
Remove the old filter
Slide or pull the old filter straight out without shaking dust into the ductwork. Note the orientation used previously; this helps ensure the new filter is installed correctly.
Tip: Take a quick photo of the old filter for reference if you’re unsure of the orientation. - 4
Check size and condition
Measure the filter frame and compare it with the new filter’s dimensions. Inspect the frame for warping or tears, and examine the media for thinning or discoloration. Replace if damaged.
Tip: If your new filter is a slightly different size, do not force it; select the exact size to avoid airflow leaks. - 5
Insert the new filter with correct orientation
Line up the filter so the arrows on the frame point toward the furnace interior, then slide it in until it sits flush against the back wall. Ensure there are no gaps around the edges.
Tip: Gently push the filter until it seats; a snug fit prevents air bypass. - 6
Re-secure the slot and restore power
Close the access panel or cover and restore power at the thermostat or service switch. Turn the furnace back on and monitor for normal airflow and sounds.
Tip: If you hear unusual noises or feel air restrictions, reseat the filter or inspect the housing gasket. - 7
Test and dispose of the old filter
Take a quick test run by returning the thermostat to its normal setting and confirming air movement from vents. Dispose of the old filter in the trash and wash your hands after handling.
Tip: Label the new filter with replacement date to simplify future cycles.
Got Questions?
What size filter do I need for my furnace?
Check the current filter frame or furnace manual for the exact size. Common sizes include 16x20x1 or 20x25x1. If unsure, measure the width, height, and thickness of the old filter.
Check the filter frame or manual for the exact size; measure width, height, and thickness if needed.
Can I use a higher MERV rating than recommended?
Using a higher MERV rating can improve filtration but may restrict airflow if your system isn’t designed for it. Start with the recommended rating (often MERV 8–11) and test performance.
A higher MERV can improve filtration but may reduce airflow; start with the recommended range.
Do I need to turn off the furnace to replace the filter?
Yes, turn off the furnace or disable the thermostat to avoid drafts while you replace the filter. In gas systems, ensure no pilot light is disturbed.
Turn off the furnace or thermostat, especially with gas systems.
What if the filter slot is hard to reach?
Use a mirror or flashlight to inspect the slot, remove obstacles, and if necessary remove the access panel per the manual. Do not force the filter through a blocked path.
Look with a light, and follow the manual if needed.
How often should I replace a filter if I have pets?
Pet dander increases debris; consider replacing every 30–60 days or more often during heavy shedding seasons.
With pets, check monthly and replace more often.
Is it okay to vacuum the filter instead of replacing it?
Some reusable electrostatic filters can be vacuumed, but many disposable filters should be replaced. Check the manufacturer’s guidance and avoid washing disposable fiber.
Only vacuum reusable filters if the manufacturer allows.
Watch Video
The Essentials
- Choose the right size and filter type for your system.
- Install with airflow arrows pointing toward the furnace.
- Check replacement frequency based on usage and environment.
- Inspect the housing and gasket for a proper seal.
- Keep a maintenance log and a spare filter on hand.