How to Filter for Heater: A Step-by-Step Guide
Learn how to identify, clean, and replace a filter for heater to improve efficiency, extend equipment life, and lower energy costs. This step-by-step guide from Heater Cost covers types, installation, troubleshooting, and maintenance tips.

This guide helps homeowners filter for heater to improve airflow, efficiency, and safety. You’ll learn how to identify filter types, decide between cleaning or replacing, and install a replacement correctly. According to Heater Cost, regular filter maintenance can improve airflow and efficiency, extending equipment life and reducing energy strain. This quick overview sets you up for the full step-by-step process.
Why filter for heater matters
A filter protects the heating system from dust, pet hair, and debris that can clog airflow and reduce performance. A clean filter helps the blower move air more easily, improve heat transfer, and maintain better indoor air quality. For homeowners, this is one of the easiest, most budget-friendly maintenance tasks, with clear payoff in comfort and efficiency. According to Heater Cost, regular attention to your heater filter can extend equipment life and prevent unexpected breakdowns. When a filter is dirty, the system must work harder to pull air, which can cause cold spots, higher energy use, and more wear on moving parts. In the long run, small, timely filter changes save money and reduce the odds of a costly repair. Additionally, wrong filter choices or oversized gaps around the filter frame can bypass filtration, negating any benefit. Always use the filter size called out in your manual and inspect the gasket or frame for wear. With multi-stage systems, filters protect not just the main unit but downstream coils and vents as well.
Filter design types and compatibility
Heater filters come in several designs, shapes, and materials. Common options include disposable pleated filters, fiberglass panels, and cartridge-style units. Pleated filters capture more particles and are often available in different MERV ratings, but compatibility depends on your system. Some heaters or air handlers require panel filters that slide into a slot, while others use canister-style cartridges. When selecting a filter, confirm the exact size (width, height, and depth) and the correct orientation. For homeowners, choosing the right filter ultimately means balancing filtration efficiency with proper airflow. Always check your manual or the equipment label to avoid blocking airflow or reducing heat transfer. If you have a complex system, consult an HVAC pro to confirm compatibility before buying.
When to replace vs clean
Not all filters are the same when it comes to maintenance. Some are washable and reusable, while most residential filters are disposable. If you have a washable filter, follow the manufacturer’s washing instructions and ensure it is completely dry before reinstallation. Disposable filters should be replaced when they appear clogged, discolored, or drastically restrict airflow. A good rule of thumb is to inspect filters monthly and replace every 1–3 months during peak heating seasons. If you notice a significant drop in airflow or rising energy bills, consider replacing the filter sooner. Remember: using the wrong type can reduce filtration efficiency and stress the system.
How to locate and identify your filter
Locating the filter starts with the equipment manual or the unit label on the side or front of the heater or air handler. If the manual isn’t available, measure the filter frame or remove a used filter to check dimensions written on the frame. Note the exact type (pleated, fiberglass, carbon, etc.) and the orientation arrows. Take pictures of the filter and the surrounding area so you can match replacement parts later. If your system has multiple filters, document the location of each one. Keeping a small maintenance log helps you stay on schedule and avoid missed replacements.
Step-by-step: removing the old filter
First, power down the system and ensure the area is safe and dry. Remove the access panel or grille if needed, then carefully slide out the old filter without shaking loose dust. Check the filter for thickness and frame integrity; if the frame is cracked or the filter is severely clogged, replace rather than clean. While removing, note the direction of airflow arrows printed on the filter so you install the new unit correctly. Place the old filter aside for disposal or cleaning if reusable, and prepare the new filter for immediate installation. Wipe down the surrounding area to minimize dust.
Step-by-step: choosing a replacement filter
Compare the new filter’s size, type, and MERV rating with the existing one. In general, higher MERV filters capture more particles but may reduce airflow if the system isn’t designed for them. For most residential systems, a mid-range MERV filter provides a balance between filtration efficiency and airflow. Ensure the frame supports the filter thickness you’re purchasing. If in doubt, choose a reputable brand and a widely compatible size to minimize fit issues and air leaks.
Step-by-step: installing a new filter
With the new filter ready, orient it so the arrows point in the direction of airflow (toward the blower or into the duct). Slide the filter into the slot firmly, ensuring a snug fit without gaps. Reattach any panels or grilles and confirm the filter sits level within its frame. If your system has a gasket, inspect it for wear and replace it if necessary to prevent air leaks. After installation, gently tap the surrounding area to settle dust and restore a clean working environment.
Step-by-step: testing and validating
Power the system back on and inspect for normal operation: listen for a steady airflow, feel the air at the vents, and check for unusual smells or noises. Look for a marked improvement in indoor comfort and a consistent temperature distribution. If airflow remains weak, re-check the filter orientation and ensure there are no obstructions in the ductwork. Finally, document the replacement date in your maintenance log so you know when to schedule the next change.
Common mistakes and how to avoid them
Avoid using the wrong size filter or an overly restrictive high-MERV option that throttles airflow. Do not reuse a visibly dirty filter without cleaning or replacement. Don’t cram the filter into a frame if it’s slightly misaligned, which can create air gaps and bypass filtration. Finally, avoid neglecting the surrounding area: accumulated dust can quickly contaminate a newly installed filter and indoor air.
Maintenance schedule and record-keeping
Create a simple maintenance calendar that aligns with your heating season. Check filters monthly during peak usage and adjust replacement frequency based on household conditions (pets, allergies, dust levels). Keep a small log with filter type, size, replacement date, and next due date. This habit reduces the risk of expired filters and helps you budget for replacements. A tidy log also supports smoother warranty claims if service is needed.
Energy efficiency and cost considerations
A clean, correctly installed filter helps maintain efficient heat transfer and steady airflow, contributing to consistent indoor temperatures and potentially lower energy consumption. While individual savings vary by home and system, a well-maintained filter reduces the burden on the blower and can delay expensive repairs caused by restricted airflow. By prioritizing filter maintenance, you support long-term energy performance and cost predictability.
How to source filters and warranties
Start with the equipment manual and model number to identify compatible filters and recommended replacement intervals. When shopping, choose filters from reputable brands and verify compatibility with your heater. Keep receipts and product details for warranty claims. Some manufacturers offer warranty coverage that includes filter replacements under specified maintenance schedules; always review warranty terms to understand coverage and exclusions.
Troubleshooting and quick fixes (bonus)
If you notice weak airflow after replacing the filter, double-check the orientation arrows, confirm the filter fits snugly, and inspect for air duct obstructions. A persistent problem may indicate a clogged blower, a dirty coil, or leaking ductwork that requires professional attention. In those cases, contact a qualified HVAC technician to prevent further damage.
Tools & Materials
- Replacement heater filter (correct size and type)(Check model number or owner’s manual; bring several sizes if unsure)
- Soft cloth or microfiber towel(For cleaning dust from surrounding area)
- Gloves (nitrile or work gloves)(Protect hands from dust and sharp edges)
- Screwdriver or pliers(Only if your unit uses a guard or panel screws)
- Vacuum with brush attachment(Useful for deep cleaning around filter compartment)
- Bucket and mild degreaser(Optional for stubborn grime)
Steps
Estimated time: 45-75 minutes
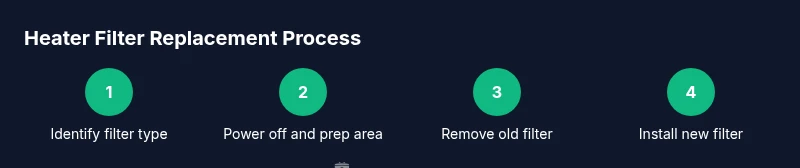
- 1
Identify the correct filter type
Consult the manual or inspect the current filter to determine size, shape, and material. Confirm whether the system uses a pleated panel, cartridge, or canister filter, and note any MERV recommendations. Choose a replacement that matches these specs to maintain proper airflow.
Tip: Take a photo of the old filter and label its orientation before removal. - 2
Shut off power and prepare area
Power down the heating system and switch off any adjacent electrical breakers if accessible. Clear the area of clutter and lay down a cloth to catch dust when the cover is removed. This reduces risk and makes the process cleaner.
Tip: Wear gloves to protect hands and avoid contact with moving parts. - 3
Remove old filter
Open the access panel, slide out the used filter carefully, and avoid shaking dust into the duct. Check for damage to the frame and confirm the filter orientation. If the frame is cracked, replace the entire assembly rather than just the filter.
Tip: Place the old filter in a plastic bag for easy disposal. - 4
Install new filter
Insert the new filter with arrows pointing in the direction of airflow toward the blower or heat exchanger. Ensure a snug fit with no gaps between the filter and frame. Reinstall any panels securely and verify the filter is level.
Tip: Double-check the depth and thickness to ensure it sits properly in the slot. - 5
Seal and test
Replace grilles and seals, power the system back on, and observe airflow from vents. Listen for unusual noises and feel for even temperature distribution. If airflow is still weak, recheck the filter orientation or contact support.
Tip: Run the system for a short cycle to confirm consistent airflow. - 6
Document and schedule next check
Record the replacement date, filter type, and next due date in your maintenance log. Use this to guide future replacements and energy-use planning. A consistent schedule prevents the buildup of debris and supports efficiency.
Tip: Set a calendar reminder to review every 1–3 months during peak heating season.
Got Questions?
What is a heater filter and why do I need one?
A heater filter traps dust and debris before air reaches the heating elements or blower. It protects the system, improves airflow, and can enhance indoor air quality. Regular replacement helps maintain efficiency and prevent unnecessary wear.
A heater filter traps dust before air reaches the heater, protecting the system and keeping air clean. Regular replacement helps efficiency and longevity.
Do I clean a heater filter or replace it?
Most residential filters are disposable and should be replaced when dirty. Some filters are washable if the manufacturer specifies. Follow the manual to avoid damaging the unit or reducing filtration effectiveness.
Most filters are disposable and should be replaced when dirty; washable options exist only if the manual allows.
How often should I replace or clean the filter?
Inspect monthly and replace or clean according to usage, environment, and manufacturer guidance. Peak heating seasons often require more frequent changes, while milder periods may extend intervals.
Check monthly and adjust frequency based on usage and environment.
Will a dirty filter affect energy costs?
Yes. A clogged filter can reduce airflow and force the system to work harder, increasing energy use and wear. Regular maintenance helps keep efficiency steady and can lower operating costs over time.
A clogged filter makes the system work harder, raising energy use and wear.
Where can I buy replacement filters?
Replacement filters are available at hardware stores, home centers, and online retailers. Bring or document your heater’s model and filter size to ensure a correct fit.
You can buy replacements at hardware stores or online by matching size and model.
Can replacing a filter prevent heater breakdown?
A clean, properly installed filter reduces strain on the system and lowers the risk of airflow-related issues. While not a guarantee, regular maintenance supports reliability and can prevent common problems.
Regular replacement supports reliability and helps prevent common airflow problems.
Watch Video
The Essentials
- Inspect filters monthly during heating season.
- Use the right size and type for your system.
- Replace worn or clogged filters promptly.
- Document maintenance dates for budget planning.
- Clean surroundings to maintain air quality and efficiency.