Best Way to Drain Water Heater: A Step-by-Step Guide
Discover the best way to drain water heater safely and effectively. This in-depth guide covers preparation, tools, step-by-step procedure, safety, and post-drain checks to extend your heater’s life and keep your home comfortable.

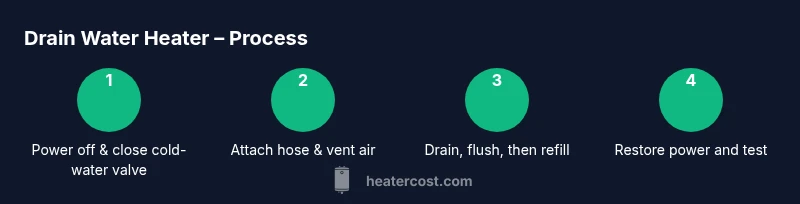
To drain a water heater the right way, shut off power, close the cold water supply, connect a drain hose, open the drain valve, and drain to a safe place. Flush with a few gallons of water if sediment is heavy, then close the valve, refill, and restore power. Always follow local safety guidelines.
What draining a water heater is and why it matters
Draining a water heater removes sediment and mineral buildup that accumulate at the bottom of the tank over time. Sediment can insulate the heating element, reduce efficiency, increase energy use, and shorten the unit’s life. The best way to drain water heater begins with understanding that the process is not just for troubleshooting leaks; it's a routine maintenance task that keeps your system operating cleanly. Homeowners who drain annually or biannually often notice steadier hot-water supply, fewer weird noises, and less mineral staining on fixtures. This section explains the purpose of draining, common signs you should act, and how this task fits into a larger maintenance plan for your home’s heating system.
Safety first: hazards and preparations
Before you touch the heater, prepare your space and check for hazards. Water heater work involves hot water, pressurized lines, and electricity or gas. Wear gloves and safety glasses, and keep children and pets away. Confirm you can access the drain area and that the floor is dry to prevent slips. If you rent, notify building management if required. Never disconnect electrical power or gas while the device is under pressure; always turn power off and allow the tank to cool when possible. Have a plan for where the hot water will drain—never into a utility sink that backs up or into a floor drain that is blocked. This foundation reduces risk and makes the job safer and easier.
When to drain: signs and timing
Sediment buildup appears as reduced hot water, rust in the water, or unusual noises, such as banging or gurgling sounds from the tank. These are indications that flushing may improve efficiency and extend life. In general, homeowners schedule a drain as part of routine maintenance or after long periods of hard water usage. If you notice leaks around joints or the drain valve itself, address promptly with a controlled drainage to investigate. Draining during cooler seasons can minimize scalding risk, but never drain if you suspect a leak in the tank. The decision to drain should consider water quality, tank age, and the presence of mineral buildup.
Tools and materials you’ll need (quick overview)
To execute the process safely, gather essential tools like a compatible drain hose, an adjustable wrench for stiff valves, gloves, a towel, and a flashlight. A pail or bucket can catch spills. If you have a floor drain or exterior drainage, verify it can handle the flow. Some heaters require turning off power before draining, so power-off instructions are critical. Optional accessories include plumber’s tape and markers to label steps. With these in place, you’ll minimize trips to the hardware store and keep the work smooth and safe.
Step zero: prepare and power down
Begin by turning off the power to the water heater. Electric units require switching the breaker off; gas units typically set to 'pilot' or 'off' position on the control. Then shut the cold-water supply to the heater valve. This prevents more water from entering the tank while you drain. If the heater has a hot water recirculation line, consider isolating it to reduce pressure changes. Clear the area, ensure drainage path is ready, and gather your tools. This prep prevents scalding, reduces pressure, and protects electrical components. After these steps, you are ready to attach the drain hose.
Step-by-step overview to drain a water heater
- Step 1: Attach the drain hose securely to the valve, ensuring a tight seal to prevent leaks.
- Step 2: Run the hose to a safe drainage location and place a bucket or towel beneath any potential drips.
- Step 3: Open the drain valve slowly to start the flow, watching for any leaks around the connection.
- Step 4: If your system allows, open a nearby hot-water faucet to vent air and speed up drainage.
- Step 5: Let the tank drain until water runs clear and you’ve removed most sediment.
- Step 6: Briefly back-flush by turning the cold-water valve on and off to loosen remaining sediment (optional, only if safe for your unit).
- Step 7: Close the drain valve and remove the hose carefully.
- Step 8: Refill the tank by turning the cold-water supply back on and restore power to the heater. Tip: If any step feels stiff or leaks persist, stop and consult a pro.
Flushing and sediment management
Flushing removes mineral buildup more thoroughly than a simple drain. After the basic drain, you can briefly flush by turning on the cold-water supply to the tank for a short burst, then letting it drain again. Repeat as necessary until the water runs clear. If your water is very hard, consider a dedicated flushing technique or a periodic full flush every 12-18 months as part of ongoing maintenance. Avoid using high-pressure water or aggressive tools that could damage the tank. For tankless heaters, the flushing approach differs; consult manufacturer guidelines to avoid operational risks. Always re-check the drain valve for leaks after flushing and ensure the area is clean before refilling.
Refill and restart safely
Once the tank is empty, close the drain valve and remove the hose. Open the cold-water supply slowly to begin refilling the tank; you may hear air escaping—this is normal. Once the tank is full and you can feel pressure at a hot-water faucet, turn the power back on or re-ignite the gas valve, following the manufacturer’s instructions. If you have an electric heater, reset the breaker or switch. Then run hot water from a faucet for several minutes to purge air and confirm stable temperature. Check the drain valve and hoses for leaks. Finally, wipe surfaces, document the maintenance, and reset any timers on smart thermostats.
Common mistakes and how to avoid them
Rushing the process can lead to spills or scalding. Never open the drain valve fully without securing the hose. Don't drain into a sink that is blocked or into a floor drain that can't handle the flow. For gas units, never skip ventilation checks; improper combustion control can be dangerous. Avoid mixing hot and cold water lines in a way that creates pressure surges. Finally, don’t ignore sediment buildup; neglecting maintenance will reduce efficiency and shorten the heater’s life.
Maintenance plan to maximize efficiency
Treat draining as part of a broader maintenance calendar. Schedule a periodic inspection of the anode rod, pressure relief valve, and thermostat accuracy. Use water-softening or filtration if you have hard water, and consider annual flushing for mineral-heavy areas. Keep an eye on water quality and request professional testing if you notice frequent sediment or rust in the supply. A simple drip of sediment reduces efficiency over time; a more serious buildup can cause overheating or premature failure. A steady maintenance plan pays off in consistent hot water and lower energy costs over the heater’s life.
When to call a professional
If your drain valve leaks continuously, the heater shows signs of rust, you smell gas, or you cannot turn off the water supply safely, stop and call a licensed professional. Complex drainage systems, high-pressure water lines, or a tank with age-related faults may require specialized equipment. Even seasoned homeowners benefit from a professional evaluation if the tank is older than typical life expectancy, or if the sediment buildup is unusually stubborn. A pro can perform a professional flush, inspect for leaks, and ensure the unit meets safety standards.
Cost considerations and potential savings
While draining and flushing are not expensive tasks by themselves, they can impact overall energy usage and equipment lifespan. Regular maintenance often reduces the risk of leaks and improves heating efficiency, translating to lower monthly bills over time. When budgeting, consider the cost of replacement parts, the potential for water damage from a failed valve, and any labor costs if you hire a pro. Homeowners who perform DIY drain work typically save on service fees, but should only do so if they are comfortable with the task and know safe procedures. In all cases, maintaining your water heater helps protect your home investment.
Post-drain checks and tests
After the drain and refill, test the system by running hot water at a faucet for several minutes. Check the pressure relief valve for proper operation, and listen for unusual noises. Inspect hoses and the drain valve for leaks during the first hours of use. If the water is excessively hot or too cold, adjust the thermostat slowly and retest. Document the maintenance activity for future reference and mark the date in your maintenance log. A quick post-drain check can catch issues before they become problems.
Quick reference checklist for busy homeowners
- Power off heater and cold-water valve before starting
- Attach drain hose and aim to a safe drainage path
- Open drain valve slowly and vent air with a hot-water faucet if possible
- Drain completely, then refill and restore power
- Run hot water to purge air and test safety devices
- Inspect for leaks and clean up the area immediately
This final checklist helps ensure you complete the job safely and efficiently, with minimal disruption to daily routines.
Tools & Materials
- Drain hose with compatible fitting(5-6 ft length; fits standard drain valve)
- Adjustable wrench(Use if valve is stubborn)
- Gloves(Heat-resistant, protect hands from hot water and minerals)
- Safety glasses(Eye protection from splashes)
- Towel or shop rag(Dry spills and wipe surfaces)
- Flashlight(Better visibility in dim basements)
- Marker(Label steps or connections for quick reference)
- Bucket(Catch small drips; not essential if draining to a drain)
Steps
Estimated time: 45-60 minutes
- 1
Power off heater
Turn off the electrical breaker for an electric unit or set the gas control to pilot/off. This prevents energizing the heater while you drain and reduces burn risk. Verify the power or gas is truly off before proceeding.
Tip: If you’re unsure about electrical panels, switch off at the main breaker. - 2
Close cold-water supply
Shut the valve that feeds cold water into the tank. This prevents new water from entering as you drain and helps keep pressure manageable during the process.
Tip: If the valve is stiff, apply a gentle rocking motion with a wrench—not a full twist. - 3
Attach drain hose
Screw or push the drain hose onto the drain valve, ensuring a tight seal to avoid leaks. Run the hose to a safe drainage location before opening the valve.
Tip: Have a second person hold the hose end if it’s long and prone to kinking. - 4
Vent with a hot-water faucet
Open a nearby hot-water faucet to vent air from the tank. This speeds drainage and prevents a vacuum from forming in the tank.
Tip: Choose a faucet on the same level to minimize air pockets. - 5
Open drain valve
Open the drain valve gradually and monitor the flow. If water jets or leaks around connections, pause and re-secure the hose.
Tip: Don’t force the valve if it feels stuck; close it and reassess. - 6
Let it drain and flush (optional)
Let the tank drain fully. If heavy sediment is present, briefly flush by turning the cold-water supply on for a moment and then off again, repeating a few times.
Tip: Only perform flushing if your unit’s manual allows it. - 7
Close valve and remove hose
When the tank is empty or nearly so, close the drain valve and disconnect the hose carefully. Keep the drain area dry as you prepare to refill.
Tip: Have towels handy to catch any residual drips. - 8
Refill and restore power
Open the cold-water supply slowly to refill. Once full, restore power or relight the gas burner per manufacturer instructions. Run hot water at a faucet to purge air.
Tip: Let the water run until it reaches a steady temperature.
Got Questions?
How often should I drain my water heater?
Most homeowners perform a flush as part of regular maintenance, depending on water quality and tank age. If you notice sediment or reduced hot water, draining is warranted.
Most homeowners flush annually or when sediment is visible. If you notice dirt in water or reduced hot water, drain it as part of maintenance.
Is it safe to drain a gas water heater?
Yes, it is safe if you follow safety steps: turn off gas, ensure ventilation, and avoid working near ignition sources. Always consult manufacturer instructions.
Yes, but make sure gas is off and there’s good ventilation before you start.
What if the drain valve won’t open?
Don’t force the valve. Close the supply, check for obstruction, and consider using a wrench only if you’re sure it won’t damage threads. If stuck, call a professional.
Don’t force it. If it’s stuck, stop and call a pro.
Will draining affect hot water supply?
Yes, draining temporarily stops hot water until the tank refills. Plan around this by draining during low-usage times or when hot water isn’t urgently needed.
Yes, you’ll lose hot water temporarily while draining and refilling.
Do I need to flush more than once?
If sediment is heavy, you may repeat the flush process. If water runs clear after one cycle, additional flushing may be optional.
If sediment is heavy, you might flush a few times until the water runs clear.
Can I drain during cold weather?
Yes, but protect hoses from freezing and ensure the drainage path won’t cause water damage. In very cold climates, drain during milder parts of the day.
Yes, but keep hoses from freezing and ensure the drain path is protected.
Watch Video
The Essentials
- Plan and assemble tools before starting.
- Shut off power and cold-water supply first.
- Vent air, drain slowly, and refill carefully.
- Test safety devices after refilling.
- Include draining as part of a regular maintenance routine.