Water Heater Mount: A Step-by-Step Guide
A comprehensive, step-by-step guide for homeowners on securely mounting a water heater on a wall, covering planning, hardware, clearance, connections, testing, and maintenance.

By the end of this guide, you will know how to safely mount a water heater on a sturdy wall, meet clearance and venting requirements, and choose appropriate mounting hardware. This quick answer highlights the key safety steps, tool needs, and inspection checkpoints to prevent leaks, noise, and premature failure.
Why proper water heater mount matters
A secure water heater mount is essential for safety, efficiency, and longevity. A poorly mounted unit can shift during earthquakes, vibrate and leak, or cause damaged valves and connections. The water heater mount also influences venting in gas models and service accessibility for maintenance. According to Heater Cost, a robust mounting strategy reduces stress on supply pipes and improves energy efficiency by maintaining consistent operating conditions. This section explains the risks of skipping proper mounting and sets the foundation for best practices.
Mounting a water heater isn’t just a one-time bolt-on task; it’s a critical safety and performance decision. When the unit is well-supported, it minimizes movement, protects connections, and helps maintain correct venting and combustion air flow. Conversely, a loose or incorrectly placed mount can lead to leaks, valve stress, or even carbon monoxide risks in gas configurations. In residential spaces, a trustworthy mounting approach also supports future service work, ensuring you can drain, inspect, or replace components without unnecessary wall or pipe damage.
Location and structural support considerations
The best mounting location is a solid, stud-backed wall in a utility area with adequate access, ventilation, and room for service. Wall type matters: if you have a masonry wall, you’ll need appropriate anchors and longer fasteners; if you have wood studs, choose lag screws that fit the stud depth and weight of the heater. Heavy tanks should not be mounted on hollow drywall alone. Before selecting brackets, verify the wall can safely bear the unit’s weight and any added load from seismic straps. This step reduces the risk of wall failure, improves alignment, and simplifies future maintenance. This content emphasizes that a proper water heater mount is a foundational part of system reliability.
Clearances, venting, and connections
Proper clearances prevent heat damage to nearby surfaces and ensure safe venting paths for gas models. Gas-fired units require a correctly routed vent with unobstructed intake and exhaust; electric models require safe clearance from combustibles and secure electrical connections. The T&P valve, shutoffs, and service ports must be accessible after installation. In addition, water lines should be planned with gentle 90-degree bends, leak-free joints, and accessible shut-off valves. Maintaining these clearances helps prevent overheating, corrosion, and service interruptions. Remember to label lines and check that the access panels remain removable for routine service.
Choosing mounting hardware and bracing
Select mounting brackets, seismic straps, and anti-tip devices rated for your heater’s weight and the wall type. Use heavy-duty brackets with corrosion-resistant coatings, and consider seismic restraints if you live in an earthquake-prone region. Anti-vibration bushings or rubber pads can reduce noise and wear on connections. Ensure screws or anchors are appropriate for concrete, masonry, or wood, and pre-drill holes to avoid wall damage. Correct hardware choice saves time during installation and extends the life of the mounting system.
Installation plan and inspection checklist
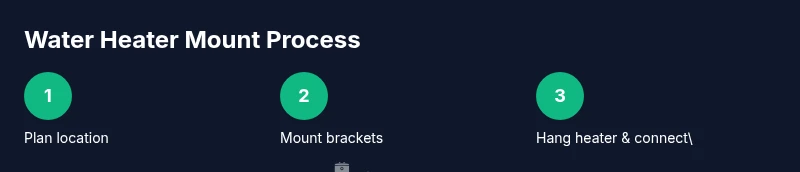
Create a simple plan: mark positions, attach the bracket to the wall, hang the heater, connect lines, and perform a leak test. Keep safety gear on hand and enlist a helper for high-weight steps. After mounting, perform a hydrostatic test (where code allows) and check all joints for leaks, then test system operation and venting. Document the installation with photos and notes for future maintenance. This section emphasizes a clear plan to reduce on-the-spot mistakes and facilitate inspections.
Tools & Materials
- Stud finder(Locate solid backing behind wall covering; avoid pipes and wires.)
- Measuring tape(Accurate spacing for brackets and heater centerline.)
- Pencil or marker(Mark mounting points clearly on wall.)
- Drill with appropriate bits(Pre-drill holes for anchors or lag screws.)
- Level(Ensure bracket and heater are perfectly plumb.)
- Wrench set(Tighten bolts and fittings safely.)
- Torque wrench (optional but recommended)(Apply correct torque on mounting bolts.)
- Lag screws/bolts suitable for wall type(Use anchors rated for the heater’s weight.)
- Masonry anchors or screws(Needed for concrete or brick walls.)
- Seismic straps or anti-tip brackets(Prevent heater from shifting during movement.)
- Anti-vibration pads(Reduce noise and wear on connections.)
- Teflon tape and pipe thread sealant/pipe dope(Create watertight water connections.)
- Plumber’s tape for gas lines (if applicable)(Use gas-rated tapes where required by code.)
- Safety gear (gloves, goggles)(Protect hands and eyes during installation.)
- Water drainage bucket and towels(Clean up spills and keep area dry.)
Steps
Estimated time: 2-6 hours
- 1
Verify wall and plan mounting location
Confirm the chosen wall is structurally capable of supporting the heater. Use a stud finder to locate studs and map the centerline for the mounting bracket. Note any pipes or cables to avoid accidental damage.
Tip: Enlist a helper to hold the heater temporarily as you mark anchor points. - 2
Shut off utilities and relieve pressure
For gas heaters, shut off the gas supply and ventilate the area. For electric heaters, switch off power at the breaker. Release water pressure in the system by opening a faucet to avoid spills during mounting.
Tip: Double-check that the main power and gas valves are fully closed before touching connections. - 3
Mark bracket positions on wall
Using the level, mark the precise locations for the mounting bracket(s) at the stud centers. Ensure the marks align horizontally and vertically to keep the heater square.
Tip: Take multiple measurements to verify symmetry before drilling. - 4
Attach mounting brackets to wall studs
Predrill pilot holes, then drive lag screws or bolts into the studs or anchors for masonry. The brackets must be firmly anchored to withstand heater weight and any movement.
Tip: Do not skip the pilot holes; this prevents splitting studs or walls. - 5
Install seismic straps and bracing
Attach seismic straps or anti-tip devices to the wall and around the heater as required by local codes or manufacturer guidance. This helps secure the unit against movement.
Tip: Place the straps above and below the heater’s center of gravity for optimal stability. - 6
Hang heater onto wall brackets
With a second person, lift and seat the heater onto the mounted bracket so it sits flush and square. Check that it is level and securely seated.
Tip: Ensure the heater is not resting on electrical or gas lines during mounting. - 7
Connect water lines and test fittings
Wrap thread sealant or Teflon tape on pipe threads and tighten water fittings. Use a wrench to snug connections, then verify there are no leaks at joints.
Tip: Leave small gaps for expansion and avoid overtightening that could crack fittings. - 8
Connect gas/electric supply and venting
For gas units, connect and seal the vent per manufacturer instructions. For electric units, secure the electrical supply and ensure clearances from combustibles exist.
Tip: Never obstruct the vent; verify that all electrical disconnects are accessible. - 9
Fill, test, and inspect
Fill the tank and perform a leak test on all connections. Check the T&P valve operation and launch the system to verify proper operation while observing for any leaks or abnormal noises.
Tip: Document test results and keep a log for future maintenance.
Got Questions?
Do I need a permit to mount a water heater?
In many jurisdictions, mounting or relocating a water heater may require a building permit. Check your local codes and, if in doubt, contact your local building department or a licensed professional.
Permits are often required for new installations or major changes; check local codes to be safe.
Can I mount a water heater on drywall alone?
Drywall alone cannot support the unit’s weight. Mount it to studs or use appropriate masonry anchors, depending on your wall material.
Drywall isn’t enough. Use studs or solid anchors for safety.
What size mounting brackets do I need?
Bracket size depends on the heater’s weight and wall type. Follow the manufacturer’s guidelines and select hardware rated for the load.
Use manufacturer specs to choose the right brackets and number of anchors.
Is professional help required for gas water heaters?
Gas water heaters involve venting and gas connections that should meet code requirements. A licensed installer is recommended to ensure safe operation.
Gas systems should be inspected by a pro to avoid carbon monoxide risks.
How often should I inspect the mounting?
Inspect the mounting annually or after major events like earthquakes. Look for loose brackets, cracks, or corrosion and address them promptly.
Check once a year or after any seismic event.
What if the heater is too heavy for the wall I planned?
You may need a reinforced wall, additional studs, or alternative mounting on a different wall. In some cases, a floor stand or alternative support may be required.
If it feels overloaded, re-evaluate mounting location with a pro.
Watch Video
The Essentials
- Mount on a solid wall with proper backing
- Use correct hardware for weight and wall type
- Maintain clearances for venting and service
- Test thoroughly for leaks and proper operation
- Document installation for future maintenance