Rheem Water Heater Installation: A Complete Step-by-Step Guide
Learn how to install a Rheem water heater safely and legally. This guide covers permits, venting, connections, testing, and maintenance for a code-compliant, long-lasting installation.

This guide shows you how to plan and safely complete a Rheem water heater installation, covering model selection, required permits, basic electrical and venting considerations, and a step-by-step process. You'll learn essential safety precautions, proper mounting, and how to verify performance. For homeowners, renters, and pros, this approach minimizes surprises and ensures code compliance.
Understanding Rheem Water Heaters and Installation Basics
Rheem offers electric and gas water heaters in standard tank and compact tankless formats. When planning a Rheem water heater installation, the model you choose determines venting needs, electrical requirements, and space dimensions. The Heater Cost team notes that selecting the right size and configuration is critical to efficiency, reliability, and long-term operating costs. In many homes, a conventional 40-50 gallon electric tank provides ample hot water for typical households, while higher demands may justify a larger tank or a compact tankless option. Regardless of model, proper installation ensures safe gas combustion (for gas models), correct venting, and reliable thermostat control. Start by identifying whether you have a gas or electric supply, available wall or floor space, and whether you’ll need a retrofit vent, a new stand, or a direct-vent option. Understanding these fundamentals minimizes rework and improves performance. Local codes may require professional oversight for gas permits and electrical wiring; always verify with your local AHJ.
According to Heater Cost, careful planning and adherence to manufacturer instructions can reduce installation complexity and improve overall comfort. For Rheem installations, it’s essential to align model capabilities with household hot-water demand and to anticipate service access for future maintenance.
Planning Your Rheem Installation: Permits, Codes, and Prep
Before you begin a Rheem water heater installation, map out the project scope, gather required permits, and review local codes. In many jurisdictions, gas installations or any electrical work tied to a water heater requires a permit and inspection. Check whether your municipality mandates a licensed professional for gas piping, venting, electrical connections, or seismic strapping. Prepare the space by ensuring adequate clearance around the unit, a stable base, and safe access for service. If you’re replacing an old unit, confirm the vent size, venting material, and the plumbing layout will accommodate the new Rheem model. Heaters Cost Analysis, 2026, emphasizes coordinating with the local authority to prevent delays. The goal is a compliant installation that passes inspection on first review and minimizes future nuisance calls.
Tools, Materials, and Safety Precautions for Rheem Installation
A successful Rheem installation relies on having the right tools, materials, and safety measures. Essential items include wrenches in multiple sizes, pipe cutter, pliers, adjustable wrench, and a torque wrench for gas fittings. You’ll need pipe sealant or Teflon tape, and appropriate connectors for cold and hot water lines. Gas models require a flexible gas connector, a gas shut-off valve, and a vent kit suited to your venting path. Electric models need proper electrical wiring, strain relief, and a clear circuit with a working GFCI if required by code. Safety gear is non-negotiable: wear insulated gloves, eye protection, and a face shield when grinding or cutting metal. If you’re unsure about any step, consult a licensed technician. According to Heater Cost guidance, prioritizing safety reduces the risk of leaks, electrical faults, or gas issues that could cause property damage or injury.
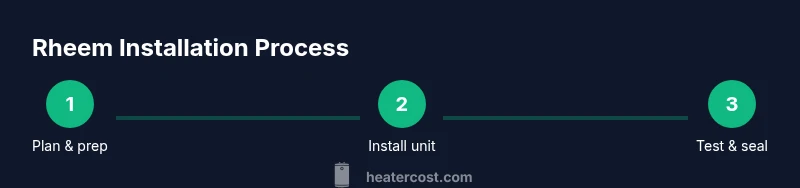
Step-By-Step Overview of Installation Phases
The Rheem installation process can be broken into three broad phases: preparation and decommissioning, the physical install, and testing/ commissioning. In preparation, verify space, shut off power and water, drain the old unit, and remove it safely. In the install phase, mount the new unit, connect cold and hot water lines, and complete venting or electrical connections as required by the model. In testing, purge air, fill the tank, expand the pressure relief valve test, check all joints for leaks, set the thermostat to the recommended temperature, and perform a startup check. This overview keeps the project organized and helps anticipate steps that may require permits or inspections. Remember to document all connections for future service and to keep a copy of the Rheem installation manual on site.
Common Pitfalls and How to Avoid Them
Common mistakes include improper venting for gas units, cross-connecting hot and cold water lines, skipping the pressure relief valve test, and failing to secure the appliance against movement or seismic events. Avoid over-tightening fittings, which can crack seals and cause leaks. Always verify electrical connections match the unit’s requirements and use a dedicated circuit if required by code. Do not delay leak testing or pressure-testing; early failure detection prevents water damage and costly repairs. If you’re unsure about venting or gas piping, consult a licensed professional and request an on-site verification of the installation plan before proceeding.
Maintaining Your Rheem Water Heater for Longevity
Maintenance plays a critical role in prolonging the life of your Rheem water heater. Regularly inspect cold and hot water connections for signs of corrosion or leaks, test the pressure relief valve, and flush the tank annually to remove sediment buildup. Keep the area around the unit clean and free of dust that could interfere with venting or airflow. Record service dates and thermostat settings to help future technicians diagnose issues quickly. By implementing routine maintenance, homeowners can extend the life of their Rheem unit and sustain peak efficiency. Heater Cost’s ongoing evaluations suggest that a proactive maintenance plan reduces unexpected downtime and improves energy efficiency over time.
Tools & Materials
- Rheem water heater (model type based on home needs)(Electric or gas model; confirm venting needs for gas or electrical clearances for electric units)
- Wrenches and pliers (various sizes)(Used for tightening connections and fittings)
- Pipe cutter(For copper or PEX water lines)
- Teflon tape and pipe joint compound(Gas-rated tape for gas lines; ensure compatibility with water and gas connectors)
- Gas shut-off valve and flexible gas connector(Only for gas models; ensure code-compliant length and material)
- Vent kit and vent piping (gas models)(Compatible with Rheem model and existing vent path)
- Electrical tester (multimeter) and voltage tester(Only for electric models; verify 240V circuit and grounding)
- Safety gear (gloves, goggles, face shield)(Personal protection during cutting, soldering, and tightening)
- Leak detection solution(Check all water and gas connections for leaks after installation)
- Permits and documentation(Carry required permits and installation manuals on site)
Steps
Estimated time: 2-6 hours
- 1
Plan and prep
Assess space, verify clearances, select the correct Rheem model, and obtain any necessary permits. Confirm ventilation path for gas models and a dedicated electrical circuit for electric models. Prepare the workspace with a clear access route for installation and service.
Tip: Document the current plumbing layout with photos to reference during reassembly. - 2
Shut off services and drain
Turn off electrical power at the breaker and shut off the water supply. Open a hot water tap to vent the line, then drain the existing tank completely to reduce spills and pressure during removal.
Tip: Have a bucket ready to capture any remaining water and wear protective gloves during draining. - 3
Remove old unit and prepare mounting
Disconnect existing supply lines and exhaust vent (for gas). Remove mounting hardware and clean the mounting surface. Install any required mounting brackets or stands that support the new Rheem model.
Tip: Ensure the base is level and secure before connecting lines. - 4
Position and mount the new heater
Move the new Rheem unit into position, align with venting and service clearances, and secure to the wall or platform. Verify the unit sits level and stable to prevent vibration or movement.
Tip: Use a level and appropriate fasteners rated for your wall material. - 5
Connect cold/hot water lines
Attach cold water supply to the cold inlet and hot water outlet to the demand line. Use appropriate fittings with Teflon tape or pipe dope and tighten to manufacturer specifications.
Tip: Mark the hot and cold lines to avoid cross-connection during final checks. - 6
Vent, gas, or electrical connections
For gas units, install the vent pipe following the manufacturer’s guidelines and connect the gas supply with a shut-off valve. For electric units, connect to the designated 240V circuit and secure with strain relief. Seal all joints to prevent leaks.
Tip: Never reuse an old vent system; replace with appropriate size and material per code. - 7
Fill, purge, and test for leaks
Fill the tank while opening a hot water faucet to purge air. Check all joints for leaks using leak detection solution and tighten fittings as needed. Ensure the system is free of air pockets to prevent noisy operation.
Tip: Keep a rag handy for wiping any spilled water and test the relief valve per code requirements. - 8
Set thermostat and perform startup
Set the thermostat to the manufacturer’s recommended temperature. Power up the heater and observe initial operation, listening for unusual sounds or smells and watching for leaks.
Tip: Avoid setting the thermostat too high to prevent scalding and energy waste. - 9
Final inspection and documentation
Schedule or complete a final inspection if required by code. Keep installation manuals, serial numbers, and permit approvals accessible for future service or resale.
Tip: Take photos of all connections and labeling for future reference.
Got Questions?
Do I need a permit for Rheem water heater installation?
In most jurisdictions, a permit is required for gas or electric water heater installation and for any venting work. Check local codes and obtain approvals before starting. An inspection may be required after installation to ensure compliance with safety standards.
Most homes require a permit for water heater installation and venting work; check your local codes and obtain approvals before starting.
Can I install a Rheem water heater myself?
DIY installation is possible for skilled homeowners, but many areas require a licensed professional for gas, venting, or electrical work. If you’re unsure about any step, hire a licensed technician to ensure safety and compliance.
DIY is possible if you’re confident with gas, venting, or electrical work; otherwise, hire a licensed professional.
What maintenance is recommended after installation?
Flush the tank annually or as recommended by Rheem, inspect connections for leaks, test the pressure relief valve, and check the thermostat setting periodically. Document service dates to guide future maintenance.
Flush annually, check connections, test the relief valve, and keep a maintenance log.
What are common signs of installation problems?
Watch for persistent leaks at fittings, unusual gas smells, improper venting, or no hot water. If you notice any, shut down power and gas (if applicable) and call a professional promptly.
Leaks, gas smells, or lack of hot water require attention from a professional.
How long does installation typically take?
Installation duration varies with model and site conditions but generally ranges from a few hours to half a day. Allow extra time for permits, inspections, and potential code-related adjustments.
Expect a few hours up to half a day, plus time for permits and inspections.
Watch Video
The Essentials
- Plan permits before you start installation.
- Verify venting, gas line, and electrical requirements match your Rheem model.
- Test all connections for leaks and set the thermostat properly.
- Document the installation details for future service.