Installation Electric Water Heater: A Complete How-To
Learn how to install a 240V electric water heater safely and legally, with a dedicated circuit, proper fittings, and a practical step-by-step approach for homeowners.

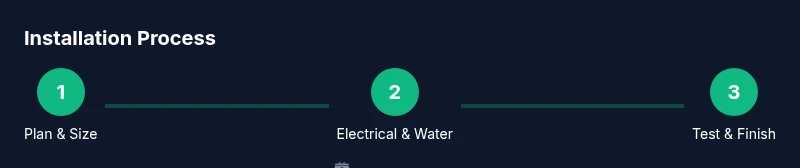
Goal: properly install a 240V electric water heater with a dedicated circuit, correct mounting, leak-free connections, and required permits. Below are the six core phases: planning and sizing, verify electrical capacity, run the dedicated circuit, connect hot/cold water lines, install relief valves and expansion components, then test the system and finalize safety checks.
Overview of Installing an Electric Water Heater
Installing an electric water heater is a practical project for homeowners who want reliable hot water without venting or fuel lines. A typical residential unit runs on a 240V circuit and demands careful attention to electrical capacity, water supply, and safe installation practices. The goal is a leak-free system that delivers consistent hot water while meeting local codes. In this guide, we’ll cover planning, electrical basics, plumbing connections, and the final testing steps. Throughout, you’ll see practical tips for selecting the right size, coordinating with your electrical panel, and avoiding common pitfalls. For homeowners, the process is manageable when you stay organized, follow safety guidelines, and consult licensed professionals for any part that falls outside your comfort zone. When in doubt, prioritize safety and code compliance above all else, and remember that a well-executed installation can save energy and reduce repair costs over time.
In this section, the Heater Cost team emphasizes that proper planning and code adherence reduce risk and ensure a long-lasting installation. According to Heater Cost, approaching the job with a clear scope and a verified electrical capacity check sets the foundation for success. This article uses general guidance based on typical residential setups and does not replace local code requirements.
For reference, the keyword to keep in mind during this process is installation electric water heater. You’ll see it appear naturally in headings and explanations to reinforce the task at hand and support search relevance without compromising readability or flow.
Tools & Materials
- Safety gear (ANSI-rated eye protection and gloves)(Goggles; sturdy gloves; closed-toe shoes)
- Voltage tester or multimeter(Verify circuit is de-energized before touching wiring)
- Adjustable wrench(Narrow-space access and adjustable fittings)
- Pipe wrench(Grip and tighten large metal fittings)
- Slip-joint pliers(Useful for compressed connections and fittings)
- Teflon tape (PTFE) or pipe thread sealant(Seal threaded connections to prevent leaks)
- Copper tubing (3/4-inch) or PEX tubing with fittings(Water supply lines to and from heater)
- Shut-off valves for cold water inlet and hot water outlet(Compression or sweat connections as needed)
- Dielectric fittings(Prevent galvanic corrosion between metals)
- Expansion tank(Required by many codes on closed systems)
- T&P relief valve (if not included with unit)(Safety valve required by code for overpressure)
- Electrical materials: 240V circuit breaker and properly sized wire(Typically 30A with #10 AWG copper; confirm per unit spec)
Steps
Estimated time: 2-6 hours
- 1
Assess size, codes, and location
Determine the correct tank size based on household needs and confirm local permitting requirements. Check the existing space for mounting options and ensure there is adequate clearance for service panels, maintenance, and vent-free operation. Verify the new unit’s electrical requirements align with your panel capacity.
Tip: Review the unit’s label for tank capacity and electrical needs; this reduces back-and-forth trips to the store. - 2
Shut off power and water supplies
Turn off the main power at the electrical panel and lockout/tagout if available. Close the cold-water supply valve and relieve pressure by opening a hot-water tap to vent air. This prevents shocks and leaks when you disconnect the old heater.
Tip: Double-check with a voltage tester that the circuit is dead before touching any wires. - 3
Drain and disconnect the old heater
Place a drain hose into a safe drainage area and drain the tank fully. Disconnect water lines, remove mounting brackets, and prepare the space for the new unit. Retain or replace any aging shut-offs if needed.
Tip: Have a bucket ready for residual water to avoid splashing and mess. - 4
Mount the new heater and set the position
Install the mounting bracket or platform and place the new water heater. Ensure it is plumb and level, then secure according to the manufacturer’s instructions. Leave space for service access and wiring connections.
Tip: Use a level and secure mounting to prevent vibration and noise. - 5
Run the dedicated 240V circuit
Run or upgrade a dedicated 240V circuit from the electrical panel to the heater location. Install a 30A (or per unit spec) double-pole breaker and run appropriately gauged wire (commonly #10 AWG copper). Obtain any required permits and have the work inspected as needed.
Tip: Consult a licensed electrician if you’re uncertain about panel capacity or wiring methods. - 6
Connect water lines and safety components
Attach cold inlet and hot outlet lines with dielectric fittings where metals meet. Install shut-off valves on both lines and the expansion tank if required. Add or replace the T&P relief valve per code and attach it to a safe drainage path.
Tip: Apply Teflon tape to threaded connections and tighten by hand plus a quarter-turn for a proper seal. - 7
Fill, bleed air, and test the system
Slowly fill the tank and open fixtures to purge air. Check for leaks at every connection, wire terminations, and fittings. Set the thermostat to a safe hot water temperature and power the unit to verify operation.
Tip: Bleed the air from the highest faucet first to guarantee a full fill. - 8
Document, test, and finalize
Record the installed specifications, including tank size, circuit rating, and local permit numbers. Run a full function test and ensure all safety devices operate correctly. Schedule annual maintenance checks to sustain performance.
Tip: Keep the manufacturer’s manual handy for future reference.
Got Questions?
Do I need a licensed professional to install an electric water heater?
Electrical work and plumbing connections must follow local codes. In many areas, a licensed electrician or plumber is required for safety and compliance. If you’re not confident with wiring, permits, or pressure testing, hire a pro.
In many places, you should hire a licensed pro for electrical and plumbing tasks. If you’re unsure about wiring or permits, consult a professional.
Is a permit required for installing an electric water heater?
Most jurisdictions require a permit for a new water heater installation or a major upgrade. Permits ensure the work meets safety standards and will be inspected. Check with your local building department before starting.
Check with your local building department; permits are commonly required for water heater installations.
What size water heater should I install?
Size depends on household occupancy and hot water demand. Typical homes use 40–50 gallons for small families and 60 gallons for larger families. Use a first-hour rating chart and local guidelines to pick the right size.
Size depends on your household; many homes fit 40 to 60 gallons based on demand.
How long does installation usually take?
Expect several hours up to a full day, depending on current plumbing/wiring, permit processing, and whether you’re upgrading to a higher-capacity unit. Plan for inspection if required by your code.
Most installations take a few hours to a day, depending on plumbing and wiring changes.
Can I reuse existing plumbing or electrical components?
You can often reuse some pipes and fittings if they’re in good condition, but most installations benefit from replacing valves, regulators, and possibly dielectrics to prevent leaks and corrosion. Follow manufacturer recommendations.
Reusing parts can be possible, but it’s usually best to replace worn components for reliability.
What maintenance is needed after installation?
Schedule annual checks of the T&P valve, drain the tank to remove sediment if required, inspect connections for leaks, and calibrate the thermostat to avoid scalding. Regular maintenance extends the unit’s life and efficiency.
Do annual checks, drain sediment as needed, and inspect for leaks.
Watch Video
The Essentials
- Plan size, code, and location before starting.
- Use a dedicated 240V circuit with proper gauge wire.
- Check plumbing connections for leaks and corrosion resistance.
- Test thoroughly and document the installation for future maintenance.
- Consult a professional if any step leaves you unsure.