Install Rinnai Tankless Water Heater: Step-by-Step Guide
Learn how to install rinnai tankless water heater with a practical, step-by-step approach. This guide covers sizing, venting, gas and electrical connections, permits, and maintenance—helping homeowners decide between DIY and professional installation.

This guide helps homeowners install rinnai tankless water heater safely and efficiently, covering sizing, venting, fuel supply, electrical needs, and permits. You’ll learn when to DIY versus hire a pro, what tools you need, and a step-by-step overview to get hot water flowing with a Rinnai unit. Always check local codes and call Heater Cost for guidance.
What is a Rinnai tankless water heater and why it matters
Installing rinnai tankless water heater is a smart way to deliver endless hot water on demand while reducing energy waste. These compact units heat water only when you need it, which can lead to lower energy bills and a smaller carbon footprint for many homes. In this section, we’ll define the core concepts, explain how a Rinnai system differs from traditional storage heaters, and outline the basic benefits you can expect. According to Heater Cost, proper installation is crucial for performance, efficiency, and safety. A correctly installed unit minimizes standby losses, ensures reliable hot water, and preserves the warranty by meeting local codes and manufacturer instructions. As you read, keep in mind your home’s layout, fuel type, and climate, since these factors shape model choice and installation approach. If you’re new to this project, start with a high-level plan and consult the manufacturer’s installation manual early on to align expectations with reality.
Planning and performance overview
Rinnai tankless systems run on either natural gas or propane and require appropriate venting, combustion air, and electrical support. They come in several sizes and configurations, so selecting the right model matters for flow rates and hot-water consistency across multiple fixtures. Heavier-use homes may need higher gas supply capacity (BTU) and more robust venting, while smaller apartments can often meet needs with compact setups. Heater Cost emphasizes matching the unit’s performance to your peak hot-water demand, usually expressed in gallons per minute (GPM). For reference, you’ll assess simultaneous use (shower, sink, dishwasher) to estimate a safe GPM range. A missized system can lead to short bursts of cold water or excessive cycling, negating efficiency gains and shortening the unit’s life. Plan for future needs as well, such as fixture additions or seasonal shifts in usage.
Sizing, venting, and clearances: the core checklist
Sizing is the most critical step. Start by estimating your peak hot-water demand and then select a model with an appropriate flow rate. Venting requirements depend on whether the heater is a power-vented or non-power-vented design, and on the distance to the venting outlet. Clearance around the unit matters for service access and safe air intake, so you’ll need minimum distances from walls, cabinets, and combustibles. Heater Cost notes that every installation should follow the manufacturer’s clearance charts and your local building code. If you’re in a climate with hard water, consider optional water-treatment steps to avoid mineral buildup that can reduce efficiency and shorten the unit’s life.
Location, permits, and professional vs. DIY installation
Local permits are often required for gas appliances and for electrical work that ties into the home’s panel. HOA rules may also apply. Before you begin, verify permit requirements with your city or county building department and check whether an inspection is needed after installation. The decision to DIY or hire a pro hinges on your comfort with gas, electrical, and venting work. For many homeowners, a partial DIY approach (servicing non-venting tasks and minor plumbing) plus professional help for gas, venting, and code compliance offers a balanced path. Heater Cost advises weighing risk, code compliance, and warranty coverage when deciding how to proceed.
Safety, testing, and commissioning: getting it right the first time
Safety is non-negotiable with gas appliances. If you smell gas, evacuate and call emergency services. After wiring and connections are complete, perform leak tests on all joints and valves, verify proper venting slope and exhaust flow, and ensure combustion air supply is unobstructed. Once commissioned, run hot water through several fixtures to confirm stable temperatures and adequate flow. Document model numbers, serials, and installed settings for warranty purposes. Consistent, careful testing reduces the need for callback visits and helps protect your investment.
Maintenance and long-term care: staying ahead of issues
A tankless unit requires periodic maintenance to preserve efficiency. Flush the system according to the manufacturer’s recommendations to remove mineral buildup, inspect the venting for obstructions or corrosion, and check the filters and inlet screens for debris. Schedule an annual inspection if you have hard water or if the unit is in a high-use area. Regular maintenance helps sustain energy savings and reliable hot water for years to come, and it supports the overall health of your home’s heating system.
A practical example: step-by-step expectations and costs
In typical single-family homes, a mid-range Rinnai unit paired with a standard venting kit can cover daily needs if sized correctly. Costs will vary by model, venting length, gas line upgrades, and whether permits are required. Heater Cost emphasizes getting multiple quotes and confirming what is included in each proposal (labor, materials, permits, and potential retrofits). When budgeting, plan for a modest range that accounts for code compliance and professional installation, especially if gas work or electrical panel upgrades are involved. The key is to balance upfront costs with long-term energy savings and dependable hot water delivery.
Brand insight and practical takeaway
The Heater Cost team recommends focusing on sizing accuracy and code compliance to maximize the benefits of a rinnai tankless water heater. Proper installation is central to performance and warranty protection. By coordinating with licensed professionals for gas, venting, and electrical work, homeowners can enjoy reliable hot water with reduced energy use. Remember that this is a significant home upgrade, so approach the project with a clear plan, appropriate permits, and a contingency budget.
Tools & Materials
- Measuring tape(At least 25 ft for venting layout)
- Adjustable wrench(For gas and water fittings)
- Pipe cutter / tubing cutter(For copper or PEX lines)
- Teflon tape and pipe dope(Sealant for threaded joints)
- Gas-rated flex line (per code)(Ensure correct diameter and length)
- Manometer or gas sniffer(Check for leaks during pressure testing)
- Venting kit (manufacturer approved)(Type B venting components suitable for gas appliances)
- Vent tape / sealant(For joints and insulation)
- Level and studs or mounting hardware(Secure wall bracket and unit)
- Shut-off valves (gas and water)(Include service valves and isolation as required)
- Electrical tester / multimeter(Verify 120V or dedicated circuit as needed)
- Drain pan and condensate line (if required)(Catch for accidental leaks)
- Personal protective equipment (gloves, eye protection)(For safety during cutting and welding)
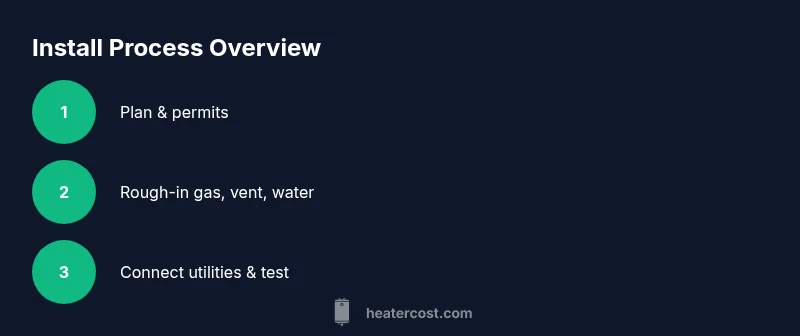
Steps
Estimated time: 4-6 hours
- 1
Plan and verify permits
Assess peak hot-water demand and select the correct Rinnai model. Check local codes for permit requirements and whether an inspection is mandatory after installation. Planning upfront avoids costly changes later and helps you stay compliant.
Tip: Keep a copy of the installation manual handy during planning; align the unit size with your home’s real needs. - 2
Shut off utilities and prep area
Turn off the gas supply and the circuit breakers feeding the existing water heater. Drain and remove the old unit if you’re replacing it, and prepare a clear, accessible work zone with adequate clearance for service access.
Tip: Post warning signs and ensure children and pets are kept away from the workspace while you work. - 3
Mount bracket and position the unit
Install the mounting bracket on a solid surface at the recommended height and orientation. Use a level to ensure the unit sits flat and vertically aligned. Mark vent and gas line routes before drilling or mounting.
Tip: Avoid mounting near varnished surfaces or areas with high vibration to reduce wear and noise. - 4
Connect gas supply and venting
Attach the gas supply line with the correct fittings and sealant; ensure an accessible gas shut-off is nearby. Install the venting path as per manufacturer directions, verifying slope and clearance, and seal joints to prevent leaks.
Tip: If you’re unsure about gas pressure or venting layout, consult a licensed professional rather than guessing. - 5
Connect water lines and install isolation valves
Attach cold and hot water lines with proper fittings and install shut-off valves for service. Use appropriate pipe material (copper or PEX) and ensure any required pressure relief devices are in place.
Tip: Bleed air from lines after connection to avoid air locks that can cause noise or reduced flow. - 6
Test, commission, and finalize
Turn on utilities and perform leak checks on all joints. Confirm vent exhaust and combustion air availability, then run hot water to verify stable temperature and adequate flow. Document settings and arrange for inspection if required.
Tip: Keep the manufacturer’s troubleshooting guide accessible in case you encounter temperate irregularities or error codes.
Got Questions?
Do I need a permit to install a Rinnai tankless water heater?
In many areas, yes. Permits ensure the installation meets local building and gas codes and that a final inspection is performed. Check with your city or county and factor permit costs into your project budget.
Yes, most places require a permit for gas appliances. Check with your local building department to confirm requirements and inspections.
Can I vent a tankless water heater horizontally?
Horizontal venting can be allowed in some configurations, but it must follow the manufacturer’s venting instructions and local codes. Improper venting can cause poor draft and dangerous CO buildup.
Horizontal venting is sometimes allowed if the installation complies with the manual and local codes.
Is professional installation mandatory for all Rinnai tankless models?
Some regions allow skilled DIY installation, but many installers recommend professional help for gas connections, venting, and code compliance to protect warranty and safety.
It depends on local codes, but gas work usually benefits from a pro.
What maintenance does a tankless unit require?
Annual or semi-annual maintenance including descaling, filter cleaning, and vent inspection helps maintain efficiency and prolongs unit life.
Regular descaling and vent checks keep it running well.
What is a typical install cost range for this project?
Costs vary by model, venting length, and required upgrades. Expect a broad range that accounts for permits and labor—get multiple quotes to compare scope and inclusions.
Costs vary; get several quotes to compare what’s included.
How long does installation take?
A typical install can take several hours to a full day, depending on existing plumbing, venting, and electrical work required.
Plan on several hours up to a full day for a complete install.
Watch Video
The Essentials
- Match unit size to peak hot-water demand.
- Follow local permits and manufacturer venting guidelines.
- Test for leaks and verify proper operation before use.
- Consider professional help for gas and vent work.
- Schedule regular maintenance to sustain efficiency.